
Wooden gift box
Wooden gift boxes are prefect for presenting small gifts, plus you can make use of valuable offcuts, or buy small pieces of exotic timber, to practice your skills and make your own wooden gift boxes.
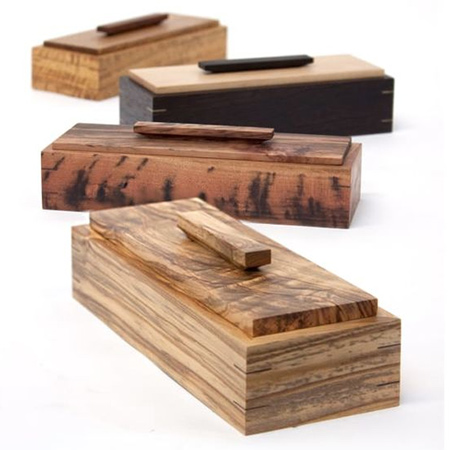
If you don't have any offcuts and like the idea of working with exotic timber, a small box is a great way to get started. Plus, this project uses a variety of skill sets that you can use for future projects. This wooden gift box is a simple design that is elegant and modern; mitred corners feature a veneer key that lock the sides firmly together.
There are various suppliers of exotic hardwoods if you don't want to use pine or meranti to make your wooden gift boxes. Prices vary according to the timber selected.
HERE'S HOW:
Making the wooden gift box is easy: 2 long and 2 short sides, a piece of the top and handle, and a base. You can use any 6mm-thick material for the base, from plywood to hardboard, depending on the finished look you want and how much you want to spend. You can also make the boxes as small - or as large - as you need for your small gift.
1. Cut the corners at a 45-degree angle with a mitre saw. Dry fit to ensure a perfect fit, or make fine adjustments as necessary.
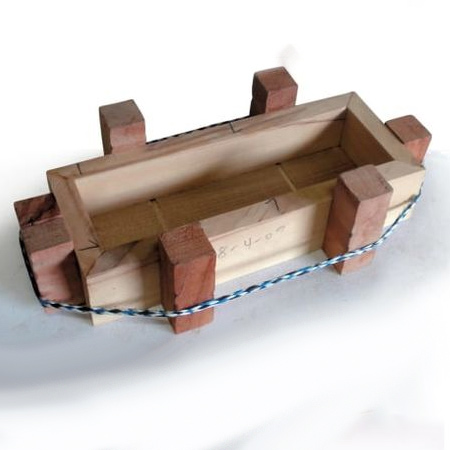
2. Glue the sides and base together with wood glue, clamp and leave overnight.
GOOD TO KNOW: An easy homemade clamp with a piece of nylon rope and eight push-blocks is shown above. To apply pressure on the joints, simply pull two blocks further away from each other.
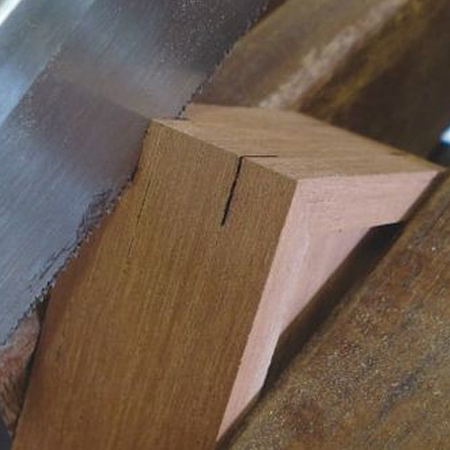
3. To make the thin cuts for inserting veneer 'keys', place the assembled boy in a clamp and use a Japanese pull saw, backsaw or tenon saw to cut slots to the same thickness as wood veneer. You can buy wood veneer at larger timber merchants, and these come in various veneers that range from 0.8 to 1.2mm thick.
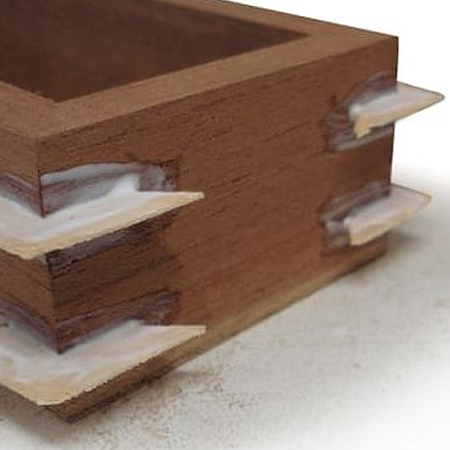
4. Squeeze wood glue directly into the slots and coat each side of the veneer. Slide the veneer key into place and leave to dry overnight. Use a sharp craft knife to cut away excess veneer. Any remaining veneer can be removed when sanding the finished project.
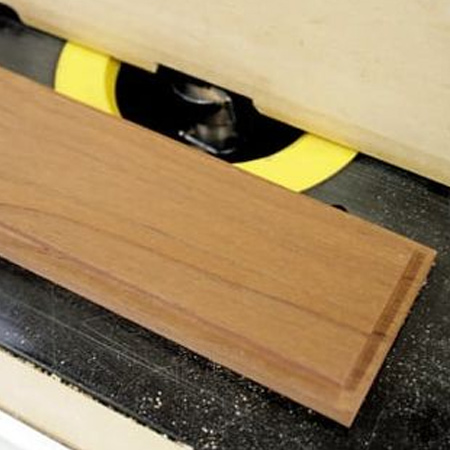
5. To make a lid that sits snug on top of the wood box, use a router or Dremel Trio to rebate around the edge.
6. You can finish off the box with a bought handle, or make a handle of your own design. The handles shown here are easy to make and are simply rectangular blocks routed to create a curved design. The handles here are mounted using bamboo skewers: Small holes are drilled through the top and handle, wood glue placed in the holes and then skewers inserted and trimmed.
