
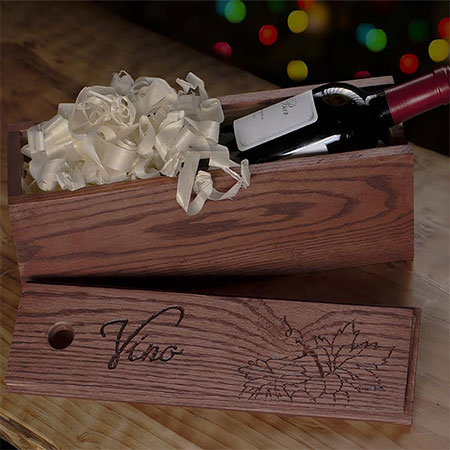
Make A Wine Gift Box
Kreg and Dremel have partnered to show you how to make this handmade Wine Gift Box.
03/12/2019
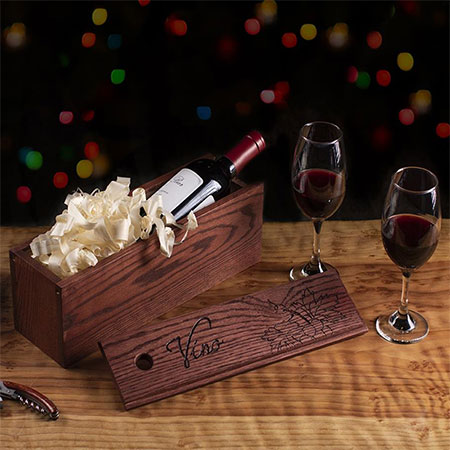
This handmade gift box will be the perfect surprise for the wine lover in your life and you can customise the gift box with any decorative print or design.
The Gift Box is just as much of a gift as the bottle of wine and the recipient is bound to love the box it came in as much than the gift inside.
YOU WILL NEED:
Choice of soft- or hardwood
Wood glue
25mm fine-thread Kreg screws
Stain, sealer or varnish to finish
TOOLS:
Dremel Rotary Tool plus accessories
Dremel Plunge Router attachment
120- and 240-grit sandpaper
Tape measure and pencil
HERE'S HOW:
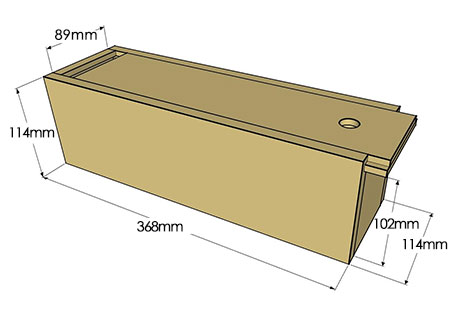
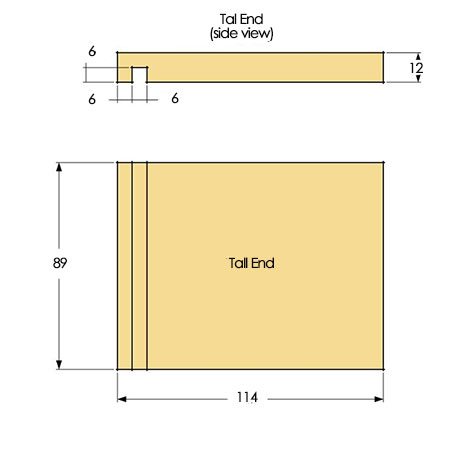
1. Create a dado (slot) for the box lid to slide into. You need to set your Dremel Rotary Tool up in the Plunge Router Attachment and use a straight router bit. Once the depth is set, do a first pass about 2mm deep. Adjust the depth to make a second pass and repeat until you reach 6mm total depth. Sand smooth.
2. Clamp the next workpiece to your bench and continue with the same router settings for the box end.
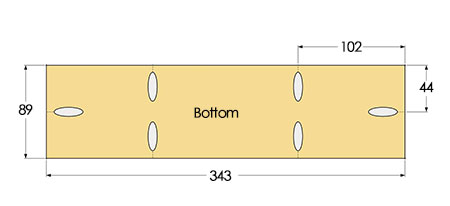
3. Set your Kreg Pocket-Hole Jig for 12mm thick material and drill pocket holes in the Bottom as shown below.
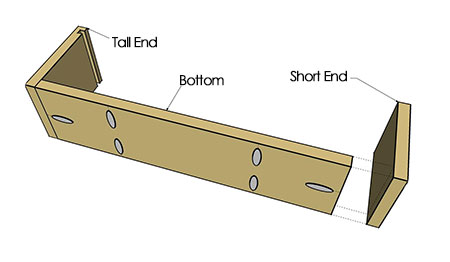
4. To begin the assembly, apply a small bead of wood glue along the lower edge of the Tall End and the Short End. Clamp to the bottom as shown below. Do make sure the dado on the Tall End faces toward the inside of the box. Secure with 25mm screws.
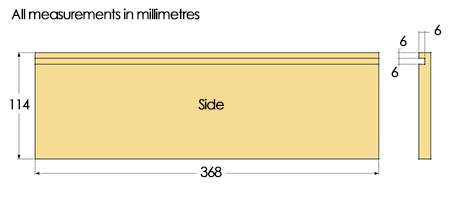
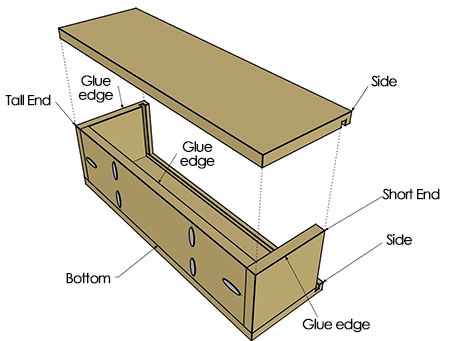
5. Now you can add the Side sections. Apply a bead of wood glue along one edge of the Bottom and Ends. Place the first Side flush with the Ends and Bottom. Clamp and then secure the 25mm screws. Repeat for the other Side.
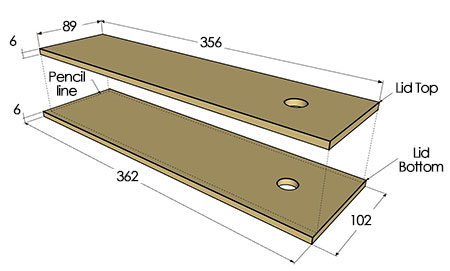
6. Sand and test fit the Lid Bottom until it slides in and out of the dadoes in the box easily. Now place in the closed position on the box. Use a pencil to mark the location of the three inside edges of the box onto the top of the Lid. Note: This will be the position in which you will glue the Lid Top to the Lid Bottom. Slide out the Lid Bottom and apply glue to the underside of the Lid Top to laminate these two sections together. Make sure you position the Lid Top against the marked pencil lines and then glue and clamp.
7. Let the glue dry overnight and then sand smooth.
Finishing
Print out your image or wording and use carbon paper to transfer onto the lid. We used the Dremel with either the 105 Engraving Cutter or 191 High Speed Cutter for the wording. Sand smooth once complete.
Wipe clean to remove any traces of dust and then apply your choice of stain, sealer or varnish.