
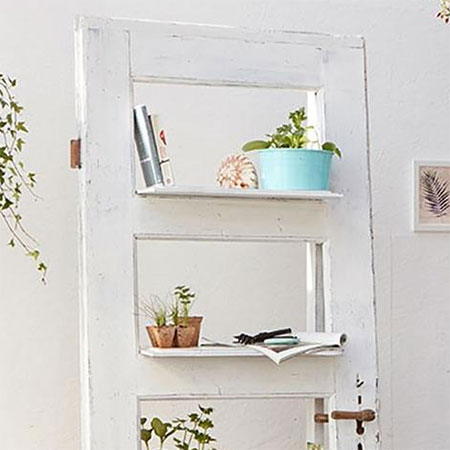
Upcycle an Old Door into a Practical Shelf Unit
Upcycling an old door into a shelf unit has been done in many different ways, but this one has to be the easiest and most practical.
17/05/2020
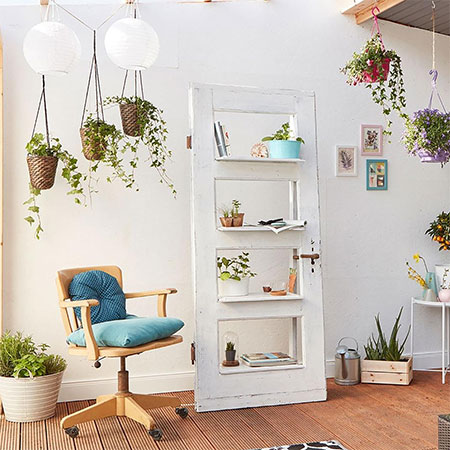
If you are busy renovating your house or know of someone else who is doing this type of job, ask them to put aside an old wood panel door for you to upcycle into an interesting shelf unit. You can add this to your home or place it out in the garden to make a stylish display and practical set of shelves.
YOU WILL NEED:
Solid wood door with panels
2 of 22 x 44mm PAR pine, slightly shorter than length of door
4 of 22 x 44mm PAR pine, as wide as door panels
1 of pine 38 x 320 x 2500mm
Paint to finish plus painting tools
Screws: 4 x 70mm | 4 x 80mm | 5 x 90mm | 3.5 x 35mm | 4 x 70mm
Drop cloth
TOOLS:
Drill / Driver plus assorted bits
Orbital or multi-sander plus 120-grit sanding pads
Jigsaw or NanoBlade saw
Carpenter's square or set-square
Clamps
Tape measure and pencil
Safety gloves
HERE'S HOW:
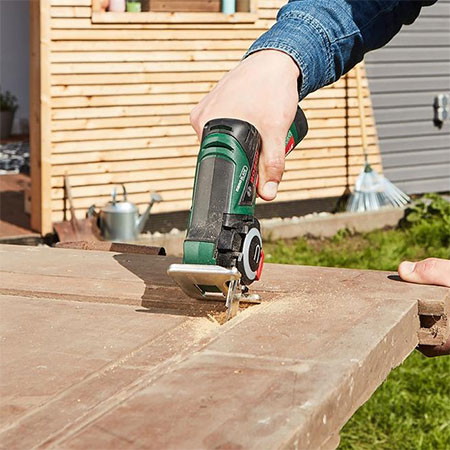
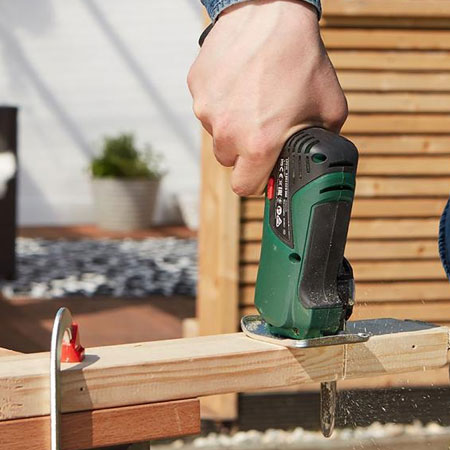
1. Use a jigsaw or nanoblade saw to cut out the door panels. If you are using a jigsaw for this step, drill a couple of 10mm holes with your drill / driver and a 10mm wood bit. This will allow you to insert the blade of the jigsaw easily to cut out the panels. Put the cut out panels in a safe place for now as you will use these later on to make the shelves.
GOOD TO KNOW: Make sure to place the door on a level surface with space underneath the panels when you are cutting these out.
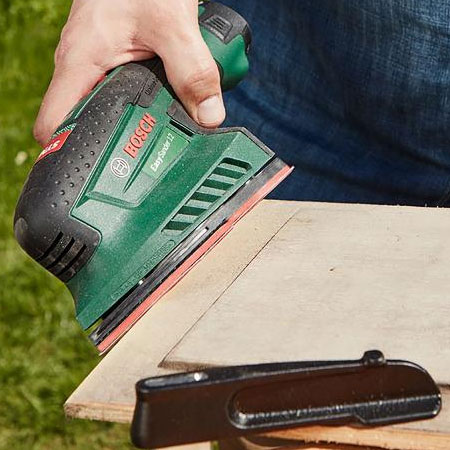
2. Using a sander and 120-grit sanding pads, sand the cut edges on the door where the panel was removed, as well at the panels themselves.
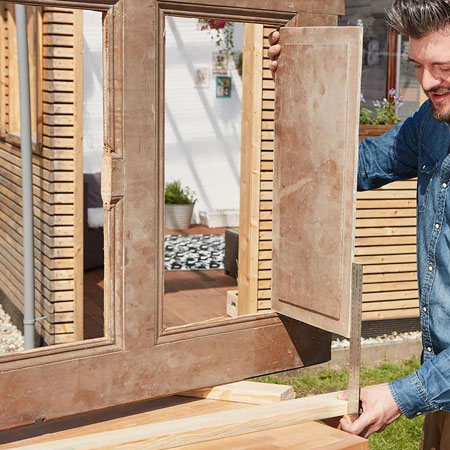
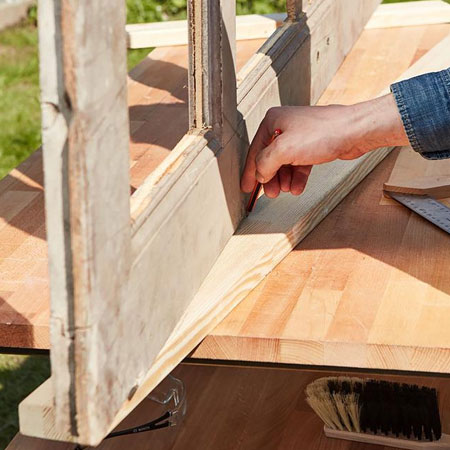
3. If you haven't had all the PAR pine cut to size at the store, do this now. Place the door on one side, resting on a piece of scrap wood. Angle the bottom of the door slightly to reflect how it will sit once you have finished making the shelf unit. Take the previously cut out panel and place this against the door from where it was removed.
The width of this panel will determine the exact distance between the piece of square timber and the door. Mark the exact height of each panel on the piece of 22 x 44mm PAR pine and repeat on the second piece of 22 x 44mm.
GOOD TO KNOW: Make sure that the door and the 22 x 44mm PAR pine legs are precisely placed since the cut out panels form the shelves and placed on cross-pieces secured against the piece of square timber.
4. At the top end of the PAR pine, mark the cutting angle required for the legs to fit at the top.
5. If not already done so, cut the shelf crossbars to the required length - which is the length of the opening where the door panels were removed.
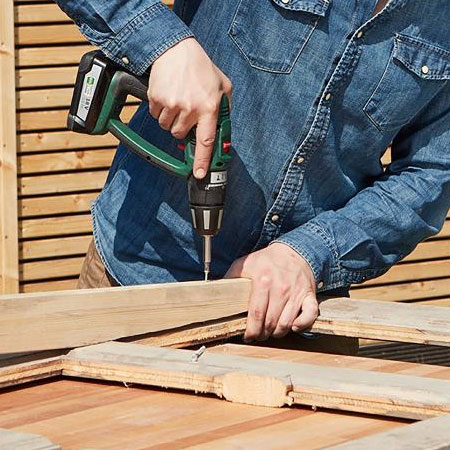
6. Secure the legs to the back of the door. Drill [3] countersunk pilot holes before securing the PAR pine legs to door by using three screws of different lengths to drill into them from behind. The 4 x 70mm goes at the top, the 4 x 80mm in the middle, and the 5 x 90mm at the bottom.
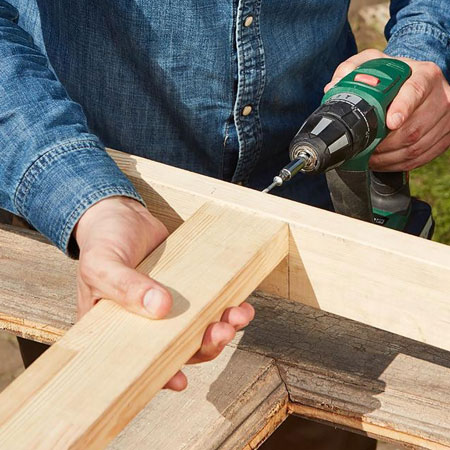
7. Use a square to mark on the legs where the cross pieces will be attached and secure with screws through the legs and into the crossbars.

8. The [4] crossbars are now connected to both legs and look like a ladder. These cross pieces hold the shelves in place and keep the unit sturdy and stable.
Now your upcycled shelf unit is complete and you can stain or paint as per your personal choice. Be sure to apply a clear polyurethane sealer for added protection.
all about diy