
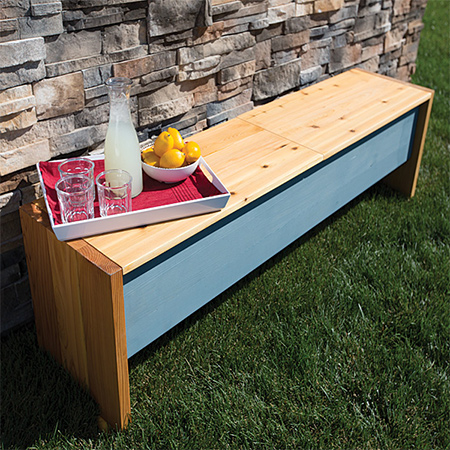
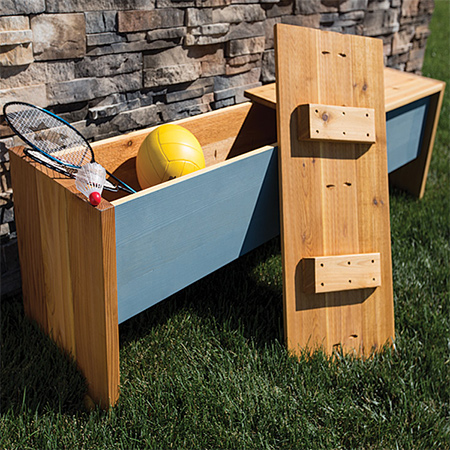
Pine outdoor storage bench
This outdoor storage bench is perfect for a deck or patio where you need extra storage, seating or a table. It looks great and will hold up well outdoors if properly treated. Lift-off panels allow for easy storage.
Visit www.BuildSomething.com for more great Kreg Pockethole Jig projects.
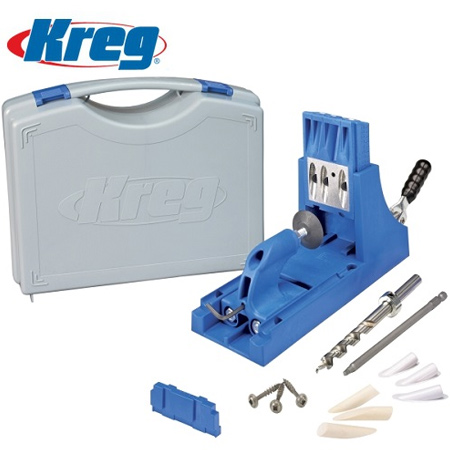
The storage bench is made from 22mm PAR pine that you will find at your local Builders Warehouse and is assembled using a Kreg Pockethole Jig. The method of assembly is strong and sturdy and offers the perfect storage or seating space for outdoors. The Kreg product range can be found at your local Builders, or get in touch with www.VermontSales.co.za to find your nearest stockist.
YOU WILL NEED:
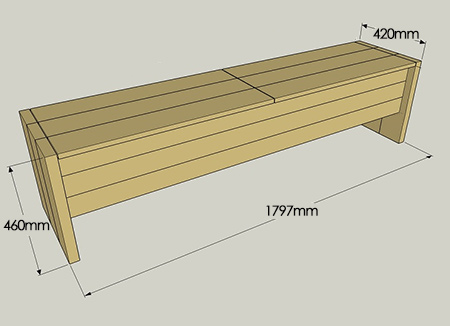
6 of 22 x 140 x 460mm pine - ends
6 of 22 x 94 x 1753mm pine - sides
2 of 22 x 140 x 1753mm pine - bottom
6 of 22 x 140 x 874mm pine - top sections
2 of 22 x 94mm pine - lid battens cut to fit
16 of 63mm exterior pockethole screws
114 of 32mm exterior pockethole screws
24 of 4 x 35mm smooth shank screws
Wood glue, exterior grade
Woodoc exterior sealer (see bottom of this page)
TOOLS:
Kreg Pockethole Jig
Drill / Driver plus assorted bits
Orbital Sander plus 120- and 240-grit sanding pads
Paintbrush
Tape measure and pencil
HERE'S HOW:
![1. Drill pocket holes on four of the six boards as shown above. Check that there are [2] right side and [2] left side boards with pocket holes. The two leftover boards will become the centre of the end panels.](../2016/sep/38.jpg)
1. Drill pocket holes on four of the six boards as shown above. Check that there are [2] right side and [2] left side boards with pocket holes. The two leftover boards will become the centre of the end panels.
2. On a flat surface, glue and clamp [3] end boards together. Leave for an hour or two and then screw them together with 63mm screws. Complete for the other side.
![2. On a flat surface, glue and clamp [3] end boards together. Leave for an hour or two and then screw them together with 63mm screws. Complete for the other side.](../2016/sep/39.jpg)
3. Drill pocket holes in the side boards to join these together. On a flat surface, glue and clamp [3] side boards and then screw them together with 32mm screws. Repeat for the other side.
![3. Drill pocket holes in the side boards to join these together. On a flat surface, glue and clamp [3] side boards and then screw them together with 32mm screws. Repeat for the other side.](../2016/sep/40.jpg)
4. For the bottom board, drill pocket holes in both boards along the length as shown below.
5. Glue and clamp [1] bottom section to a side panel making sure the edge of the board is flush with the bottom of the side panel. Secure with 32mm screws. Repeat for the other side.
![5. Glue and clamp [1] bottom section to a side panel making sure the edge of the board is flush with the bottom of the side panel. Secure with 32mm screws. Repeat for the other side.](../2016/sep/41.jpg)
6. Place an end panel on a flat surface with pocketholes facing up. Position a side panel / bottom section on top of the end panel. Use a scrap piece of pine to set the distance from the top edge of the end panel to the top of the side panel. This allows for the top / lid to fit flush once the bench is complete. Mark the location and apply glue to the edge and secure with 32mm screws.
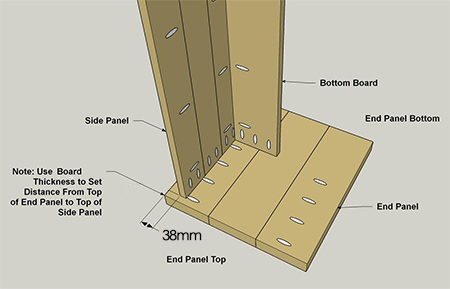
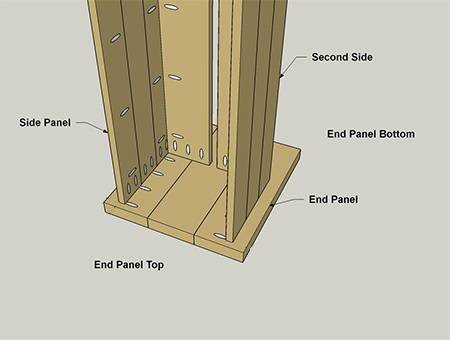
7. Secure the second side in the same way and then repeat the process for the other end panel.

GOOD TO KNOW: The gap in the bottom allows for air circulation and moisture to escape.
8. Drill pocket holes in [4] of top boards, as shown below.
9. Glue and clamp [3] top boards together as shown below. Join together with 32mm screws. Repeat for the second top panel.
![9. Glue and clamp [3] top boards together as shown below. Join together with 32mm screws. Repeat for the second top panel.](../2016/sep/44.jpg)
10. Cut [4] battens to fit the top. It is preferable to cut a mitre on the end of each batten. Place on the underside of the top section and drill pilot holes. Attach using 35mm screws.
![10. Cut [4] battens to fit the top. It is preferable to cut a mitre on the end of each batten. Place on the underside of the top section and drill pilot holes. Attach using 35mm screws.](../2016/sep/45.jpg)
Finishing
Sand any rough edges and smooth the surface before wiping away any dust.
Finish off your new storage bench with one of the Woodoc range of exterior sealers. If painting the side panels, apply wood primer and a suitable exterior paint.