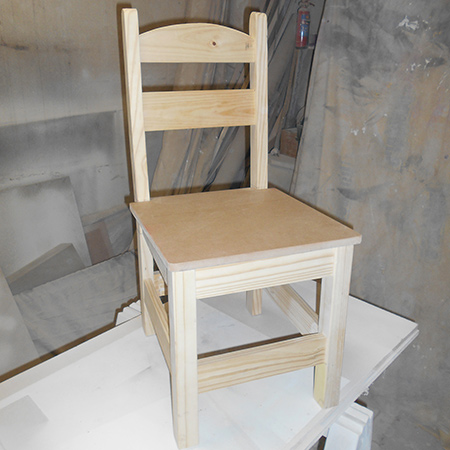
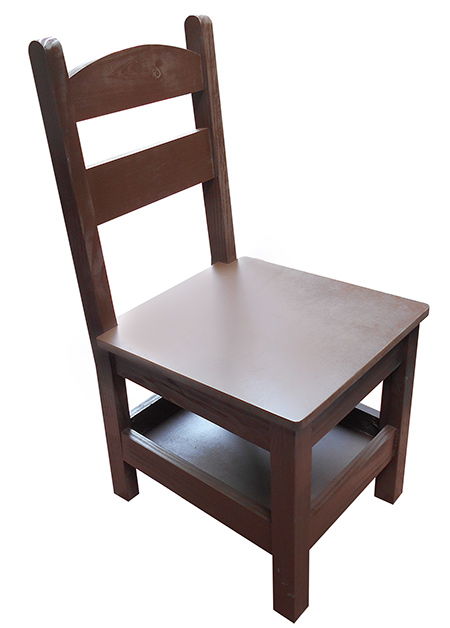
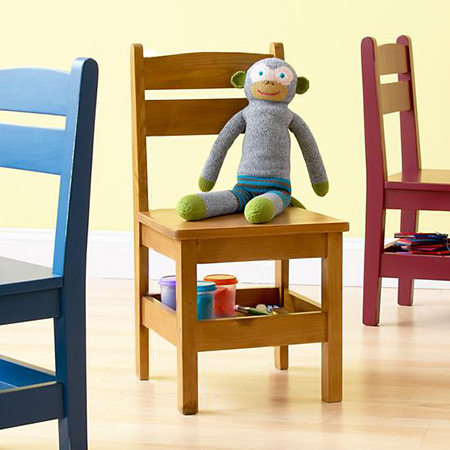
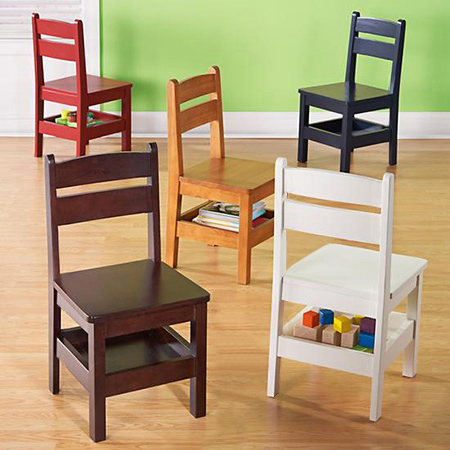
DIY kiddies chair with storage shelf
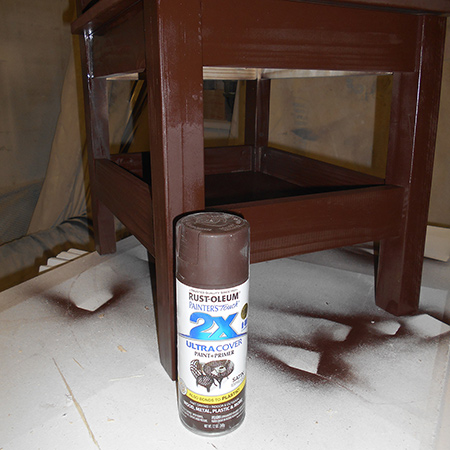
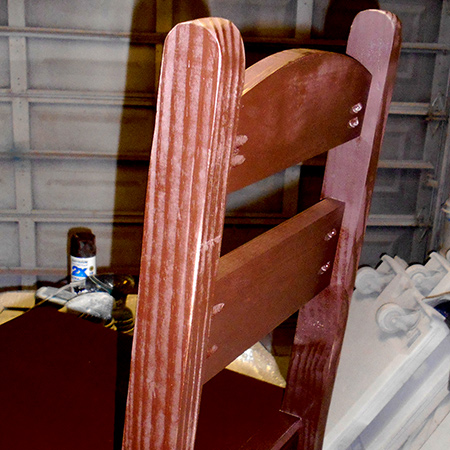
Use PAR pine and MDF to make these kiddies chairs with storage tray. You can paint them any colour using Rust-Oleum 2X spray paint or use wood stain or tinted varnish.
YOU WILL NEED:
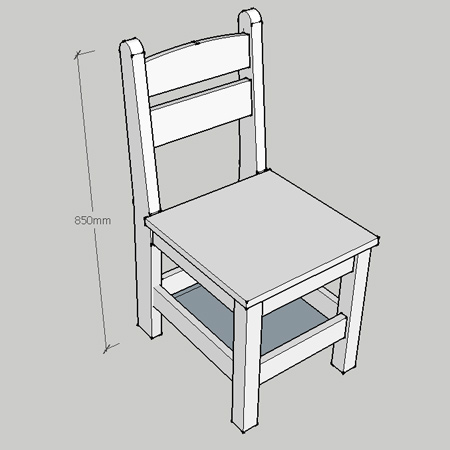
1 of 32 x 69mm x 1800mm PAR pine - back legs
- cut 2 to length 850mm
1 of 44 x 44mm x 1800mm PAR pine - front legs
- cut 2 to length 400mm
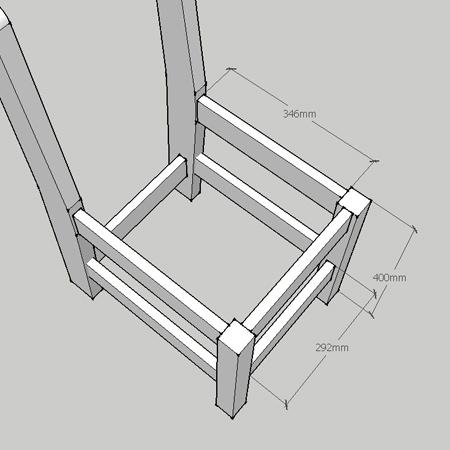
2 of 20 x 67mm x 1800mm PAR pine - cross supports
- cut 2 of 292mm - lower/upper front
- cut 2 of 309mm - upper/lower back
- cut two of 346mm - upper sides
- cut two of 355mm - lower sides trimmed to fit
1 of 20 x 96mm x 1800mm PAR pine
- cut 2 of 309mm - back rest
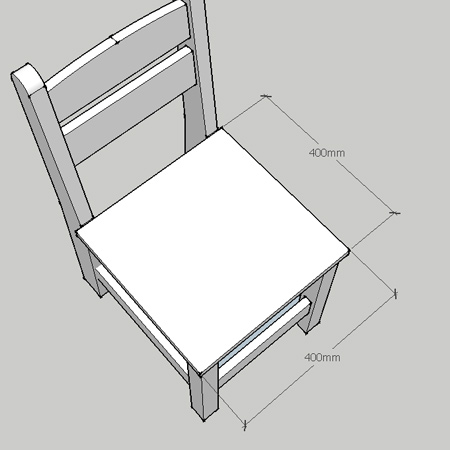
1 of 400 x 430mm 16mm MDF (or pine) - seat
1 of 350 x 400mm 16mm MDF (or pine) - storage shelf base - trim to fit
Ponal wood glue
Wood filler
30mm and 45mm screws
TOOLS:
Drill / Driver plus assorted bits
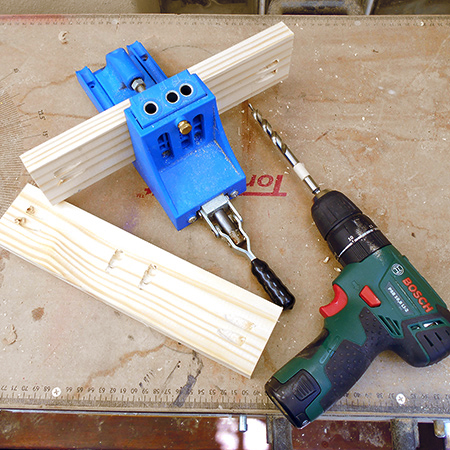
Kreg pockethole jig
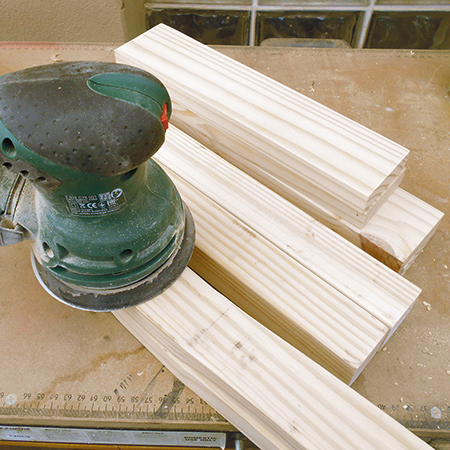
Orbital sander plus 120- and 240-grit sanding pads
Buy all the materials and supplies for this project at your local Builders store.
HERE'S HOW:
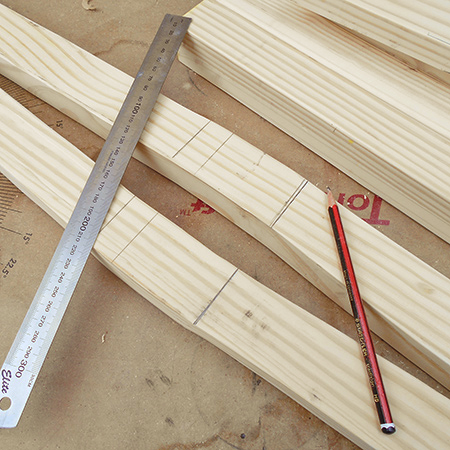
1. Back Legs:
- To cut out the back legs cut the 32 x 69mm PAR pine in half and measure and cut two lengths of 850mm. On each section draw a line 450mm down from the top. From this line measure 43.5mm up and down and draw a line. This block indicates where the seat and sides will be mounted.
- At the front of each section measure in 20mm at the top of bottom and draw a line from this point to the edge of the block.
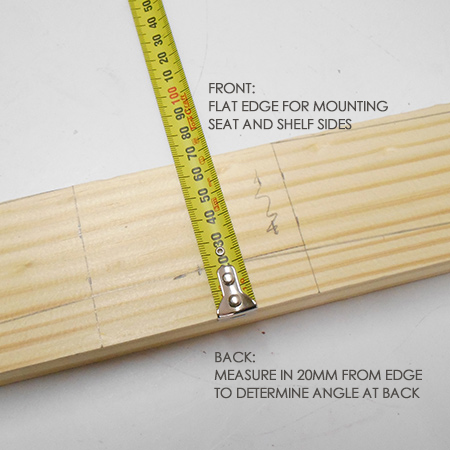
- At the back of each leg - at the 450mm mark - measure in 20mm and draw a line from this point to the top and bottom (back edge) of each leg.
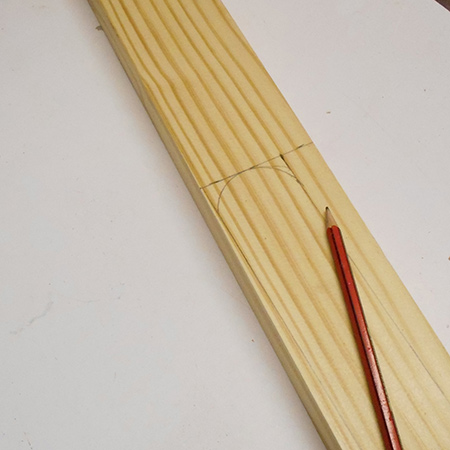
- Use a template to draw a rounded top on each section.
- Follow your guides to cut the shaped back legs.
2. Prepping the seat supports
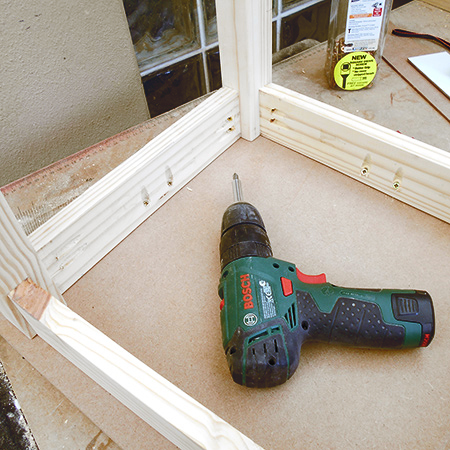
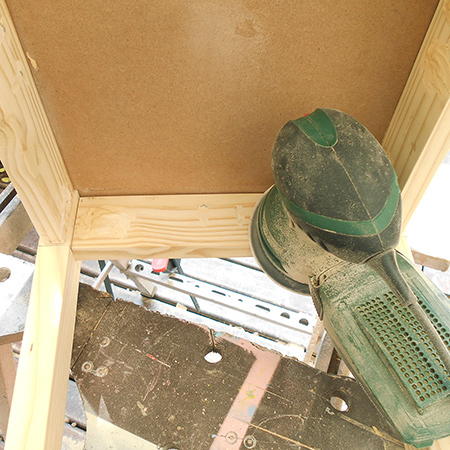
- On the seat support sides, front and back use a Kreg pockethole jig to drill out pocketholes in the sides (for attaching to the legs) and in the centre of the top edge (for securing the seat).
- Before assembly round off the sharp edges with 120-grit sanding pads and then sand all the wood smooth with 240-grit sanding pads. Be careful not to sand away the square block at the front of the back legs for mounting the seat supports an seat.
- After sanding put back the markings for mounting the seat support and top.
3. Securing the seat supports
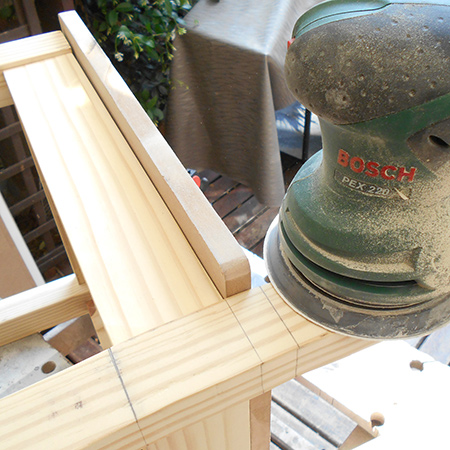
- The seat sides, front and back are not flush with the legs but are secured approximately 6mm in from the edge. To do this I used two 3mm scraps of masonite to lift the supports before securing the supports to the legs. Since the shelf base is trimmed to fit, allowance is already made if you need to adjust this indent slightly.
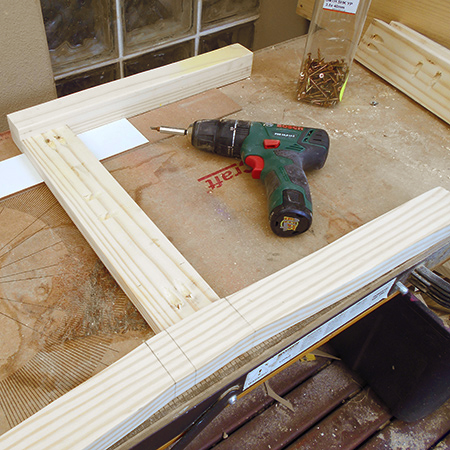
- Position the supports to line up with the top of the front leg and the bottom line of the drawn block on the back leg.
- Mount the sides, front and back in the same way to complete the seat support.
- With the seat supports mounted you can secure the seat using 30mm screws.
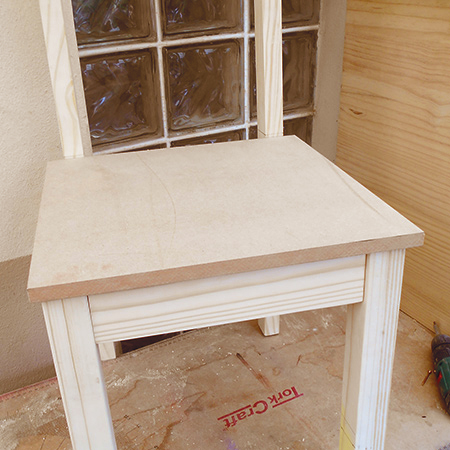
- The pocketholes previously drilled in the centre of the seat supports allow for you to place the chair on its side to attach the seat.
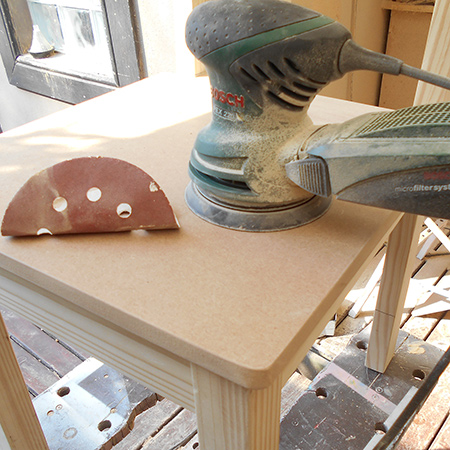
4. Finishing the seat
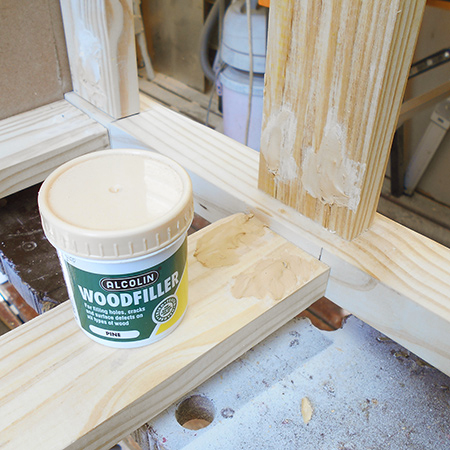
- Use pockethole plugs or wood filler to disguise the pocketholes. If using wood filler, let this dry before sanding smooth.
- Round off the corners of the seat and any sharp edges. Note: You can do this before mounting the seat, but I forgot and only did the sanding once the seat was attached.
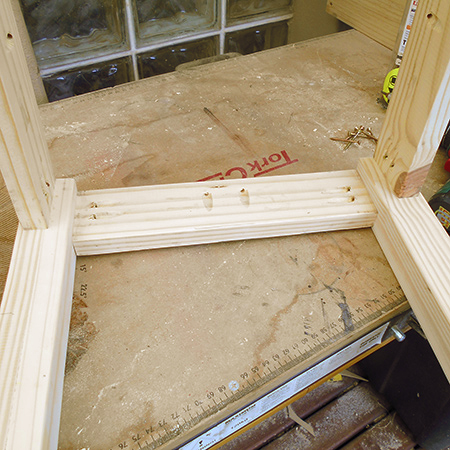
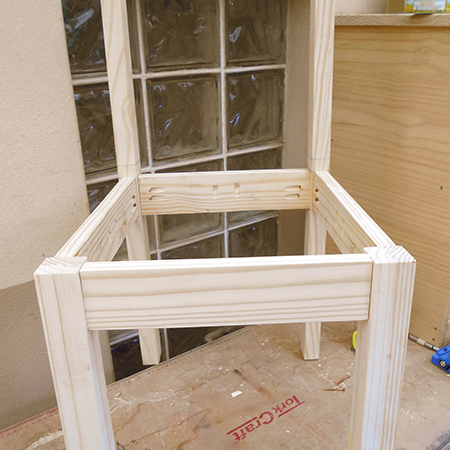
5. Secure the storage shelf
- Mount the sides, front and back for the storage shelf in the same way as the seat support.
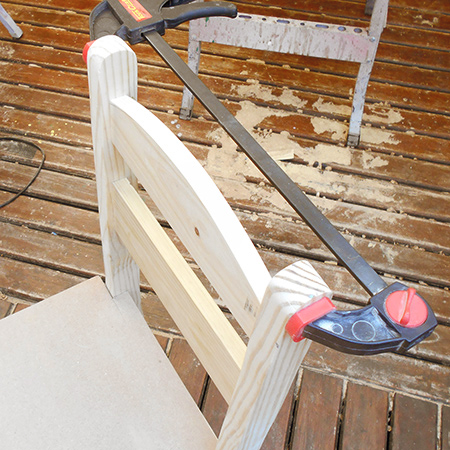
6. Attach the seat back
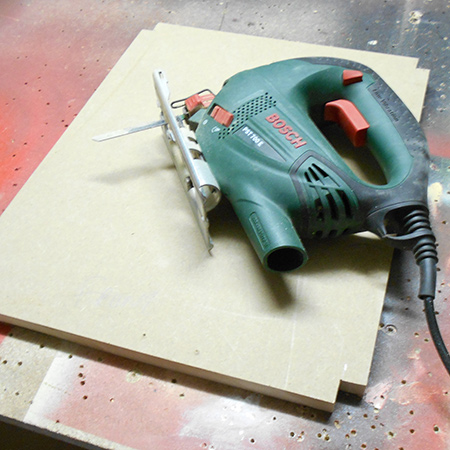
- Use a curved template to draw a curved shape on the top back rest and cut this out with a jigsaw.
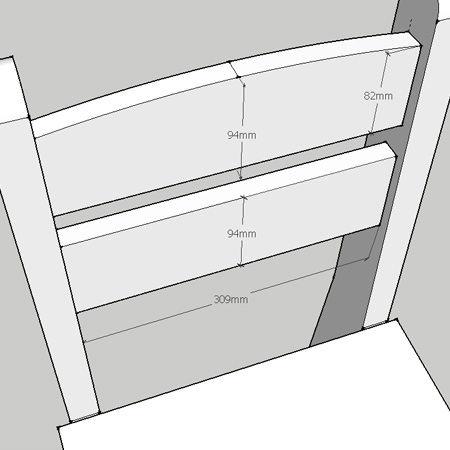
- Drill pocketholes at the edges of both back rests and secure to the top of the back legs. I found it handy to use a long quick clamp to hold the legs together while securing these sections in place.
7. Attach storage shelf base
Measure up and cut out the corners for fitting the storage shelf base. Drill pocketholes to the underside of the shelf base and secure to the sides, front and back.