How to make a stacked bookshelf
This stacked bookshelf or display unit is easy to make using laminated and PAR pine that you can buy at your nearest Builders Warehouse.
14/09/2018
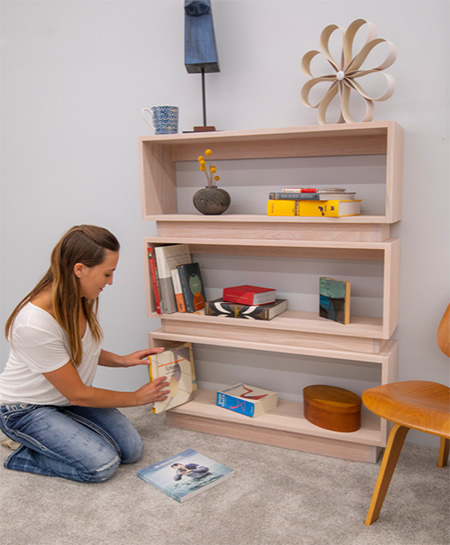
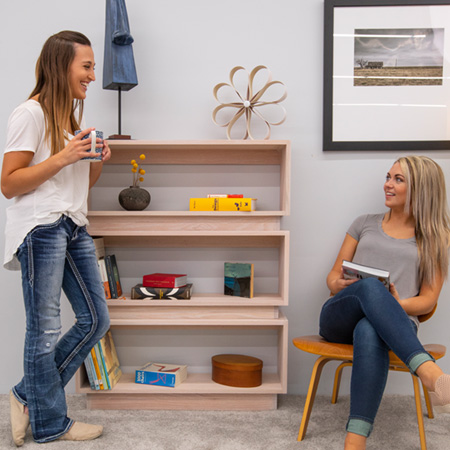
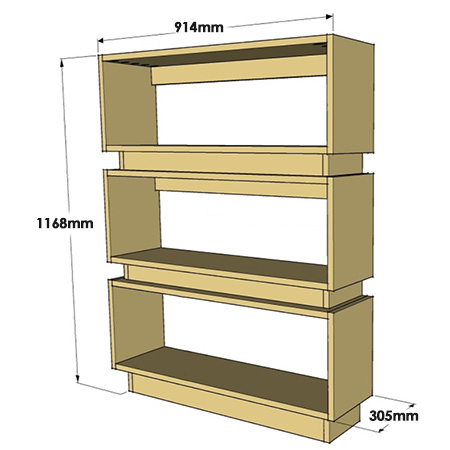
Designed by Build Something, this stacked bookshelf can be used for books or as a display unit. The stacked bookshelf is made using 19mm laminated and PAR pine that you can have cut to size at your local Builders Warehouse. When buying the laminated pine for this project, buy pieces that are as free from knots and defects as possible, and check that boards are flat and not warped or bowed.
Once you've finished assembling the bookshelf, you can finish the unit with either stain or tinted sealer or polyurethane varnish, or paint the unit. The bookshelf shown here was finished with Rust-Oleum Ultimate Wood Stain in Antique White.
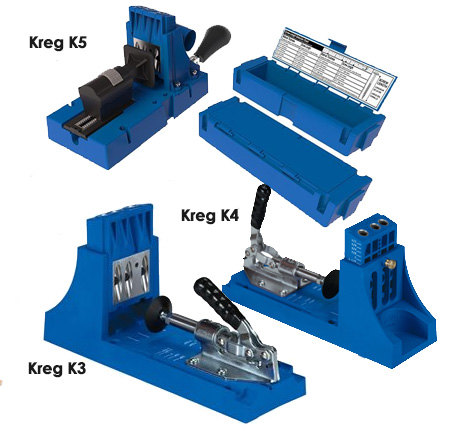
To assemble this project you are going to need to use a Kreg Jig. There are 3 variants of the Kreg Jig available: K3, K4 and K5. Each system comes with a selection of accessories and attachments. You will find a selection of Kreg tools and accessories at Builders Warehouse.
YOU WILL NEED:
6 of 19 x 305 x 876mm laminated pine - shelves
6 of 19 x 305 x 318mm laminated pine - sides
3 of 19 x 69 x 876mm PAR pine - cleats
4 of 19 x 69 x 800mm PAR pine - long spacer for shelf spacer assembly
4 of 19 x 69 x 267mm PAR pine - short spacer for shelf spacer assembly
2 of 19 x 69 x 800mm PAR pine - long base for base assembly
2 of 19 x 69 x 248mm PAR pine - short base for base assembly
Wood glue
32mm coarse thread pocket hole screws
TOOLS:
Drill / Driver plus assorted bits
Kreg pocket hole jig
Kreg clamps
Orbital sander plus 120- and 240-git sanding pads
Tape measure and pencil
Buy all the tools and materials needed for this project at Builders Warehouse.
HERE'S HOW:
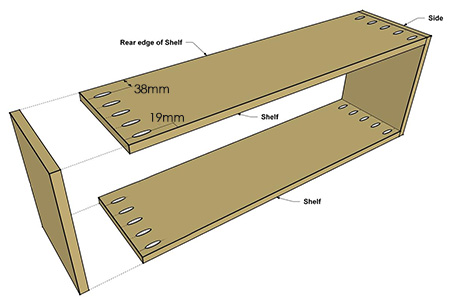
1. Set up your Kreg jig for 19mm-thick board and drill pocket holes along the edge of the shelves to attach the shelves to the sides using wood glue and 32mm screws.
GOOD TO KNOW: Invest in a Kreg Plug Cutter to be able to fill your pocket holes with matching plugs for invisible joins.
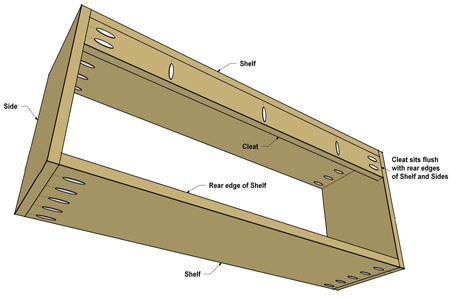
2. Drill [2] pocket holes at both ends of the Cleats and along the bottom edge. Use wood glue and 32mm screws to secure the Cleats inside the frame, as shown below. Make sure the Cleats are flush with the back edge of the frame.
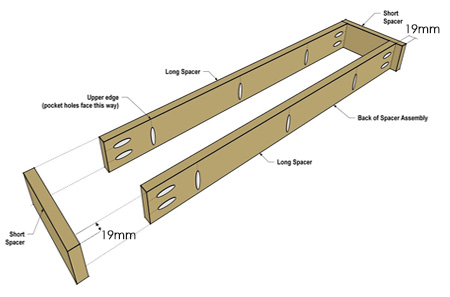
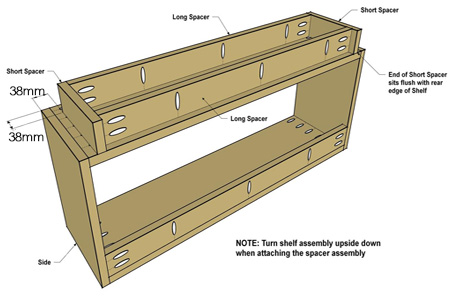
3. The shelves are stacked on an assembly that fits between each shelf. Drill pocket holes at the ends and along the bottom edge of each Long Spacer (as shown below) and use wood glue and 32mm screws to join the Long Spacers to the Short Spacers. Note that the front Long Spacer is flush with the front edge, while the back Long Spacer is inset by 19mm.
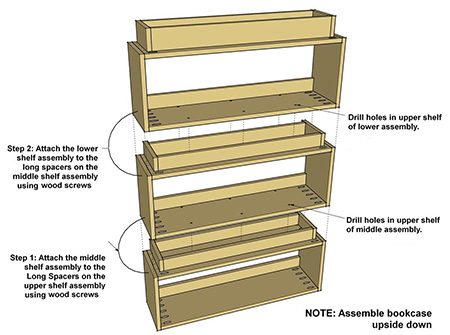
4. Turn the top and middle Shelf Assemblies upside down to mount each Spacer Assembly. Secure to the Shelf Assembly with wood glue and 32mm screws - as shown below. There is a 38mm rebate at the front and both ends.
5. Assemble the Base by joining the Long Bases (front/back) to the Short Bases (sides). Drill pocket holes as shown below and join together using wood glue and 32mm screws.
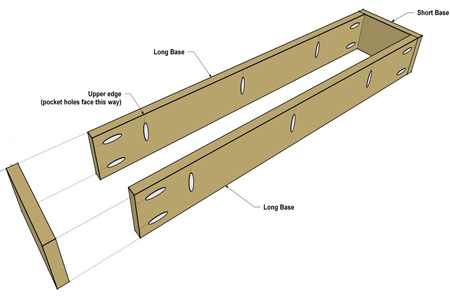
6. Assemble the Base by drilling pocket holes at the ends of the Long Bases and secure to the Short Bases with wood glue and 32mm screws. Note that there is a 38mm at the front and sides of the Base Assembly, as well as a 19mm inset at the back of the Base Assembly. This last inset allows for pushing the unit against a wall and allows for a standard skirting board height. For higher skirting boards, increase the height of the base accordingly.
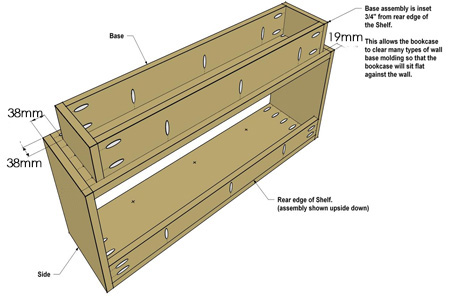
7. Now you're ready to assemble the bookshelf. Working with the assembled shelves upside down, drill countersunk pilot holes through the top of the bottom and middle shelf assemblies in order to secure these together with 45mm screws.