
Easy slat bench
This pine slat bench is easy to make and you can finish in your choice of wood tint and paint colour. Buy all your supplies at your nearest Builders store.
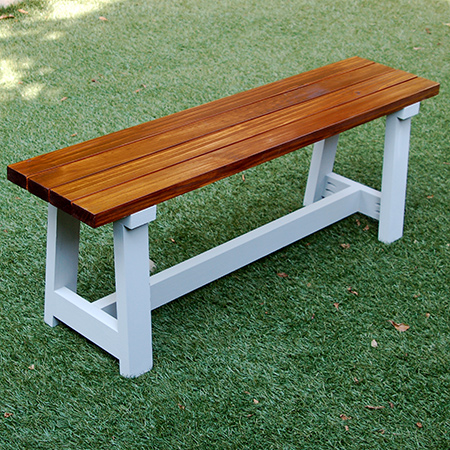
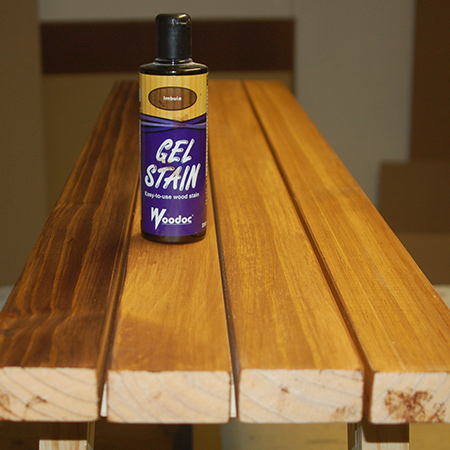
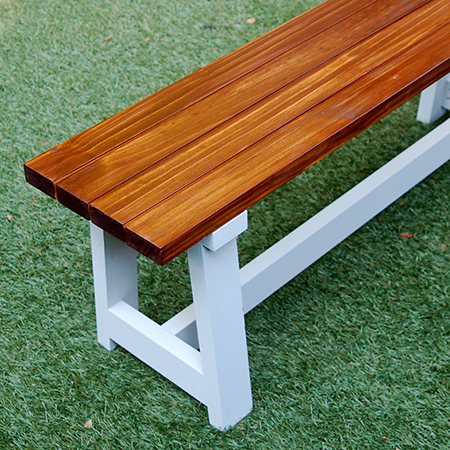
The bench shown here has a slatted seat finished with Woodoc Gel Stain in imbuia, finished with Woodoc 5 Polywax Sealer, and a base painted with Rust-Oleum Chalked paint in aged grey. See the full range of Rust-Oleum products at your local Builders or hardware store.
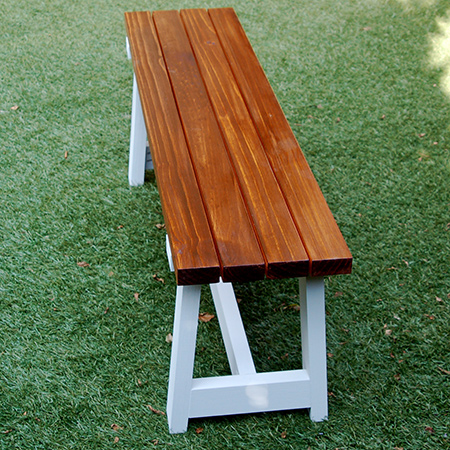
The slat bench measures 1200mm in length, but you can easily modify this if you need a shorter or longer bench for an entrance or hallway, or to use with a dining table. We used a Kreg Pockethole Jig to make our bench so that screws are out of sight, but if you don't own a pockethole jig you can join with conventional methods.
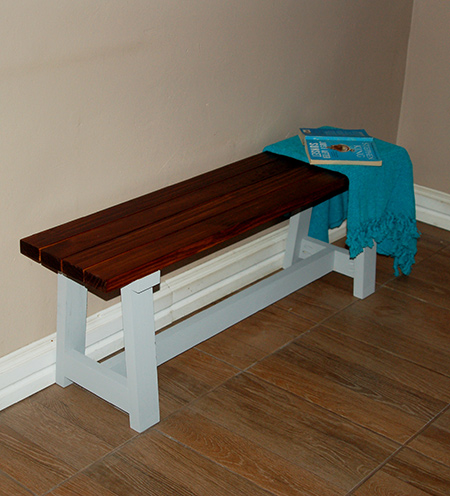
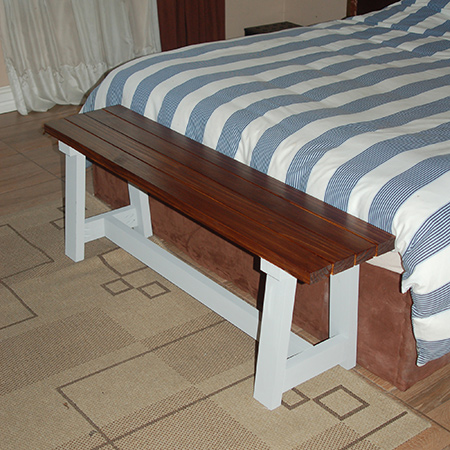
There are so many uses for our DIY slat bench. Place at the bottom of a bed as a place to sit while you dress.
YOU WILL NEED:
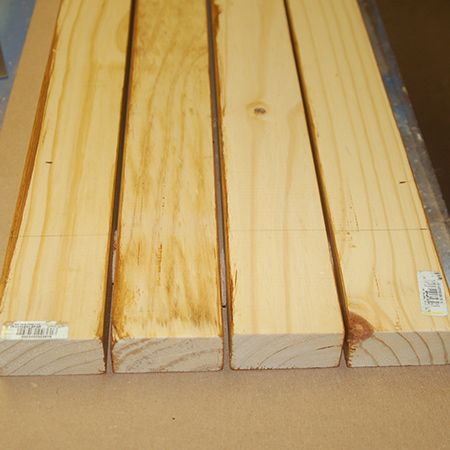
4 of 32 x 67 x 1200mm pine - seat slats
4 of 32 x 67 x 368mm pine - legs
2 of 32 x 67 x 284mm pine - seat support
2 of 32 x 67 x 230mm pine - side rail
1 of 32 x 67 x 950mm pine - bottom rail
1 of 32 x 67 x 878mm pine - top rail
2 of 22 x 44 x 224mm pine - seat slat cross piece
32mm pockethole screws
Woodoc gel stain in your choice of tint
Woodoc 5 or 10 interior sealer*
Rust-Oleum Chalked ultra matt paint
TOOLS:
Drill / Driver plus assorted bits
Kreg pockethole jig kit (we used a Kreg K4)
Jigsaw or mitre saw
Orbital sander plus 120- and 240-grit sanding pads
Tape measure and pencil
Paintbrushes
*If you plan of having the slat bench outdoors, finish with Woodoc 30/35 or 50/55 exterior sealer.
HERE'S HOW:
Preparation:
Sand all the pieces smooth before assembly.
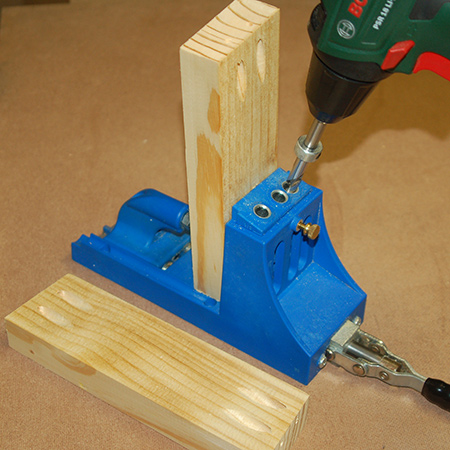
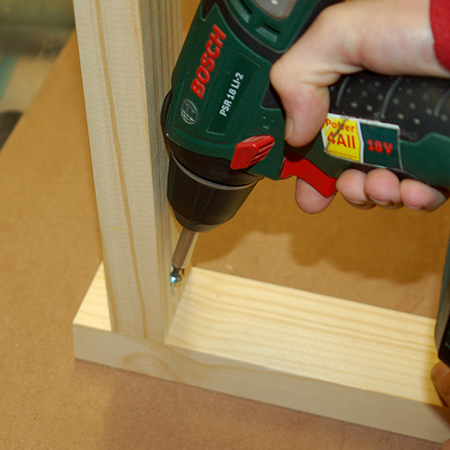
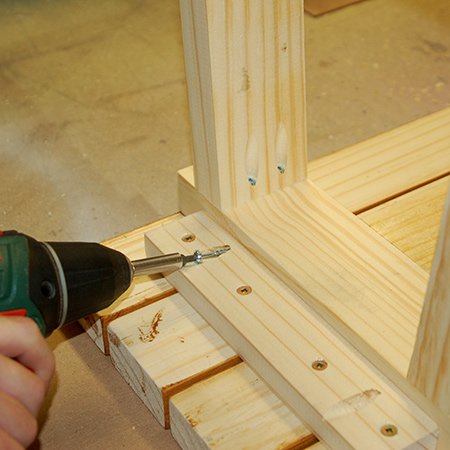
1. All the pieces that make up the base are joined using pockethole joints. By using this method, screws are almost invisible or out of sight. Drill pocketholes into the rails, cross pieces and legs.
2. The slats that form the seat have 5mm spacers between each slat and are then joined using the seat slat cross piece. DO NOT glue this in place - see Step 9 below.
GOOD TO KNOW
Before securing the seat slats, apply whatever colour Woodoc Gel Stain you want for the finished bench. It is far easier to apply this to the slats before they are secure.
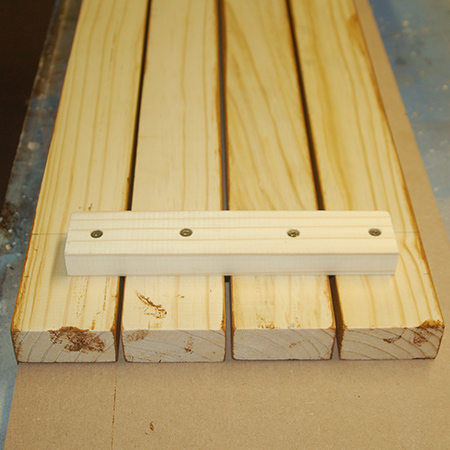
NOTE: The seat slat shown above was later drilled with pocketholes - see Step 9.
3. Before you assemble the bench you need to cut a few angles on the legs and side rail.
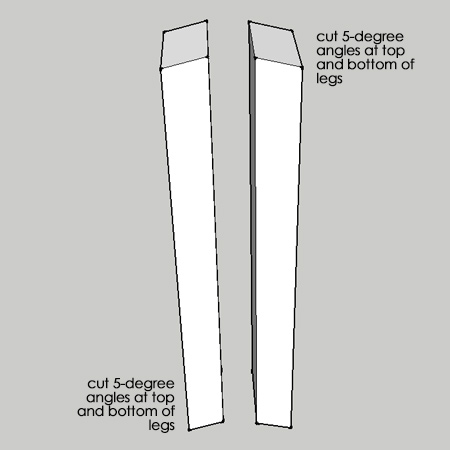
4. Cut a 5-degree angle at the top and bottom of each leg, as shown above. Also, cut a 5-degree angle on both side rails, as shown below.

BELOW: How the sides should be assembled. The side rail is flush with the outside of each leg.
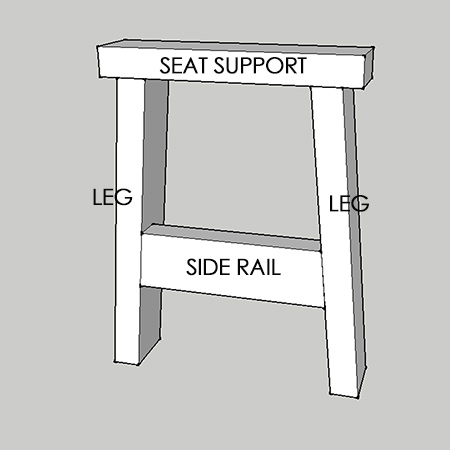
5. Secure the legs to the seat support with wood glue and 32mm pockethole screws.
6. Measure and mark at 40mm up inside each leg and then attach the side rails with wood glue and pockethole screws.
GOOD TO KNOW
The side rail should be flush with the outside edge of each leg - on opposing sides. Assemble two sides.

7. Measure and mark the centre of the seat support and side rail in order to mount the top and bottom rails.
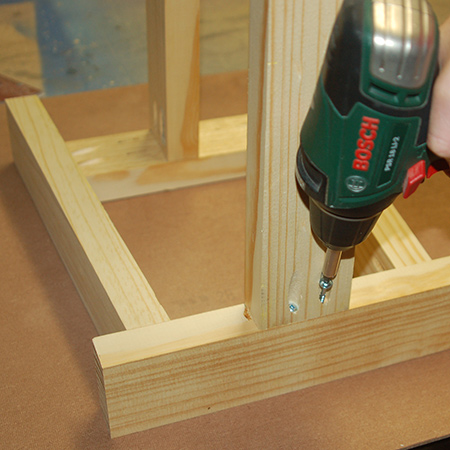
8. Use wood glue and pockethole screws to secure the top and bottom rails to the sides.
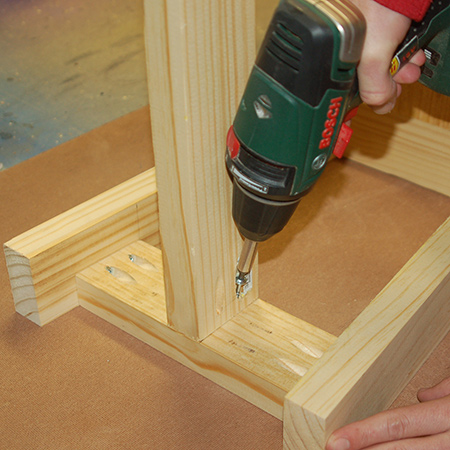
9. Place the bench face down on the slats in order to mount the bottom frame to the underside of the seat slats. Push the frame in place between the [2] seat slat cross pieces. Secure in place with wood glue and pockethole screws through the seat slat cross piece into the seat support.
Finishing
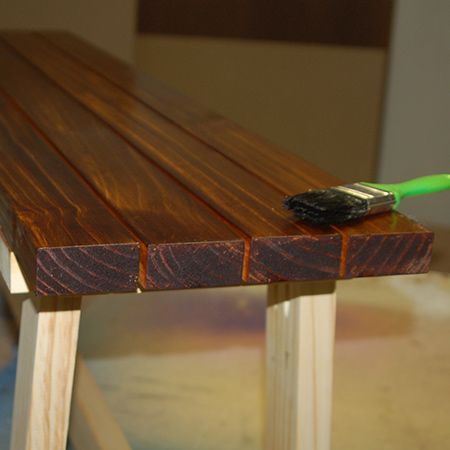
Sand the assembled bench and round off any sharp edges. Wipe clean. We originally applied Woodoc gel stain in traditional teak to the top slats, but then applied imbuia for a darker contrast.
After applying the gel stain, three coats of Woodoc 5 polywax sealer were applied to the seat slats.
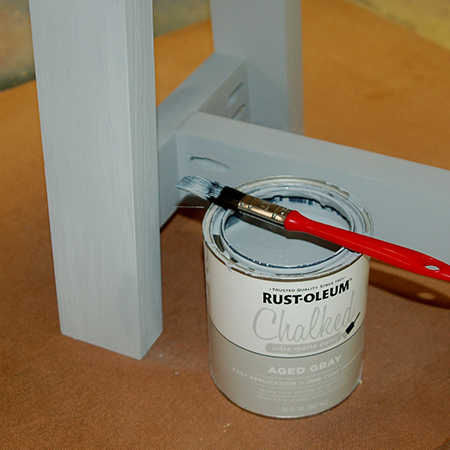
The bottom frame was painted with Rust-Oleum Chalked Ultra Matte in aged grey. There are other colour options and you will find the full range of Rust-Oleum products at your local Builders Warehouse.
GOOD TO KNOW
If you plan on placing the slat bench outdoors, finish with Woodoc 30/35 or 50/55 exterior sealer
Not responsible for errors or omissions