
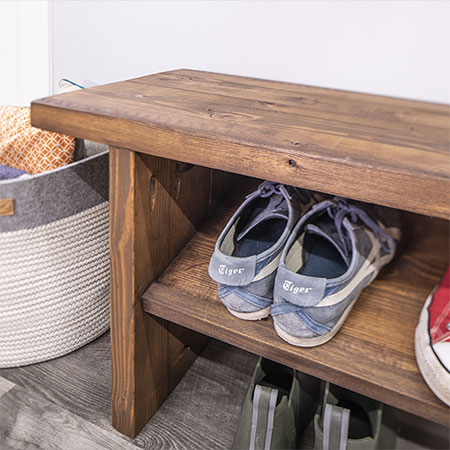
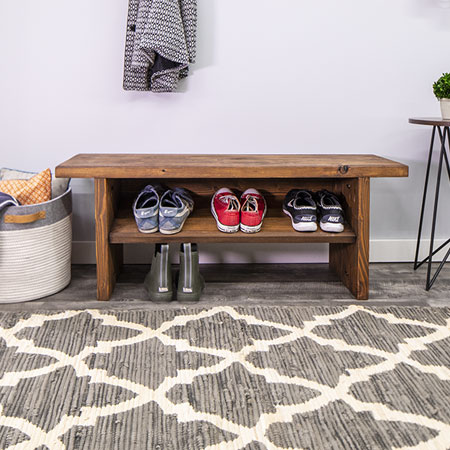
Shoe Rack for Entrance Hall
Very few SA homes have what they call a 'mud room' but this shoe rack is perfect for an entrance or next to a back door.
12/09/2019

This pine shoe rack by Build Something is ideal for close to a front or back door for storing muddy shoes. You can buy the PAR pine needed for this project at any Builders Warehouse and have them cut it to size for you for easy assembly.
Once you have assembled the shoe rack, you have the option to leave is raw or stain and varnish in your choice of finish. If you prefer, you can even paint the shoe rack with acrylic PVA or water-based enamel paint for a durable, long-lasting finish.
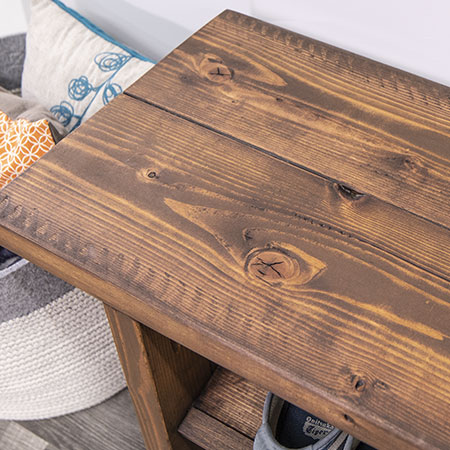
For finishing the shoe rack, sand the entire assembly and then apply your choice of finish. You can stain and varnish the bench in your choice of wood tint with a matt, satin or gloss finish.
YOU WILL NEED:
2 of 38 x 184 x 1143mm PAR pine - seat
4 of 38 x 184 x 394mm PAR pine - legs
1 of 38 x 184 x 813mm PAR pine - back rail
1 of 19 x 286 x 813mm PAR pine - shelf
1 of 19 x 25 x 25 x 813mm PAR pine - shelf cleat
32mm Coarse-thread pocket-hole screws
Wood glue
TOOLS:
Drill/Driver plus assorted bits
Kreg pocket-hole jig
Orbital sander plus 120-grit sanding pads
Clamps
Tape measure and pencil
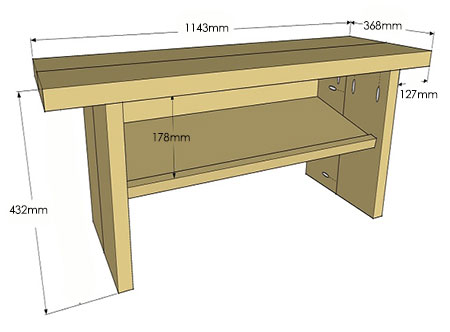
HERE'S HOW:
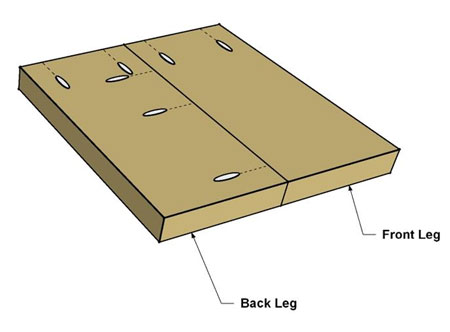
1. Drill pocket-holes along the legs, as shown above. Join the two sets of legs together using wood glue and 32mm coarse-thread screws.
GOOD TO KNOW: Place the legs on a level, flat surface and clamp down while joining together.
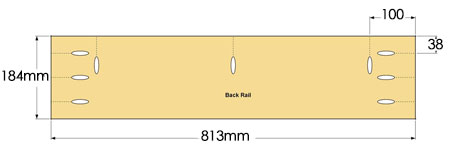
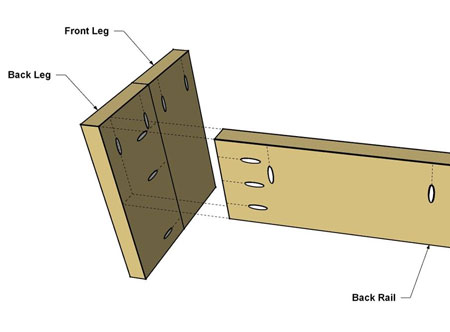
2. Apply wood glue to the ends of the Back Rail and place between the Legs. It should be flush along the rear edge and along the upper end - with pocket holes facing toward the back of the bench. Check that the pocket holes along the edge of the Back Rail face upward for attaching the Seat later on. Clamp in place and secure with screws.
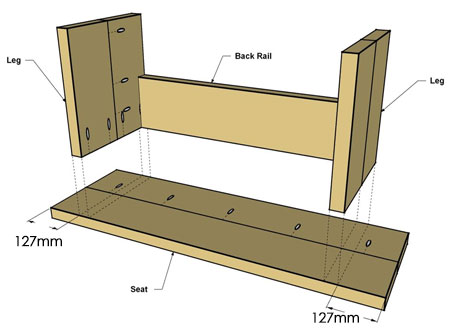
3. Position the Seat on a flat work surface - with pocket holes facing up. Centre the base on the Seat with the Base flush with the Seat at the front and back. Secure using glue and screws.
4. Drill pocket holes in the shelf, as shown below. Apply glue along the pocket-hole edge of the shelf, and clamp the Cleat in position. The Cleat should be flush at the bottom of the Shelf. Secure to the Shelf with screws.

5. Mount the shelf as shown below. Adjust the angle and position to suit your own needs. Secure the Shelf to the Legs using screws.
