How to make a shadow box
You can use a shadow box to display your favourite decor accessories. To make a shadow box all you need are some pieces of pine or board and moulding for the front.


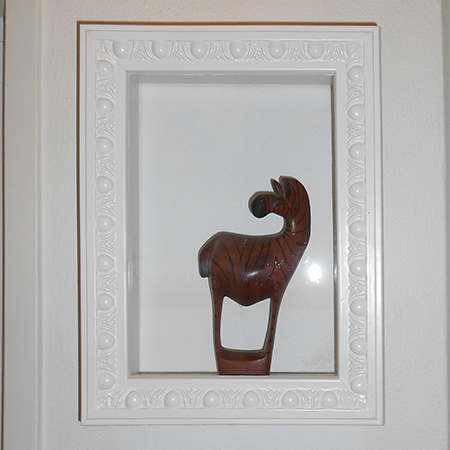
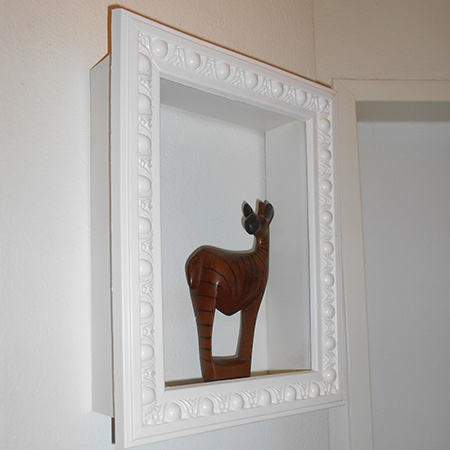
I saw these wonderful shadow boxes on Pinterest by Shanty-2-chic where she recycled old picture frames for the fronts and wondered how easy it would be to make my own shadow boxes. The principle is very simple: make a box and add a frame to the front. When making my own shadow box I also added a piece of glass to the front to make a more of a frame, rather than just a shelf.
If you prefer to have an arrangement of shadow boxes to serve as wall shelves, simply leave out cutting a rebate to add a piece of glass.
I didn't have any old picture frames to use for the fronts, so I made by own frames using extruded polystyrene that I found at my local Builders.
YOU WILL NEED:
2 pieces 80 x 300mm pine / MDF - sides
2 pieces 80 x 260mm pine / MDF - top and bottom
Length of pine moulding or extruded polystyrene
Pattex No More Nails adhesive
Picture hanger
Piece of glass, cut to fit
Masking tape, thin
TOOLS:
Drill / Driver plus assorted bits
Mitre box and backsaw or mitre saw
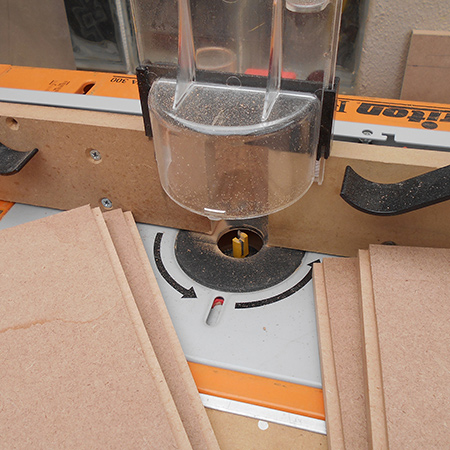
Optional: Router or router table
HERE'S HOW:
1. Because I am fitting a piece of glass to the front on my shadow box, I used my router table to cut a 5mm rebate in the sides, top and bottom to support the glass.
2. The sections were glued and then clamped overnight.
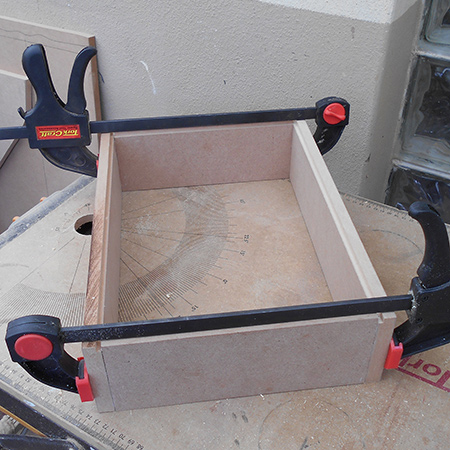
3. The space was measured to have a piece of glass to fit the opening.
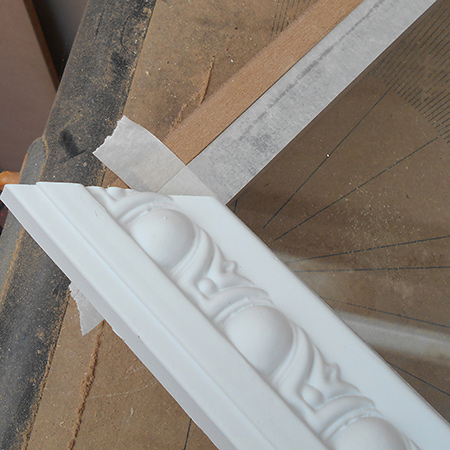
4. A thin strip of masking tape was placed around the edge of the glass. This will help when cutting the front frame to fit and allow the front frame to overhang on both the inside and outside of the box.

5. Cut one end of the pine moulding or polystyrene cornice and place at the corner of the tape.
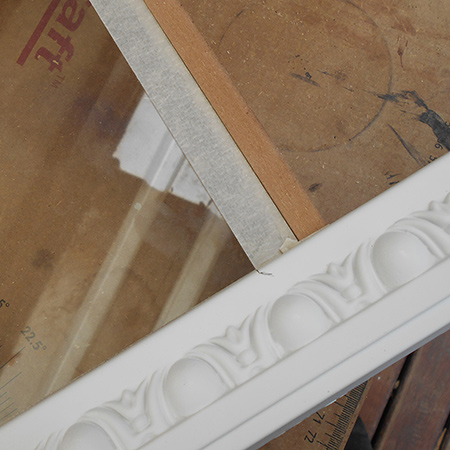
6. At the other end, mark where to cut. A little mark to indicate the cutting angles does away with any confusion.
7. Glue the front frame by applying a liberal bead of adhesive to the top edges of the box and also to the edges of the moulding. Press the frame or moulding firmly in place making sure the edges are nicely joined together.
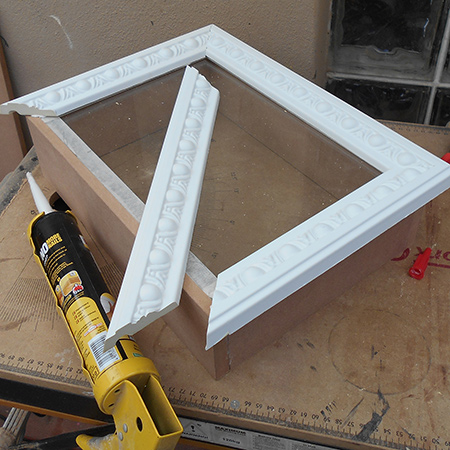
8. Wipe away any adhesive that oozes out. You can also use the adhesive to fill any gaps at the corners.

GOOD TO KNOW: Use a blunt knife to push back any masking tape that is visible on the front of the frame.
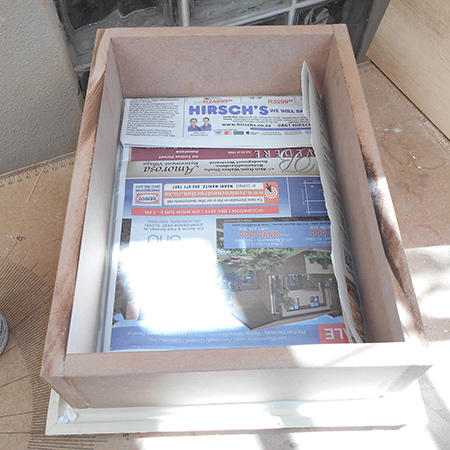
9. Use pieces of newspaper to cover the glass inside and on top to protect when painting with spray paint.
GOOD TO KNOW:
If you are using spray paint,
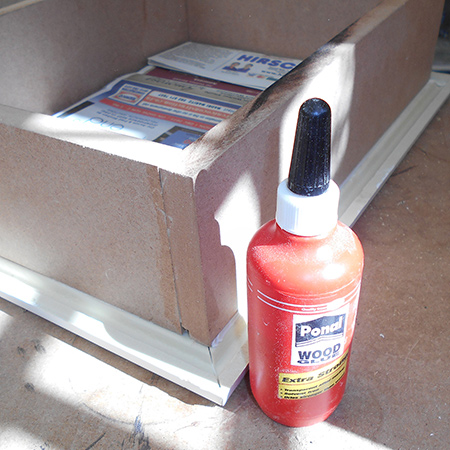
apply a thin layer of wood glue to the cut edges
to seal these.
Finishing
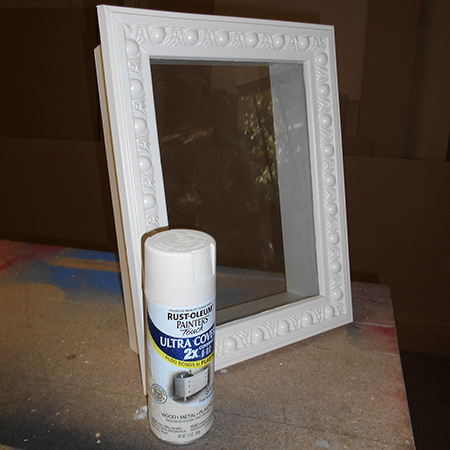
Spray inside and outside the shadow box with Rust-Oleum 2X Ultra Cover. I used satin Heritage White to spray the shadow box. You will find the full range of Rust-Oleum products at your local Builders store.
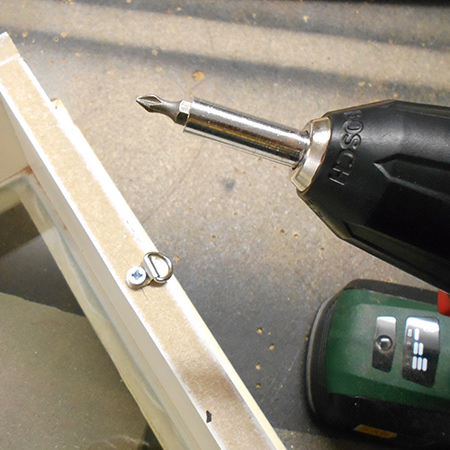
Attach a picture hanger at the back of the frame for hanging on a wall.