Dust hood for mitre saw
When you use a mitre saw on a regular basis you know it makes a lot of mess, which is why this dust hood is an excellent idea.
18/07/2018
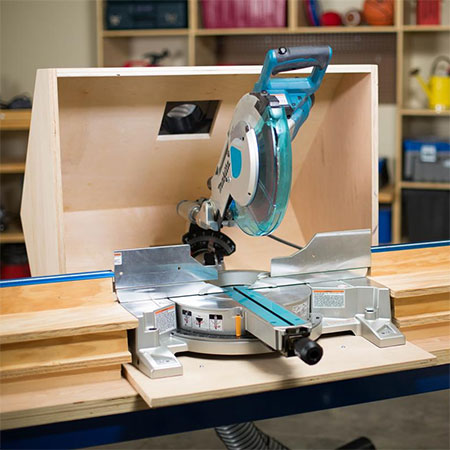
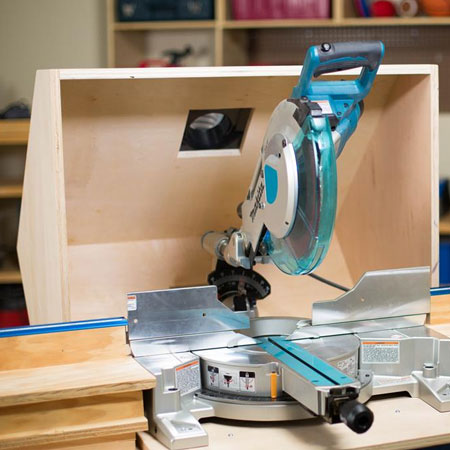
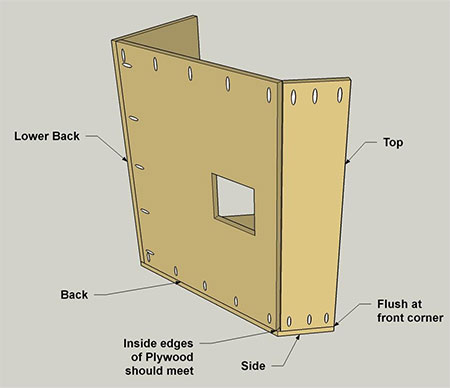
Even with the addition of an extractor, a mitre saw can make a lot of mess. The sawdust gets everywhere and can quickly mess up a workshop if you use your mitre saw on a regular basis. This DIY dust hood fits over a mitre saw and helps an extractor remove a lot of the dust that would normally end up on the floor - or you workbench.
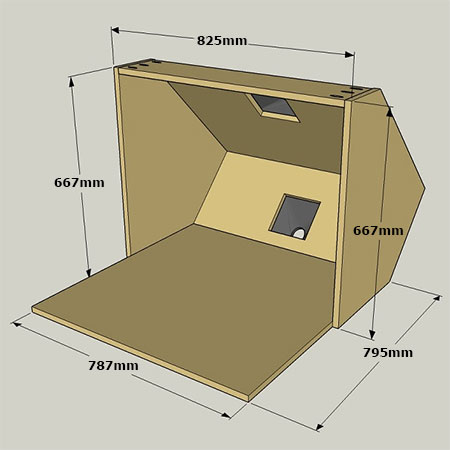
Designed by BuildSomething.com, this plywood dust hood can be modified to fit any type of model mitre saw and won't cost that much to make. Before you make, check the dimensions of your mitre saw, as this dust hood was built to fit a 250mm sliding mitre saw. To measure your mitre saw, swing the saw to full miter capacity in both directions and measure the overall width. Should this be wider than 787mm, modify the measurements below accordingly.
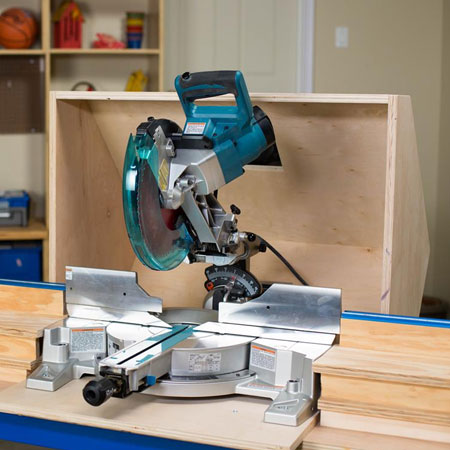
Also check the overall depth of your mitre saw to make sure it fits. On the plan below, from the front edge of the bottom to the back of the hood 1016mm has been allowed and that should be plenty for most mitre saws.
YOU WILL NEED:
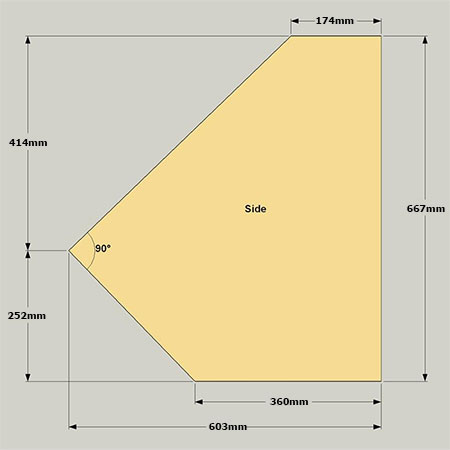
2 of 603 x 667mm 19mm plywood - sides
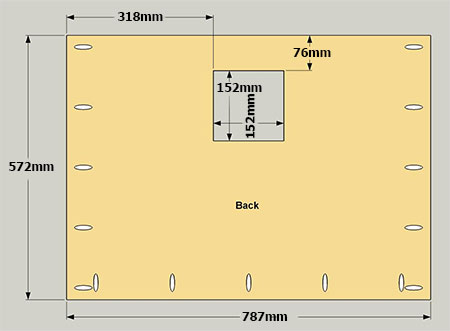
1 of 572 x 787mm 19mm plywood - back
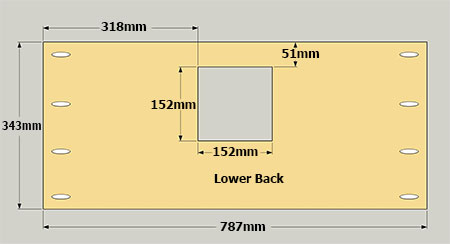
1 of 343 x 787mm 19mm plywood - lower back
1 of 165 x 787mm 19mm plywood - top
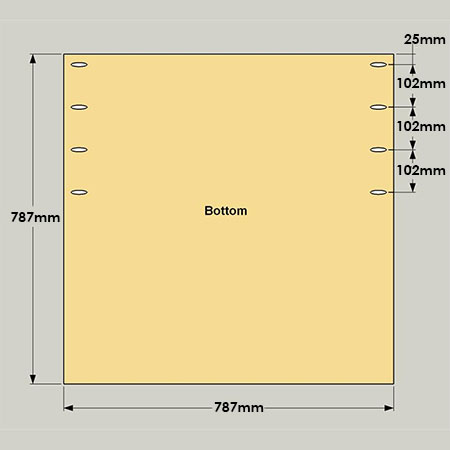
1 of 787 x 787mm 19mm plywood - bottom
32mm coarse-thread pocket hole screws
Wood glue
TOOLS:
Kreg pocket hole jig
Drill/Driver plus assorted bits
Jigsaw and clean-cut blade
Orbital sander plus 120- and 180-grit sanding pads
Tape measure and pencil
Have all your plywood cut to size at your local Builders Warehouse for easy assembly.

HERE'S HOW:
1. Cut the angles on the sides with your jigsaw. Sand all the cut edges and surfaces smooth.
GOOD TO KNOW: If you’re using veneered plywood, 180-grit on a orbital sander will do the job. If you’re using pine or commercial plywood, start with 120-grit.
2. Adjust the depth on your pocket-hole jig for 19mm plywood and then drill pocket holes in the Back as shown in the diagram below.
3. Mark the location of the dust port and drilll out the four corners of the hole with a 10mm wood bit to cut out the opening for the dust port with a jigsaw. Sand all edges smooth after cutting.
4. In the Lower Back, drill pocket holes as shown below.
5. Mark the location of the dust port in the Lower Back and drilll out the four corners of the hole with a 10mm wood bit to cut out the opening for the dust port with a jigsaw. Sand all edges smooth after cutting.
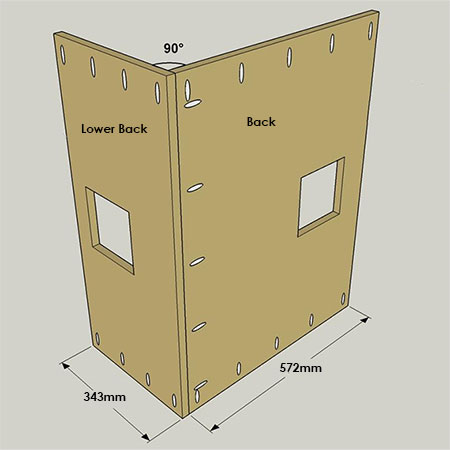
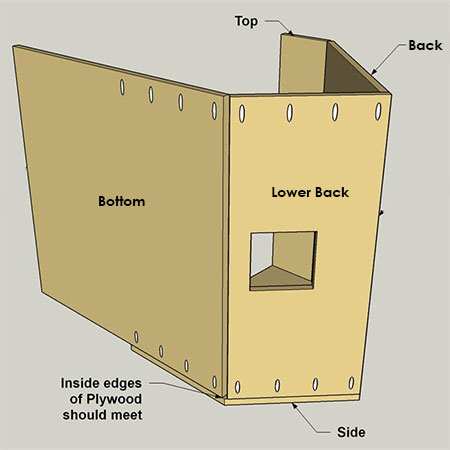
6. Apply wood glue and clamp the Back and Lower Back together - making a 90° Corner. Secure with 32mm coarse-thread pocket-hole screws.
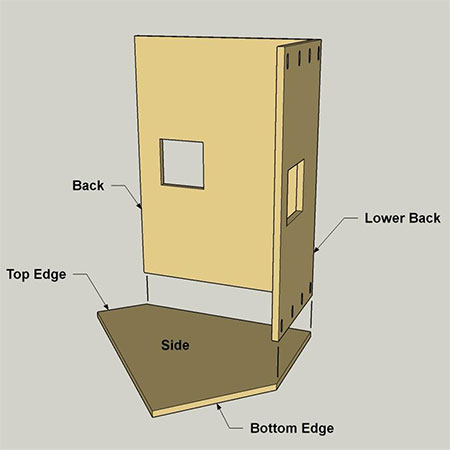
7. Lay one Side flat on your work surface and then position the back assembly. Use wood glue and 32mm screws to join.
8. In the top, drill pocket holes at the locations shown, and then sand smooth.
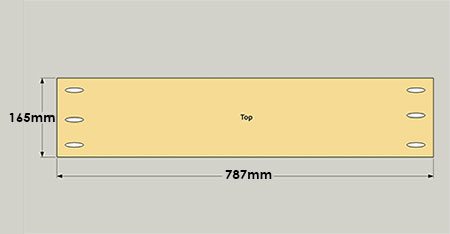
9. Attach the Top as shown below using wood glue and 32mm screws.
10. Drill pocket holes in the Bottom as shown in the diagram below.
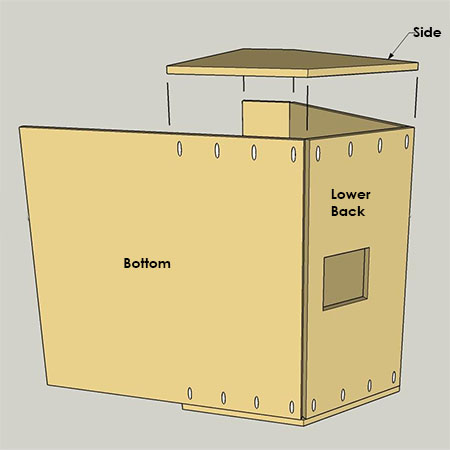
11. Attach the Bottom using wood glue and 32mm.
12. Apply wood glue to the edges of the joine sections and add the remaining side piece. Secure with wood glue and 32mm screws.
Finishing
Since this is a workshop project, you could leave it unfinished or add a coat or two of varnish or sealer to help protect the plywood.
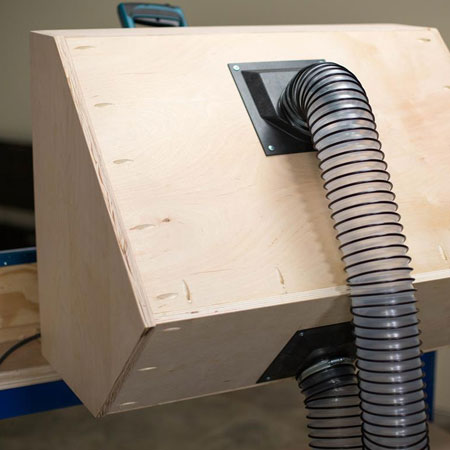
Position plastic dust hoods over the openings in the Back and Lower Back and then drill pilot holes and secure the hoods in place.
Place your mitre saw on the Bottom, making sure it’s positioned so that the saw can swing, bevel, and slide like it’s supposed to. Also make sure you can easily reach the handle and the power trigger. If all is well, bolt your saw down.