
Make a Custom Rocking Chair
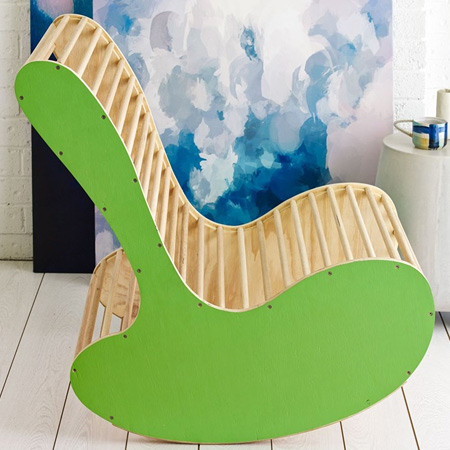
This is not your granny's rocking chair - this rocking chair is a modern take on an old classic and is ideal for a nursery, playroom, or for relaxing in the den.

I stumbled across this idea in Better Homes and Gardens magazine and it's a fun project that only uses a single sheet of pine plywood. You can paint the sides of the rocking chair with Rust-Oleum 2X spray paint in any one of their bold colours, or go muted with Rust-Oleum Chalked ultra matte paint.
YOU WILL NEED:
4 of 875 x 800mm 18mm pine plywood - sides
2 of rubber or plastic runners 680 x 30mm
49 of meranti dowels, 18mm x 600mm length - cut 3 lengths out of a 1800mm length
Piece of cardboard
3.5 x 30mm and 4x 50mm cut screws
25mm panel pins
Wood glue
Wood filler
Choice of paint to finish
TOOLS:
Quick clamps
Jigsaw and clean-cut blade
Drill / Driver plus assorted bits
18mm spade bit
Orbital Sander plus 120- and 180-grit sanding pads
Combination square
Hammer
Tape measure and pencil
Buy everything you need for this project at Builders Warehouse.
HERE'S HOW:
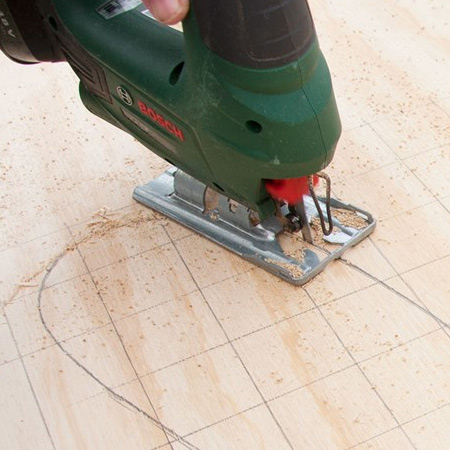
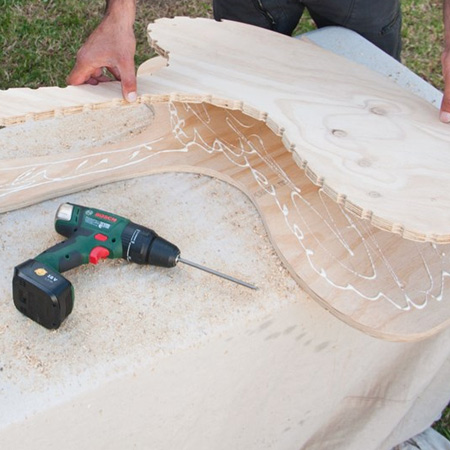
1. On the sheet of plywood, draw a 50mm square grid on the rough face. Follow the template as a reference for drawing the shape for one side of the rocking chair.
2. Cut this out with your jigsaw - face down to reduce chipping on the smooth face of the board.
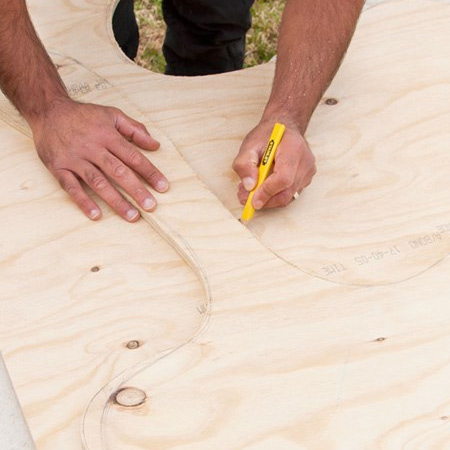
3. Place the cut panel on the remaining plywood sheet and trace around to cut 3 more panels. Check the spacing so that you can cut out all pieces from the one sheet.
GOOD TO KNOW: Make sure to use a sharp pencil and draw close to the edge all round.
4. For one side pair together two pieces with good faces facing out. Align the edges and temporarily join with a few 30mm screws. These screws will be removed and filled later on. Repeat for the other side.
GOOD TO KNOW: One pair will be the inner panels and the other the outer panels.
5. Sand the cut edges nice and smooth.
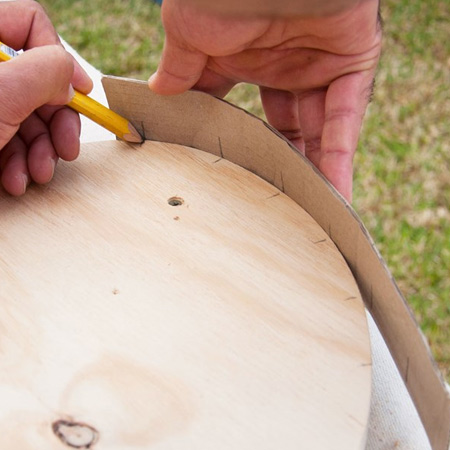
6. To mark for drilling out for the dowels in the inner panels, mark 50mm guides on a strip of cardboard. Starting where the first dowel will be placed at the base of the chair, position the cardboard strip along the edge and transfer the 50mm marks - moving the cardboard up and around the edge of the chair to the back and then repeating this on the other side.
GOOD TO KNOW: You should have a total of 49 marks around the edge.
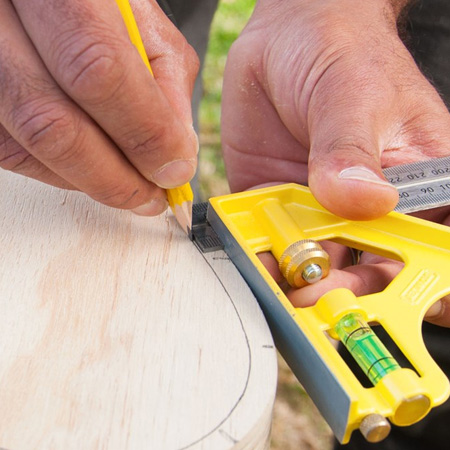
7. Use a combination square to mark a 9mm line on the inner side panels. Run this line all around the edge of the inner panel.
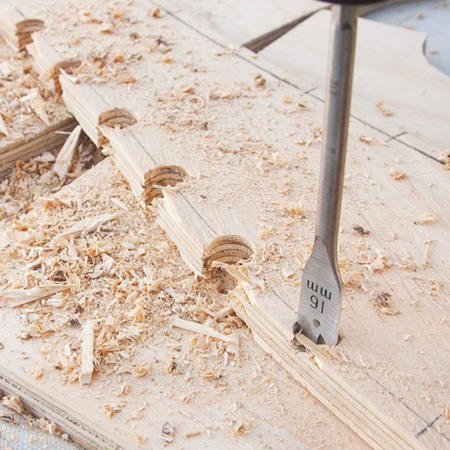
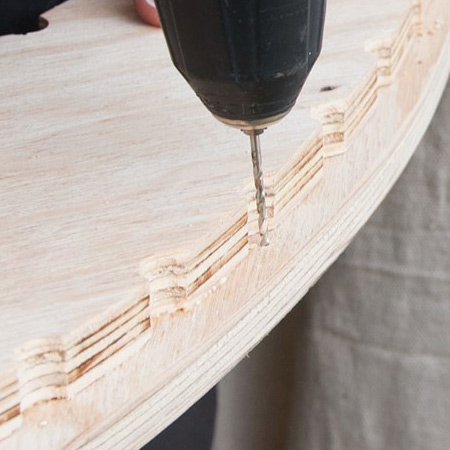
8. Remove the screws to separate the panels and use an 18mm spade bit to drill holes at the marks - along the 9mm line.
GOOD TO KNOW: Place a scrap piece of board underneath to reduce splintering.
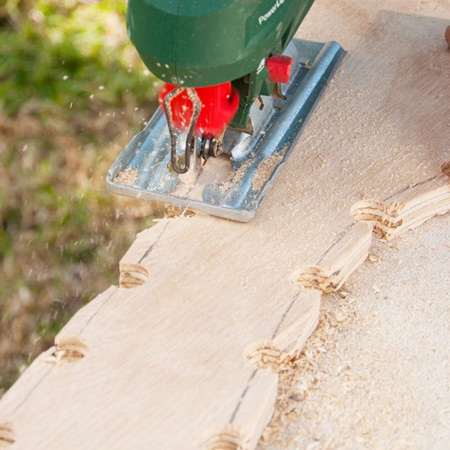
9. After drilling, cut along the drawn line with a jigsaw and then sand smooth.
10. Glue the inner and outer panels together, making sure the inner panel sits equal distance inside the outer panel. There should be an 8mm gap all the way around.
11. Secure the plastic or rubber runner to the base of the side panels. Position centrally along the bottom edge and secure with glue or 30mm screws.
12. Mark the position for the dowels on the inner panel by drilling a pilot through the first and every third rod. On the outer panel countersink the hole. These holes can be filled with wood filler and sanded smooth.
GOOD TO KNOW: At this stage you can paint the outer panel in your choice of paint.
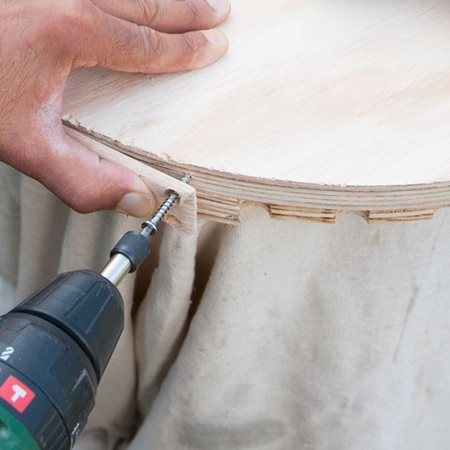
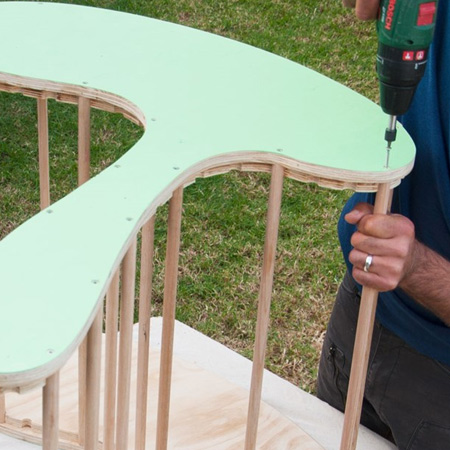
13. Drive in 50mm screws through the outer panels at the drilled positions.
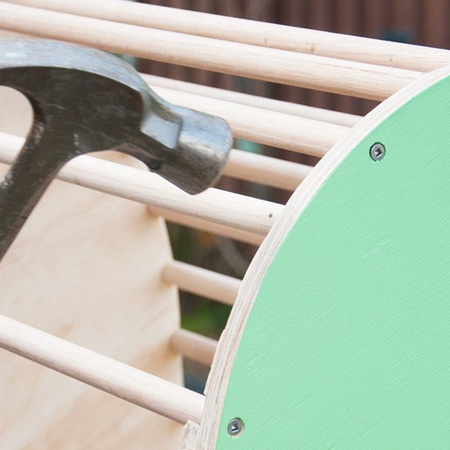
14. For the remaining dowels, drill a 2mm hole at both ends of each dowel in order to secure onto the frame with wood glue panel pins.
15. Fill any holes with wood filler and sand smooth.
Now your retro rocking chair is ready for use. Sit back and enjoy.
bhg.com.au