Make a cabinet for a record player
So many people are rediscovering the joy of playing your vinyl's, so this Record Player Cabinet will provide plenty of storage and allow you to show off your collection!
05/10/2018
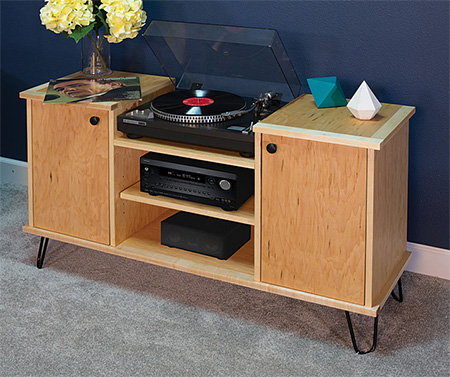
With the resurrection of vinyl records, many people are rediscovering the joy of playing vinyl's. This Record Player Cabinet will provide plenty of storage and allow you to show off your collection!
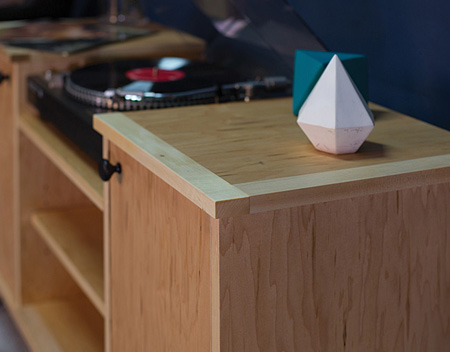
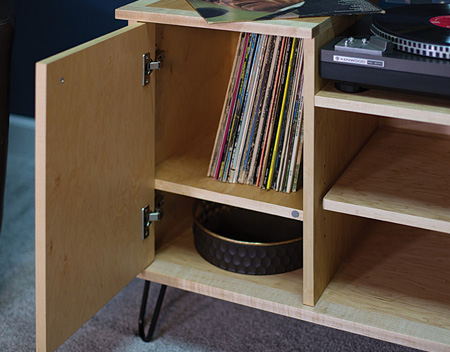
The cabinet is built using maple-veneered plywood with pine edge and has a mid-century vibe to it.
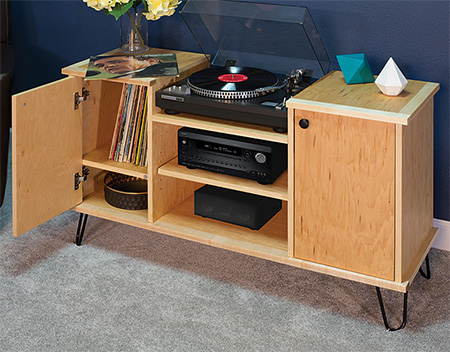
The cabinet offers plenty of storage for your vinyl record collection or accessories, and everything is neatly behind closed doors.
YOU WILL NEED:
All sections 19mm maple-veneer plywood unless otherwise advised.
1 of 330 x 362mm maple plywood - Left Top Panel
1 of 330 x 362mm maple plywood - Right Top Panel
1 of 362 x 1143mm maple plywood - Bottom Panel
4 of 19 x 38 x 362mm pine/maple - Side Edging
2 of 19 x 38 x 362mm pine/maple - Top Edging
1 of 19 x 38 x 1220mm pine/maple - Bottom Edging
2 of 387 x 476mm maple plywood - Outside Panel
2 of 387 x 476mm maple plywood - Inside Panel
2 of 381 x 365mm maple plywood - Fixed Cabinet Shelf
1 of 387 x 483mm maple plywood - Fixed Middle Shelf
1 of 3 x 508mm x 1188mm maple plywood - Back Panel
1 of 349 x 476mm maple plywood - Adjustable Shelf
2 of 311 x 470mm maple plywood - Door
19mm wide edge banding, pine or maple
Wood glue
32mm coarse-thread pocket hole screws
4 of shelf pins
4 of 150mm long hairpin legs, or legs of choice
2 of knobs or handles
4 sets full inset concealed hinges
TOOLS:
Drill / Driver plus assorted bits
35mm Forstner bit
Orbital sander plus 120- and 240-grit sanding pads
Kreg pocket hole jig
Kreg concealed hinge jig
Kreg shelf pin jig
Jigsaw plus clean-cut blade
Clamps
Tape measure and pencil
HERE'S HOW:
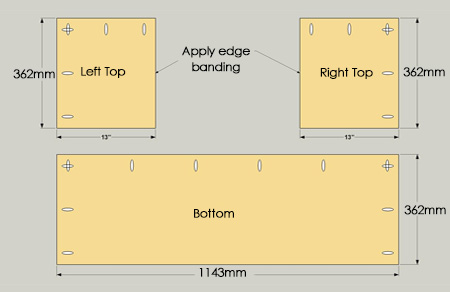
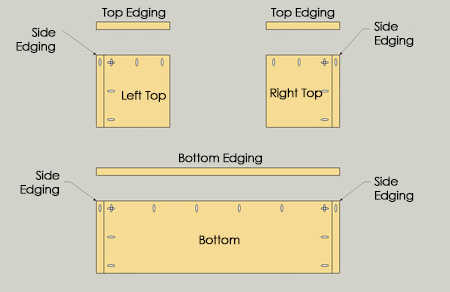
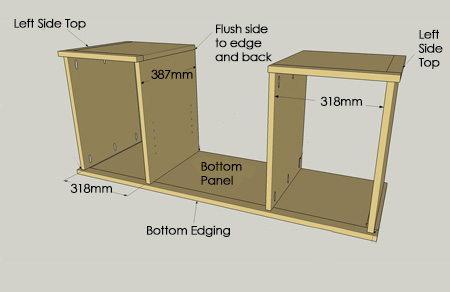
1. Set the pocket-hole jig for 319mm-thick material. Drill pocket holes as shown above. On the Top Panels apply edge banding to one edge of each panel, as above. Trim edging flush and lightly sand the cut edges.
2. Drill a centered pocket hole in one end of each of the Side Edging pieces. Lay the Top and Bottom Panels - with pocket holes facing up - and secure the Side Edging to the Bottom and Top Panels first using 32mm screws. Attach the Top Edging and Bottom Edging also using 32mm screws.
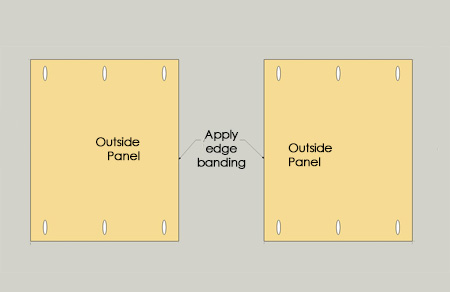
3. In both outside panels drill pocket holes as shown below. On one long edge of each panel apply edge banding to one edge of each panel, as below. Trim and sand.
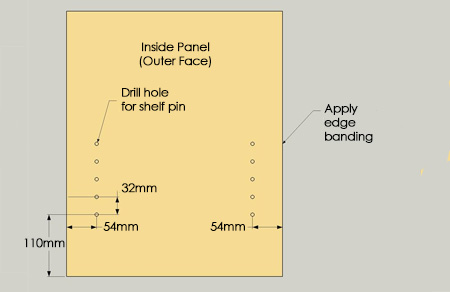
4. For the Inside Panels, drill pocket holes as indicated below. On the face of each Inside Panel that does not have pocket holes, drill shelf pin holes, as per below diagram. You can use a Kreg Shelf Pin Jig to do this. On one long edge of each panel, apply edge banding to one edge of each panel, as below. Trim and sand.
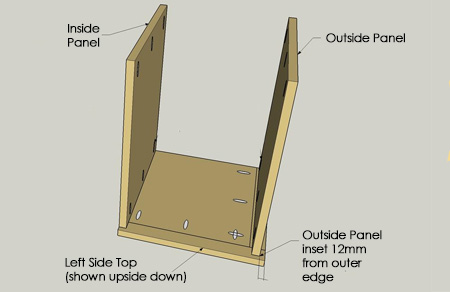
5. Start assembling the unit by attaching the Inside and Outside Panels to the Tops. Lay the Left and Right Top panel out and then place each Inside Panel on each Top Panel, as shown in the second diagram below. Secure with wood glue and 32mm screws.
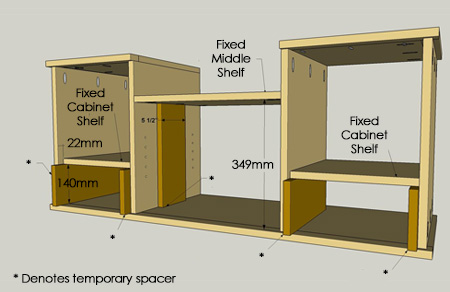
GOOD TO KNOW: Ensure that shelf pin holes face outward and the outside face is flush with the outside edge of the Top and flush at the back.
6. Position each Outside Panel on each Top with the pocket holes facing inwards. Inset the panel 12mm in from the outside edge of the Top and flush at the back edge as shown. Secure with wood glue and 32mm screws.
7. Place the Bottom Panel on a flat work surface - with the pocket holes facing down. Position each side case assembly on the Bottom Panel making sure the assembly is located with the proper insets, as indicated below. Secure the Outside Panel to the Side Edging on the Bottom using wood glue and 32mm screws. Now you can mount the Inside Panel to the plywood Bottom using wood glue and 32mm screws.
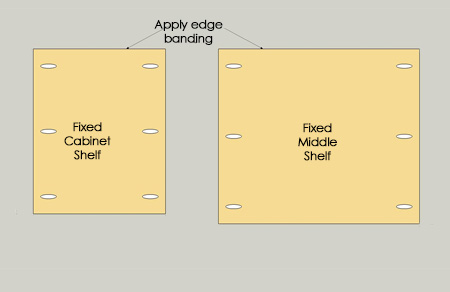
8. On the two Fixed Cabinet Shelves and one Fixed Middle Shelf apply iron-on edge banding, then trim and sand.
9. Have some scrap pieces handy to use as temporary spacers. Secure the Shelves to the Sides using 32mm screws.
10. Cut the back panel using 3mm Masonite/Evowood or plywood. Staple to the back, or use a hammer and panel pins.
GOOD TO KNOW: Determine the location to drill the cable hole with a hole saw or Forstner bit. Do this BEFORE attaching the Back.
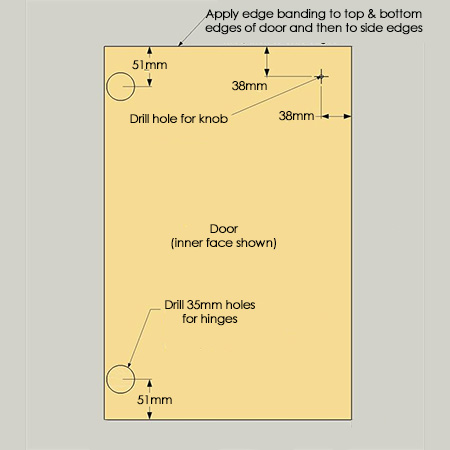
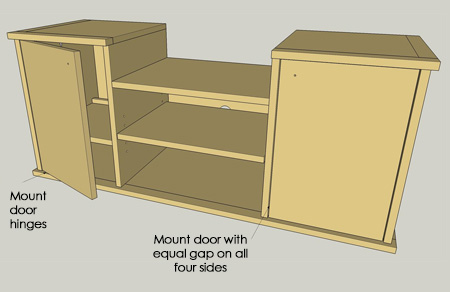
11. Apply edge banding to the forward edge of both doors. Measure and mark the location for door knobs and drill pilot holes. Mark for drilling holes for the full-inset concealed hinges. Mount the Hinges to the Doors.
12. Apply edge banding to the forward edge of the Adjustable Shelf.
13. Mount the doors to the cabinet with an equal spacing at the top and bottom. Adjust the hinges using their adjustment screws to even out the side gaps. After applying your choice of finish can install knobs or handles.
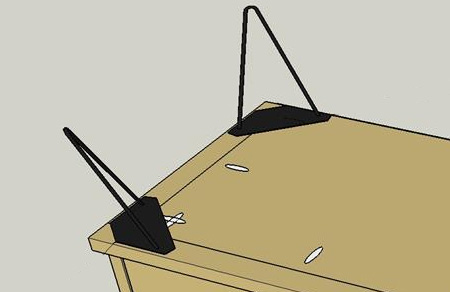
14. Attach the hairpin or your choice of legs.