
Quick Project: Decorative shelf with corbels
This quick and easy shelf is made using a couple of polyurethane corbels, a scrap of timber or board, and some moulding.
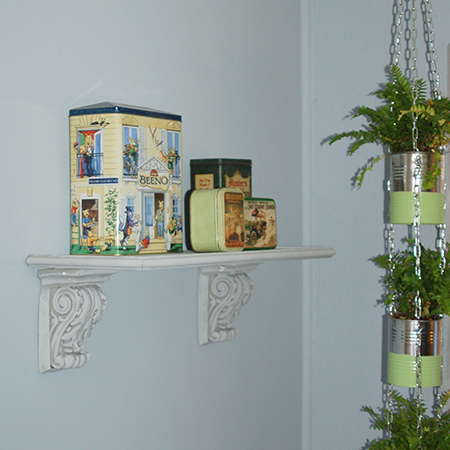
Thanks to Park Lane Decor for supplying the corbels I decided that these would be perfect for making a quick, easy and decorative shelf.

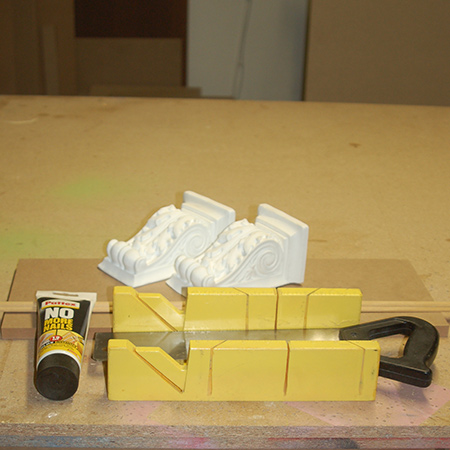
YOU WILL NEED:
Pair of corbels (wood, plaster of polystyrene)
Scrap of timber or board
Length of pine moulding
Pattex No More Nails adhesive or adhesive suitable for polystyrene
2 Keyhole brackets and [4] 30mm screws
Wall plugs and screws for mounting to wall
TOOLS:
Drill / Driver plus assorted bits
Tape measure and pencil
With the exception of the polyurethane corbels, buy all other materials and tools at your local Builders Warehouse.
HERE'S HOW:
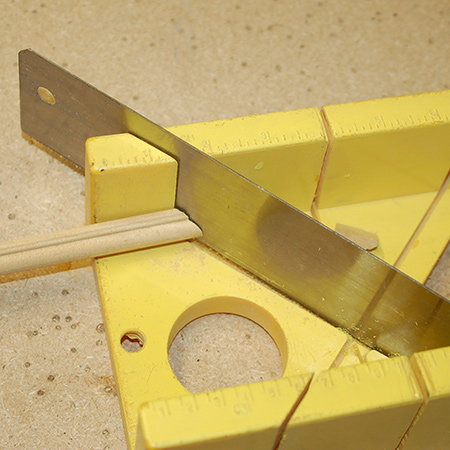
1. Measure the front edge and sides of the timber of board for the shelf and cut the moulding to fit.
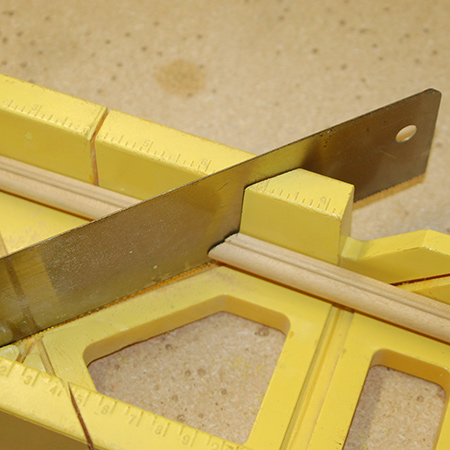
2. Use a mitre box and backsaw to cut opposing 45-degree angles.
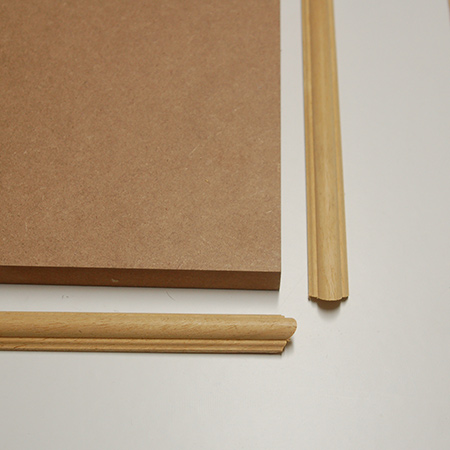
3. Make sure that the strips are cut exactly to fit around the timber or board shelf.
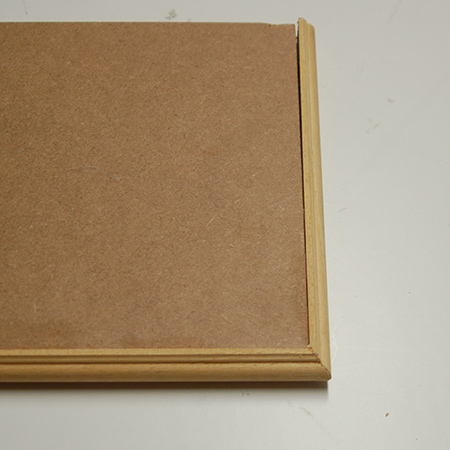
4. Use Pattex No More Nails adhesive to secure the moulding around the edge of the shelf. Leave to dry overnight.
5. At the same time you can use adhesive to secure the corbels to the underside of the shelf.
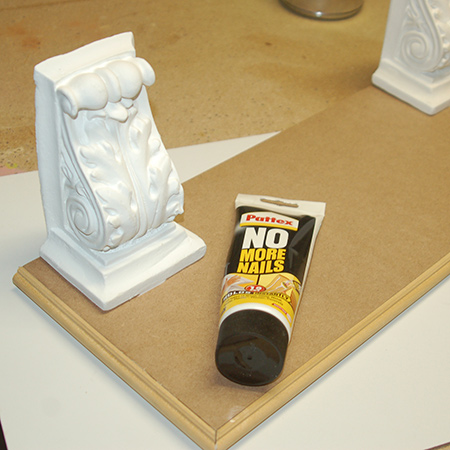
GOOD TO KNOW: I made a boo-boo! I didn't realise the tops of the corbels were painted and they later came unstuck because they were stuck to the painted layer. If you use the same corbels, sand away the layer of paint on top to prevent the same from happening.

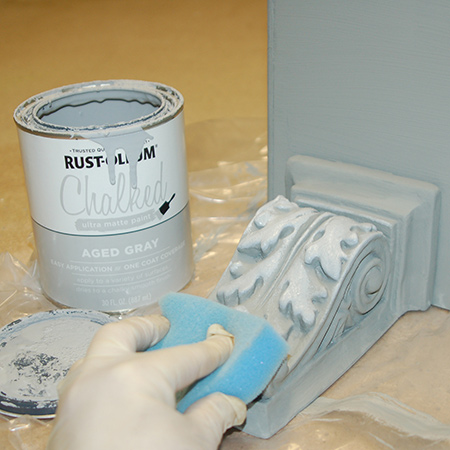
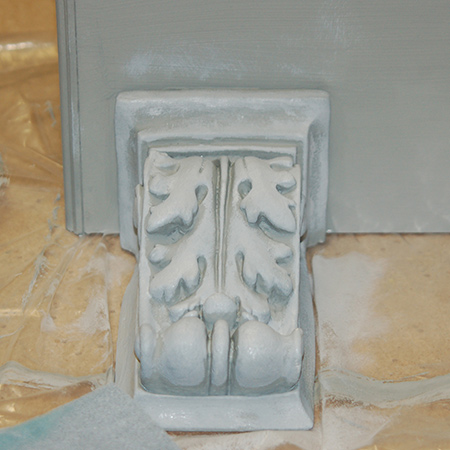
6. I applied one coat of Rust-Oleum Chalked ultra matt paint in Country Grey with a paintbrush and let this dry.
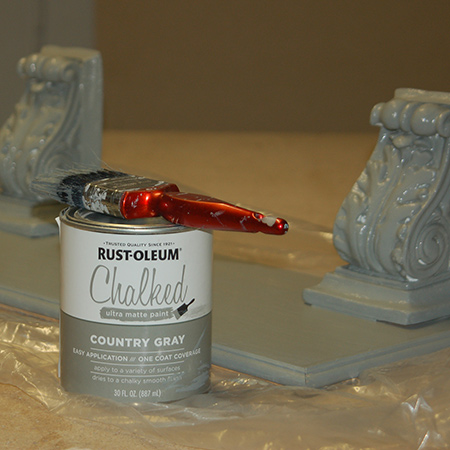
7. Over this I applied Rust-Oleum Chalked ultra matt paint in Aged Grey, but this time I used a sponge and lightly dabbed the paint onto the surface. In this way you leave the darker colour visible in detailing and this gives it a soft vintage effect.
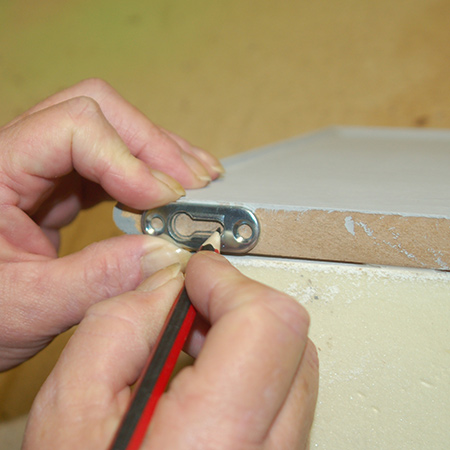
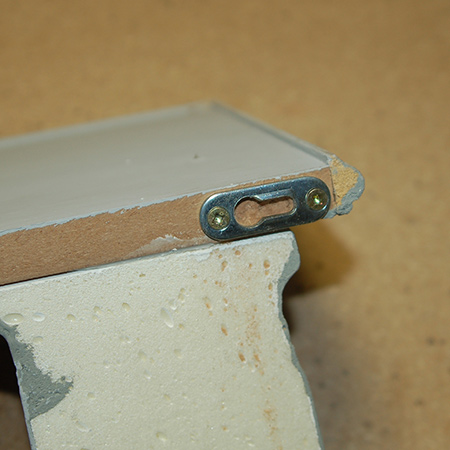
8. I am using keyhole hangers to mount the shelves onto the wall. These will be mounted along the back edge. For both sides, mark the keyhole and holes for screw mounting with a pencil.
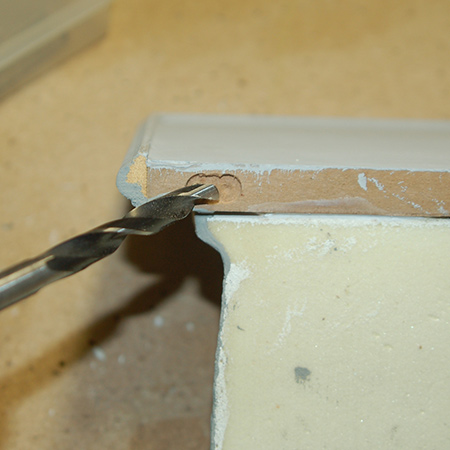
9. Use a 10mm wood bit to drill out the marked keyhole area to a 3mm depth and drill 2mm pilot holes in the centre of the screw mounting holes.
GOOD TO KNOW: It is essential to drill pilot holes before driving in screws, as without pilot holes the timber or board will bulge or pop.
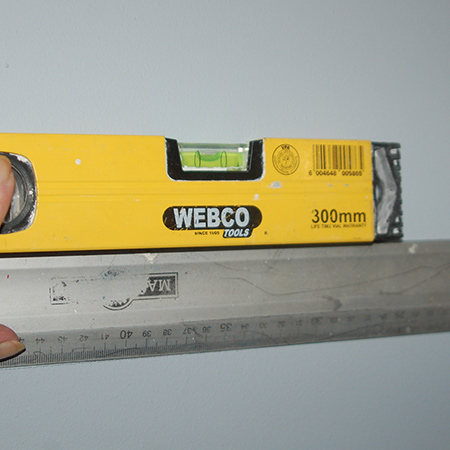
11. Use a spirit level to mark the wall for mounting the shelf. Also measure from the exact centre of each screw hole (larger hole) to the one on the opposite side, and mark this on the wall as well.
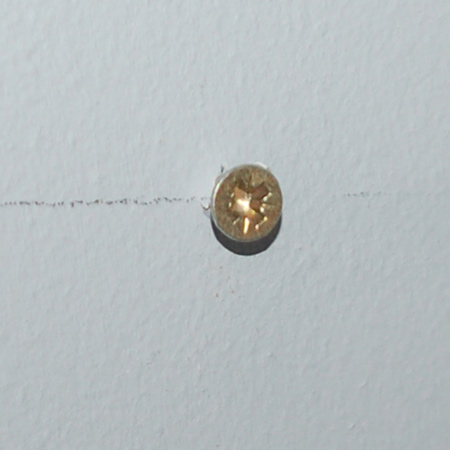
12. At the marks, drill out for wall plugs and screws. In my case I am mounting onto a board, so not using wall plugs.
GOOD TO KNOW: Nylon wall plugs are necessary when securing any item to walls. Click here for more information.
Now you can slip the keyhole brackets over the screws and slide to the side to firmly hold the shelf in place.
