
Quick Project - Make a Garage Storage Shelf
For a garage that has become a dumping ground for "stuff", this plywood shelf is a great storage solver and you can make it using pine shutterply on the cheap.
25/04/2021
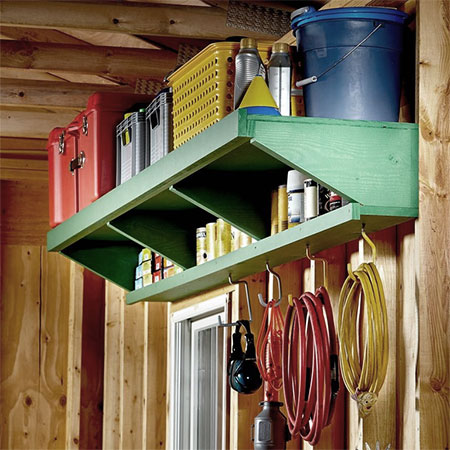
The garage always seems to be the dumping ground for "stuff" or anything that doesn't have anywhere else to go. Before you know it, there isn't even enough space to park the car. This storage shelf is a great storage solution for getting stuff off the floor and out of the way and it's affordable enough that you can assemble one or more shelves if you have plenty of "stuff".
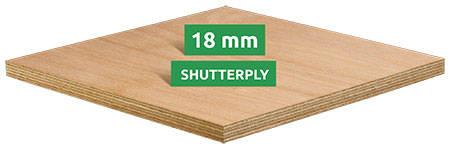
For those looking for affordability, you can use pine shutterply to make the garage storage shelf and it only costs around R450 for a large sheet that measures 18mm thick x 2440 x 1220mm. You can buy pine shutterply at larger hardware stores or timber merchants. Have all the components cut to size for easy assembly.
https://shutterply.co.za/
WHAT IS SHUTTERPLY?
While shutterply is also a plywood, it is not as decorative as veneered or marine plywood. The exterior veneer on shutterply is not up to the par of other plywood products and this is the reason why it is inexpensive in comparison. Shutterply is great for those projects that don't need to look fantastic.
If you prefer to make a more stylish shelf for storage, most of the components that make up this shelf can be substituted with pine or pine plywood.
YOU WILL NEED:
1 of 18 x 400 x 2440mm shutterply - top
1 of 18 x 220 x 2440mm shutterply - back
1 of 18 x 143 x 2440mm shutterply - bottom shelf
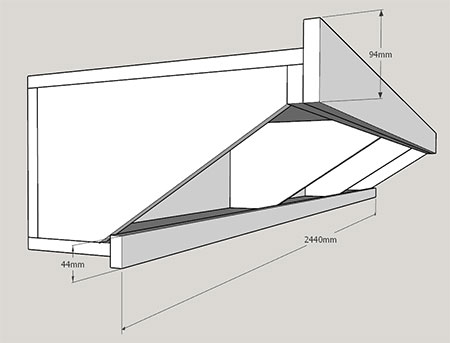
2 of 18 x 44 x 2440mm shutterply - top/bottom shelf facings
1 of 18 x 94 x 2440mm shutterply - shelf front
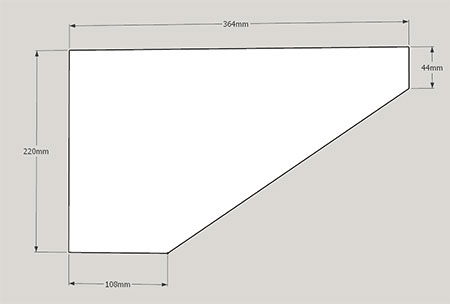
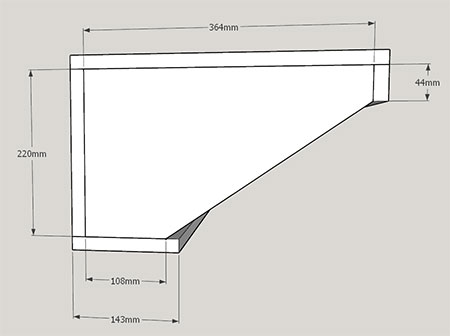
4 of 18 x 220 x 364mm shutterply - dividers, cut at an angle
4 x 30mm cut screws
Sealer, varnish or paint for finishing and paintbrush
TOOLS:
Drill/Driver plus assorted bits
Orbital Sander plus 120-grit sanding pads
Jigsaw
Tape measure and pencil
Safety gear
HERE'S HOW:
Step 1
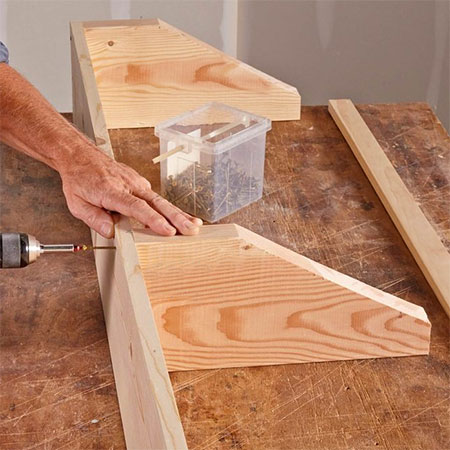
Before you can start to assemble the shelf unit, use a jigsaw to cut the dividers as shown in the diagram below.
Step 2
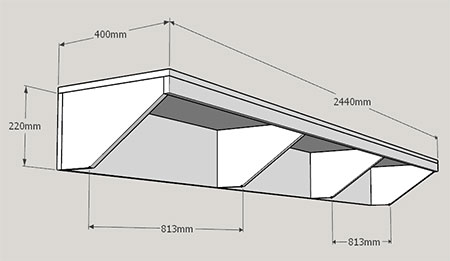
Secure the dividers to the shelf back with [2] screws through the back into the dividers. Note that the spacing between the end dividers and those within the shelf is 813mm from the end to the centre of each divider. See diagram above Step 1. This isn't set in stone and you can always adjust the space between the dividers to suit your own storage needs if you have larger items that you want to store on the shelf.
Step 3
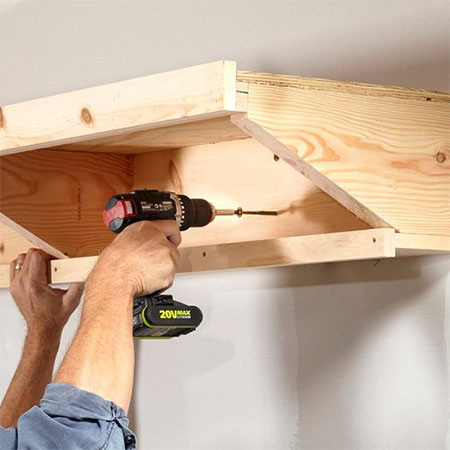
Add the top section by screwing through the top and into the dividers. You can also add the front face and bottom shelf in the same way.
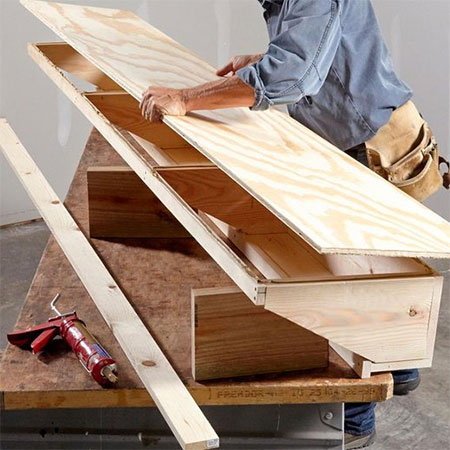
Step 4
Finish off the assembly by attaching the bottom shelf facing and shelf front. Both of these are included to provide a lip along the edge of the storage so that items will not easily fall off.
Finishing
Before mounting the shelf onto a wall, take the time to sand to remove loose splinters and then sealer, varnish or paint as desired.
Step 5
To secure the storage shelf onto a wall, use nylon wall plugs and screws. Place [2] screws within each divider section. We recommend either Rawlplug or Fischer wall plugs as these nylon wall plugs are manufactured to support heavy items. Use a #8 or large wall plug to secure the shelf to the wall.
Do not use plastic wall plugs to mount the shelf to the wall. Nylon wall plugs are far stronger and will support the extra weight once the shelf is loaded.
family handyman