Quick Project: Easy Coat Hangers for Wall or Rack
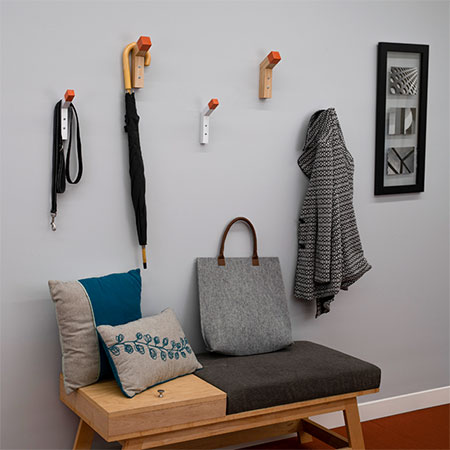
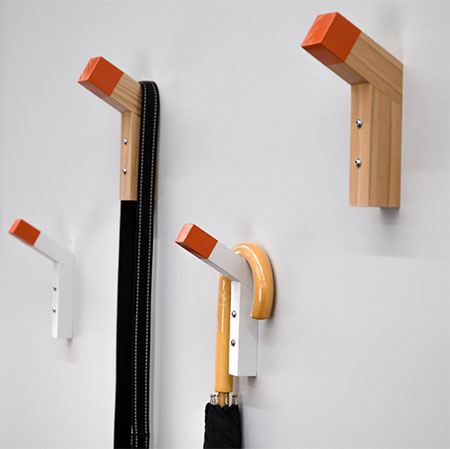
These modern coat hangers are ideal for mounting directly onto a wall, or fitted onto a backing board.
27/08/2019
build something
These modern coat hangers show that storage doesn't have to be difficult to make. You can make and assemble your own stylish storage solution using PAR pine that you can buy at any Builders store and a Kreg Pocket Hole Jig.
YOU WILL NEED:
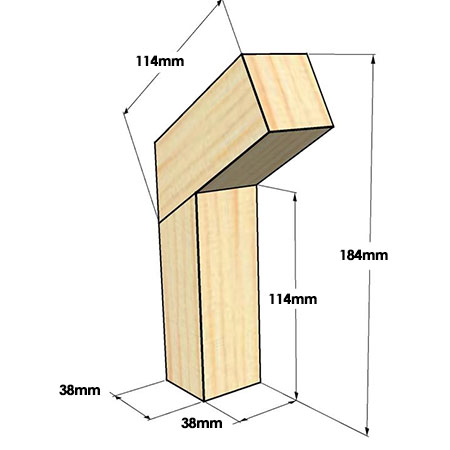
38 x 38mm PAR pine cut to lengths:
- 114mm long sections for the post and arm
Wood glue
32mm Coarse thread screws
Painter's Tape
TOOLS:
Drill / Driver plus assorted bits
Kreg pocket hole jig
Mitre or table saw (or use a jigsaw with adjustable base)
Sander plus 120-grit sanding pad
Tape measure and pencil
HERE'S HOW:
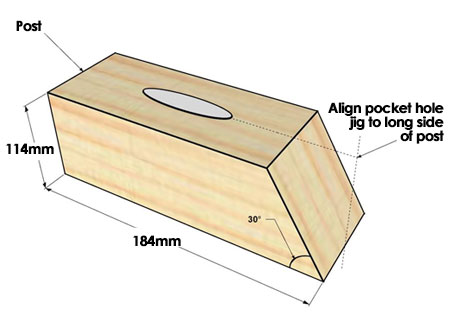
1. Set your table saw, jigsaw or mitre saw to cut a 30° angle on each post and arm. The Posts are the same length, so you can cut as many as you need for your hanging board or to mount directly onto a wall.
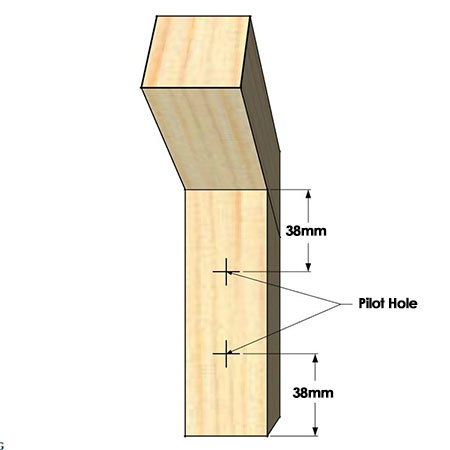
2. Set up your pocket hole jig for 38mm thick material and drill a single, centred hole in the Post section.
GOOD TO KNOW: When using a K4 benchtop jig, place the Post with the short side against the Drill Guide. If using a portable R3 jig, align the short side of the Post to the Drill Guide but visually align the long side to the Positioning Sliders.
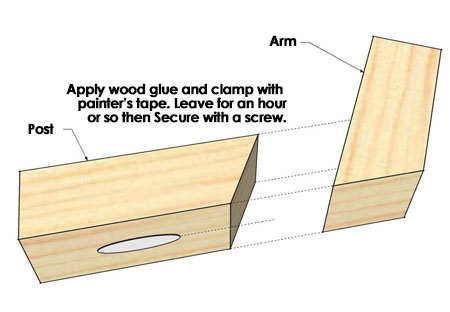
3. Now you can apply wood glue to the angled end each post to secure to the arm, as shown below. Clamp the pieces together with painter’s tape and leave to dry for about and hour, after which you can screw these pieces together with a 32mm coarse-thread screw.
4. Before mounting the hangers, sand with 120-grit sandpaper. Wipe to remove all traces of dust and then apply your choice of paint, sealer or varnish to finish.
5. To mount the hangers, note that the original project is of American origin and they have fastened the hangers directly to a drywall beam. We recommend using nylon wall plugs and screws to secure onto the wall. If you are fastening the hangers onto a board, secure with screws through the back of the board.