
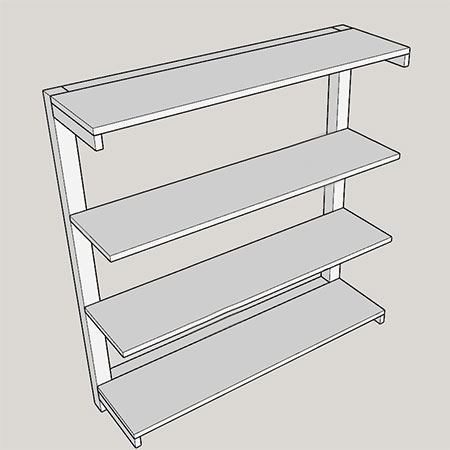
How To Make This Quick And Easy Bookcase
This quick and easy bookcase won't take long to make and it's the perfect size for a study or home office, children's bedroom or in a living room or entrance.
24/02/2021
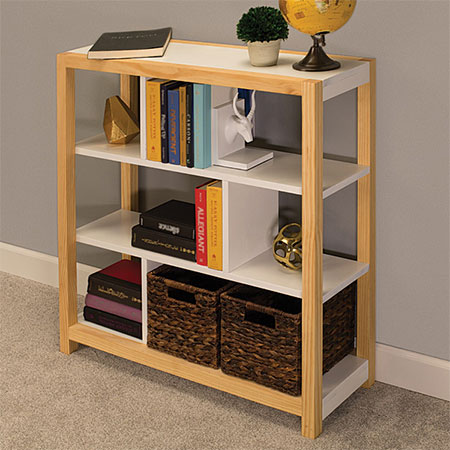
A bookcase is a handy piece of furniture for any home, and this quick and easy bookcase won't take long to make. Plus, all the supplies you need can be found at your local Builders store.
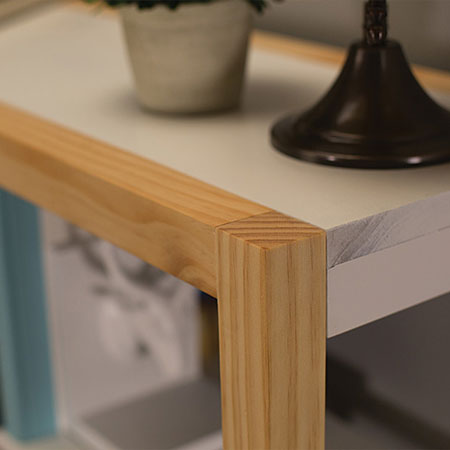
The legs and crosspieces are 44 x 44mm PAR pine, while the shelves, top and aprons are 16mm SupaWood (MDF). Since you can't buy only a partial sheet of SupaWood, it makes a lot of sense to add other projects you might want to make and have everything cut to size at the same time. That way, you pay for and use a full sheet.
As you are assembling the bookcase, think about how you want to finish the PAR pine sections, as it is better to sand, stain and seal or varnish these before assembly. Likewise the SupaWood sections. Assemble these as components that are easily added to the frame and paint everything ahead of time and before you get down to the final assembly to complete the bookcase.
SAFETY FIRST: If you make this bookcase for a child's bedroom, be sure to use steel brackets to fasten it to the wall to prevent accidents.
YOU WILL NEED:
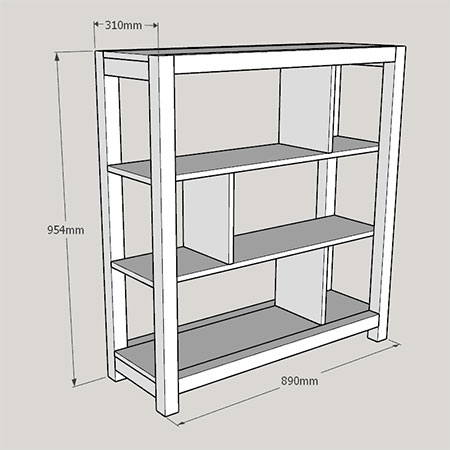
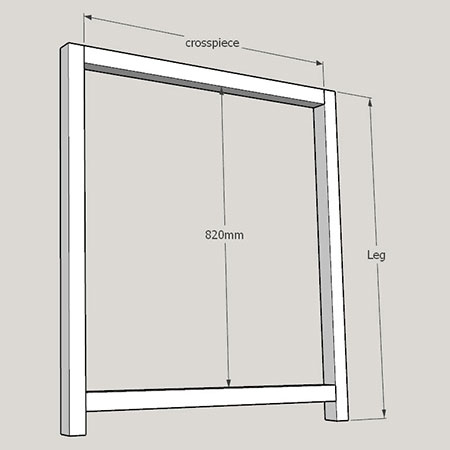
4 of 44 x 44 x 954mm PAR pine - legs
4 of 44 x 44 x 802mm PAR pine - crosspieces
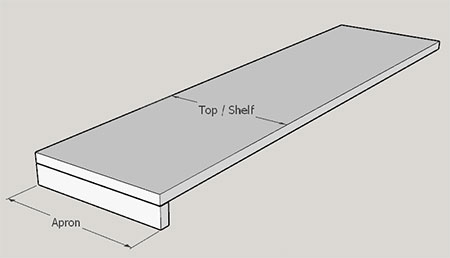
4 of 16 x 222 x 802mm SupaWood - top and shelves
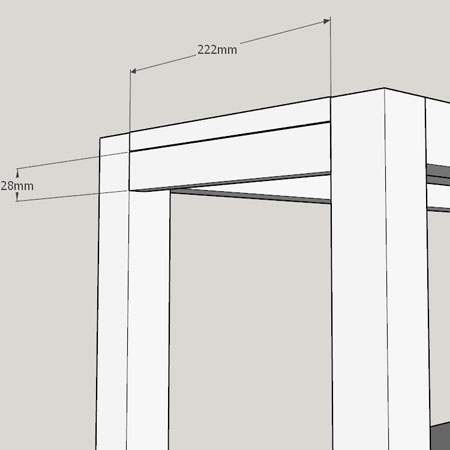
4 of 16 x 28 x 222mm SupaWood - side aprons
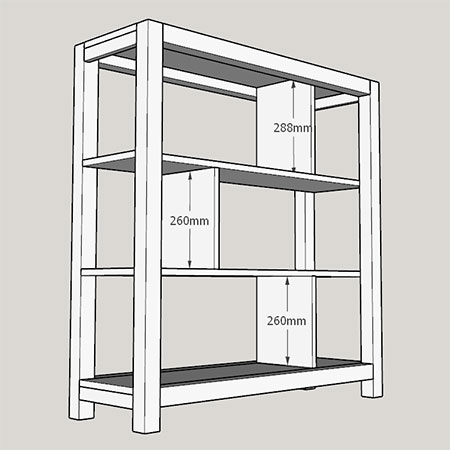
1 of 16 x 222 x 288mm SupaWood - top shelf divider
2 of 16 x 222 x 260mm SupaWood - shelf dividers
Wood glue
32mm and 64mm coarse-thread pocket-hole screws
120-grit sandpaper or medium sanding sponge
Choice of finish: stain | sealer | varnish | paint
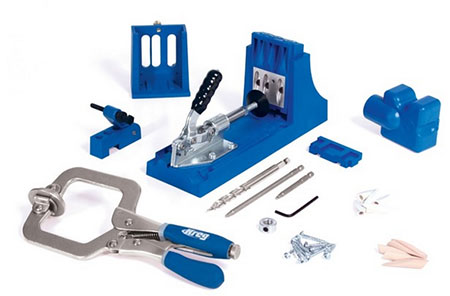
PURCHASE ALL YOUR ESSENTIAL KREG TOOLS AND SUPPLIES AT YOUR NEAREST BUILDERS STORE.
TOOLS:
Drill/Driver plus assorted bits
Multi or orbital sander plus 180-grit sanding pads (for the SupaWood)
Kreg pocket-hole jig
Tape measure and pencil
Clamps
Safety gear
DRAWING 1
DRAWING 2
DRAWING 3
HERE'S HOW:
1. Secure the side aprons to the underside of the top and bottom shelves - on both sides. Drill [2] pocket-holes in the back of the aprons and secure to the shelf using wood glue and 32mm screws. Sand these and paint or finish as required before assembly.
2. Drill pocket-holes in the PAR pieces, as shown below, to assemble the frames for the front and back. Use wood glue and 64mm screws. Repeat the process for the opposite side. At this point in the project and before you assemble, you can sand the wood pieces and apply your choice of finish to both front and back frames.
3. With the front and back frames assembled and finished, you can now attach the top and shelves to one of the frames. Drill pocket-holes on the underside of the top and shelves and secure to the frame using wood glue and 32mm screws. Refer to Drawing 2 above for the distances between the shelves. Repeat this step to secure the top and shelves to the other frame.
4. To finish off your bookcase, drill [2] pocket-holes at both the top and bottom of each shelf divider. Secure these in place using 32mm screws. For the best finish, use Kreg wood plugs to disguise the screw holes.
kregtool.com