
Easy wood planter for home or patio
Make this easy wood planter as a decorative touch for your patio or home and design it to fit a galvanised tub - new or old!
13/08/2018
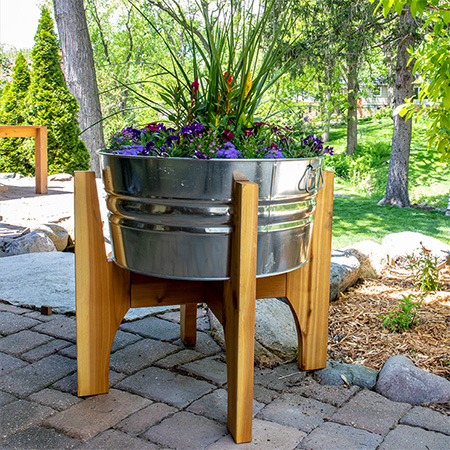
This easy wood planter can be made using PAR pine bought at your local Builders Warehouse, or Meranti or other hardwood sourced from a timber merchant. Modify the design to fit your size of galvanised tub or container and fill with colourful annuals.
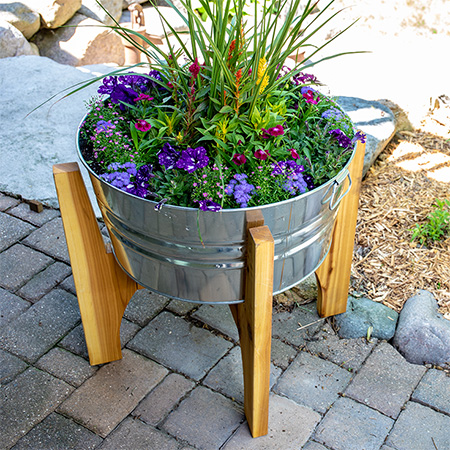
The guys over a BuildSomething.com designed this clever planter, and you can use any container you want for planting up. It's a great idea for using an old galvnised tub. As an afternote, allow a drainage tray underneath the pot or tub to catch water.
YOU WILL NEED:
4 of 19 x 140 x 584mm PAR pine - legs
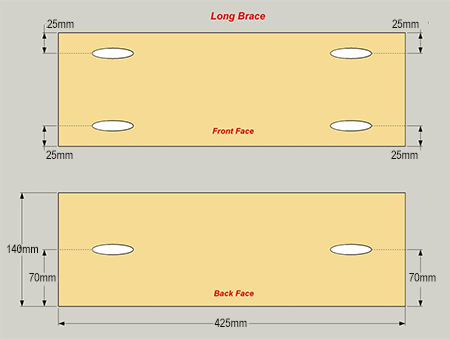
1 of 19 x 140 x 425mm PAR pine - long brace
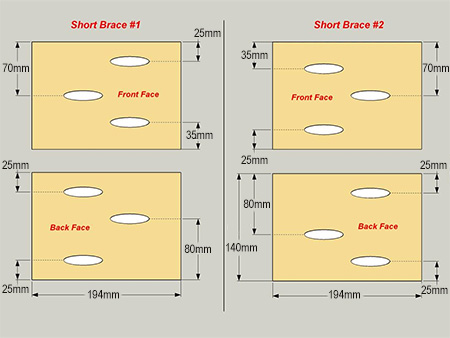
2 of 19 x 140 x 194mm PAR pine - short brace
Tub or container of choice - with drilled drainage holes
Wood glue, exterior grade
32mm coarse-thread pocket hole screws
Exterior sealer plus paintbrush
TOOLS:
Drill / Driver plus assorted bits
Kreg Pocket Hole Jig
Kreg clamps
Jigsaw and clean-cut blades
Sander plus 120- and 240-grit sanding pads
Tape Measure and pencil

HERE'S HOW:
GOOD TO KNOW: Set the correct cutting depth on the jig and clamp all section firmly when joining.
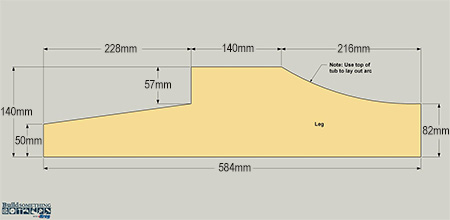
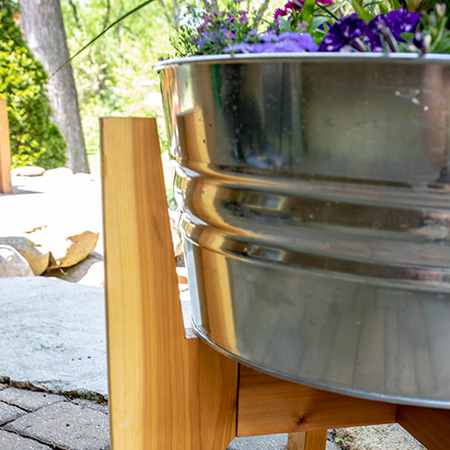
1. Cut the Legs to length and cut out the detail as shown in the diagram above. For the curved section we used the shape of the tub to determine the shape of the arc. Sand the pieces once cut.
GOOD TO KNOW: Cut one leg and use this as a template for the remaining legs.
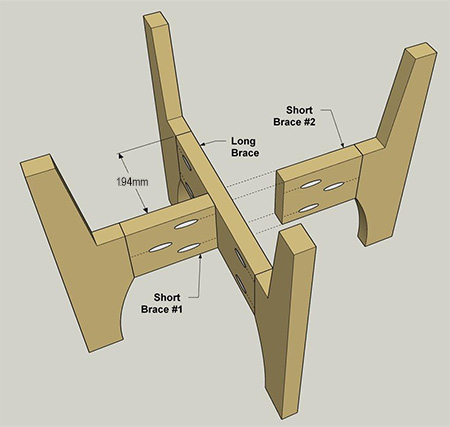
2. Cut the Long Braces to length and add pocket holes as shown in the diagram below.
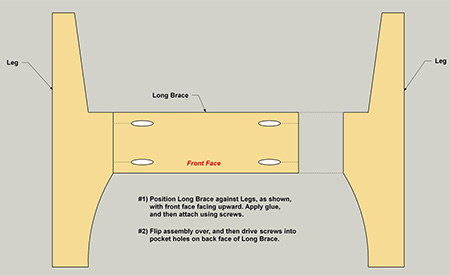
3. Secure the Long Brace to [2] Legs using exterior grade wood glue and screws. Clamp the join firmly together as you work. start with the pieces front face up and then flip over to continue.
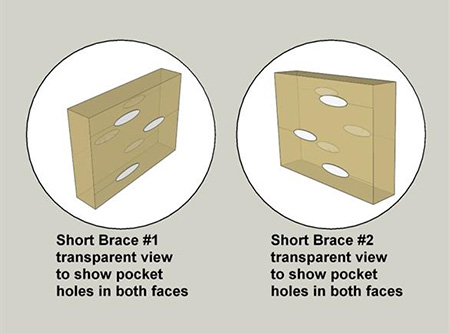
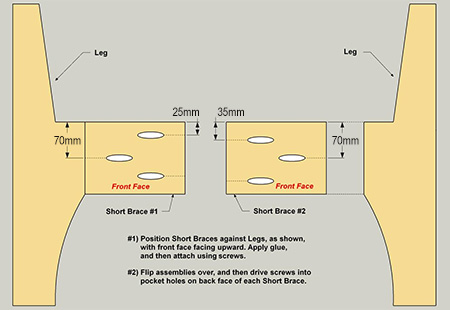
4. Cut the Short Braces to length. The Short Braces have pocket holes in the front and back faces. Follow the diagram below so that the screws won't interfere with each other.
5. Secure the Short Braces to the remaining [2] Legs as shown below. Glue, clamp and screw together tightly. Work on one side and then flip for the other side.
6. Complete the assembly by centring the braces and joining with wood glue and screws.
Finishing
Sand to remove any excess glue before applying your choice of clear or tinted exterior sealer.