Build a Portable Table for Outdoor Braai or Picnic
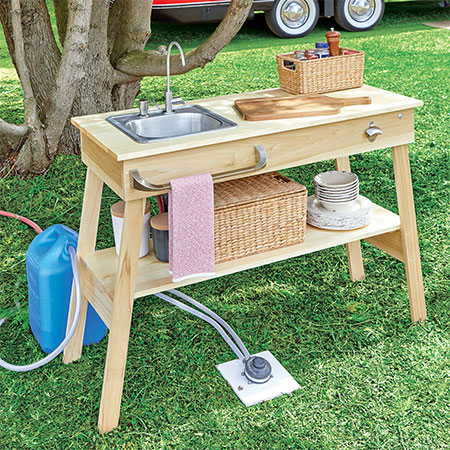
This portable picnic or braai table lets your prepare all your meals without missing any comforts you have at home, plus it's also a great addition to your outdoor entertainment area if you don't have an outdoor kitchen.
30/06/2020
family handyman
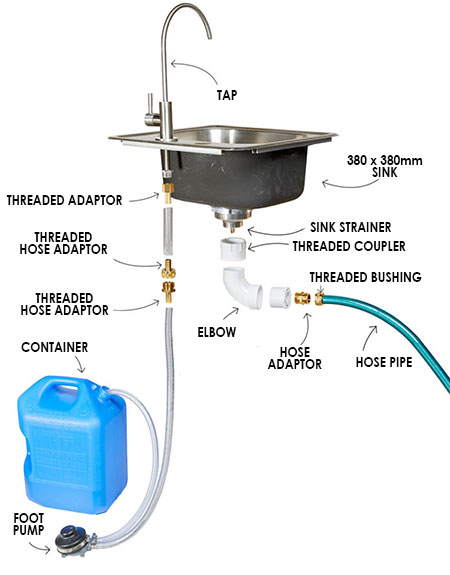
We South Africans do enjoy the great outdoors, and who wouldn't when you live in such a beautiful country. When travelling around the countryside, this picnic or braai table lets you set up anywhere and have all the facilities you need in an instant. The table is easy to set up and you can have access to clean water simply by adding the necessary tubing and accessories, as well as a foot pump.
If you prefer to leave out the fittings for the foot pump and water container. Manually fill the sink with clean water and place a bucket underneath the sink drain to collect wastewater.
YOU WILL NEED:
All sections PAR or laminated pine shelving cut to sizes:
A 1 521 x 1219mm - top
B 2 140 x 1168mm - frame sides
C 2 140 x 432mm - frame ends
D 2 64 x 845mm - short legs
E 2 64 x 902mm - long legs
F 2 140 x 391mm - stretchers
G 1 385 x 1219mm - shelf
H 2 25 x 368mm - cleats
8mm steel washers [8]
38mm mender plates / steel braces [8]
30 and 50mm cut screws
8 x 50mm carriage bolt [2]
Exterior wood sealer
TOOLS:
Drill / Driver plus assorted bits
Jigsaw
Circular saw - if cutting own wood to size
Tape measure and pencil
HERE'S HOW:
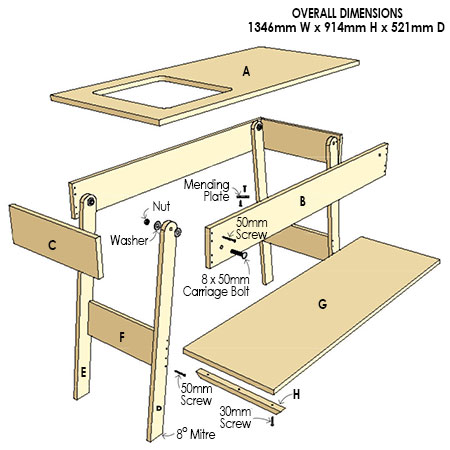
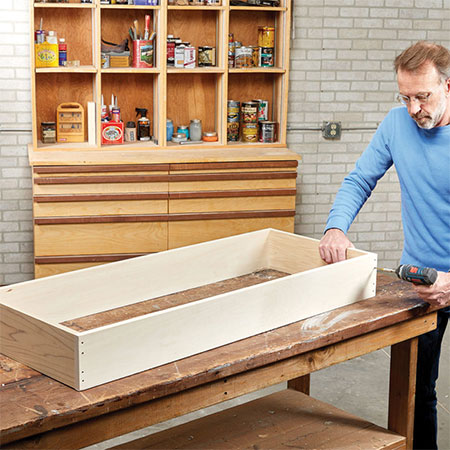
1. Assemble the frame using 50mm screws noting that the frame sides are secured into the frame ends. Pre-drill and countersink pilot holes for a neat finish.
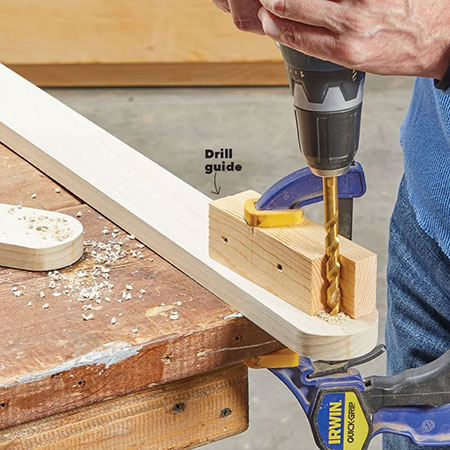
2. To ensure straight drilling, use a drill guide when boring the holes for the carriage bolts. If you have a drill press, this is ideal for drilling perfectly straight holes.
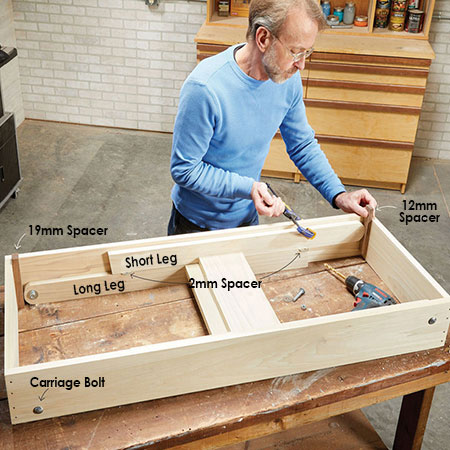
3. To assemble the legs, first, place the longer leg in the frame flush against a 19mm spacer. Drill a hole through the frame, using the hole in the leg as your guide. Secure the leg to the frame with a carriage bolt and nut.
GOOD TO KNOW: Clamp the leg to the frame as you drill a hole. This will prevent the leg from moving.
4. For the short legs, place these on top of each long leg, flush against a 12mm spacer and then drill through the frame in the same way as the step above.
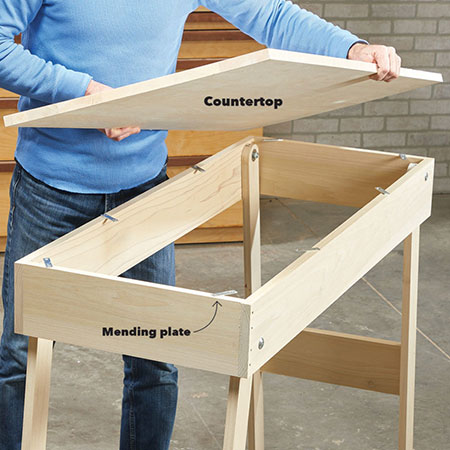
5. Now you can install the top section. Screw mending plates / steel braces at an angle along the top edge of the frame - see image below.
6. Ensure the countertop is placed centrally over the frame and screw in place from underneath. This method of attaching the top will allow for expansion and contraction caused by ambient conditions.
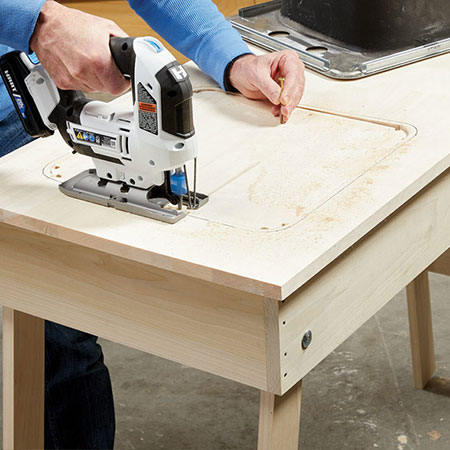
7. Measure and mark the location for the sink, allowing a 10mm lip all the way around to support the sink in place. Drill a 10mm hole inside the marked area and insert your jigsaw bit to cut out the opening. Mount the sink according to the instructions provided.
8. To finish off your picnic or braai table, plumb as per the diagram below. Water to the sink is supplied by clean water from a container, while the drain outlet feeds into a garden hose pipe. If you prefer, you can leave out this installation and manually fill up the sink for cleaning and washing, allowing the water to drain into a container underneath the sink.