
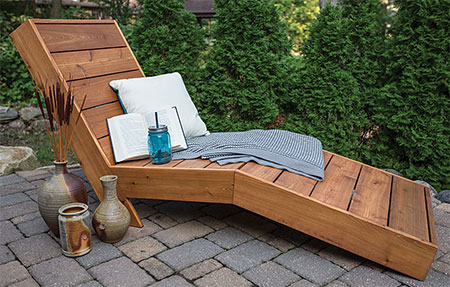
Make a Pine Sun Lounger for the Poolside
Everybody needs a place to sit and relax on weekends and this DIY pool sun lounger is good-looking enough for any poolside and easy to make over a weekend.
14/10/2020
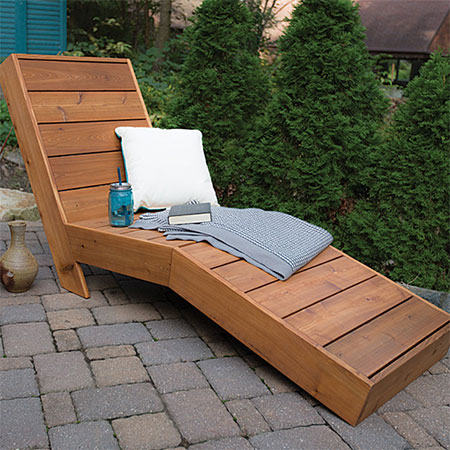
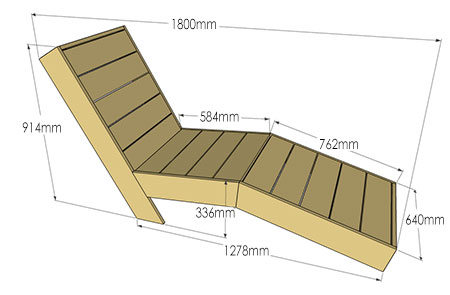
This poolside or garden sun lounger is easy to make over a free weekend and all the materials are readily available at your local Builders store. You can make it using PAR pine for a more affordable option or you can spend a bit more on meranti, saligna or your choice of hardwood.
The design of this sun lounger lets you lie comfortably and relax on weekends to soak up the sun or relax in the shade.
YOU WILL NEED:
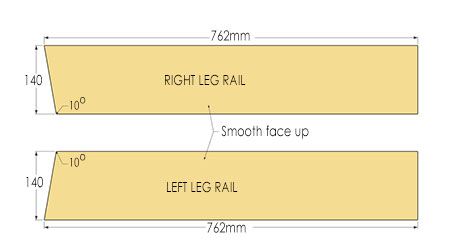
2 of 19 x 140 x 762mm PAR pine - Leg Rail
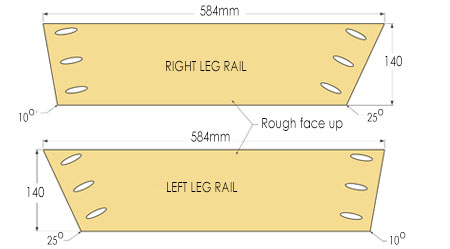
2 of 19 x 140 x 584mm PAR pine - Seat Rail
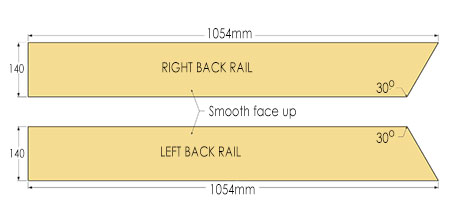
2 of 19 x 140 x 1054mm PAR pine - Back Rail
16 of 19 x 140 x 604mm PAR pine - Slat
2 of 19 x 89 x 380mm PAR pine - Seat Brace
2 of 19 x 89 x 305mm PAR pine - Back Brace
32mm screws
Wood glue, waterproof
Exterior sealer plus paintbrush
TOOLS:
Drill / Driver plus assorted bits
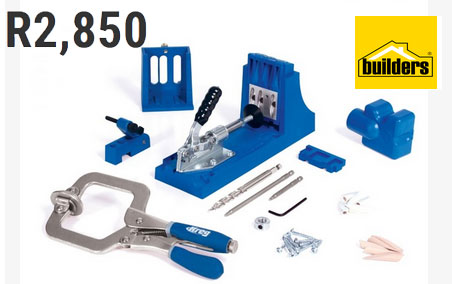
Kreg pocket-hole jig, preferable MODEL 320
Mitre saw
Orbital sander plus 120- and 240-grit sanding pads
Clamps
Tape measure and pencil
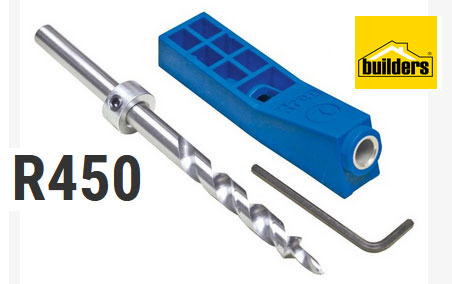
Find a wide selection of Kreg tools and accessories at your local Builders store.
HERE'S HOW:
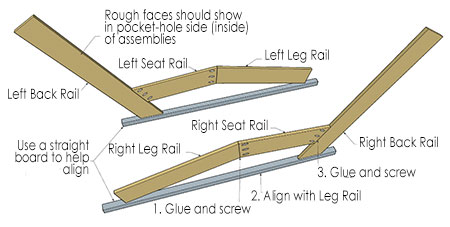
1. Before assembly you need to cut a few parts. Start with [2] Back Rails and cut 30-degree angles (mirror image) at one end of both pieces, as shown below.
2. On the Leg Rails cut one end of these at a 10-degree angle, as shown below.
3. Angle both ends of the Seat Rails as shown below. Set your pocket-hole jig for 19mm-thick material and drill pocket holes in the ends on the rough side, as shown. The holes don't need to be exact but do make sure that you can equally space all [3] holes in the angled ends.
4. To assemble the Side Rails, place the pieces as shown below, making sure the rough faces are on the inside. Apply wood glue and then screw the pieces together. The method for joining both Side Rails is the same.
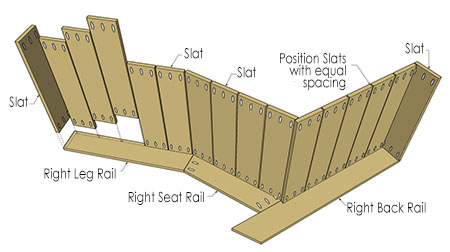
5. Pre-drill pocket-holes in all the slats, as can be seen in the image below. To begin adding the Slats start with the right-hand side assembly. Work on a flat surface and apply a bead of wood glue before securing the Slat in place with 32mm screws. Ensure that all gaps are spaced equally along the length, approximately 6mm gaps.
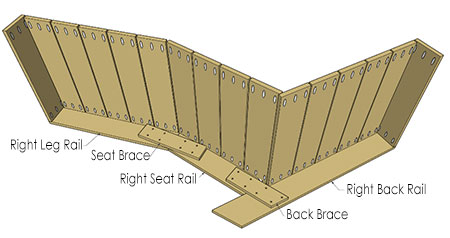
6. Attach the Braces to the inside of the frame, as shown below. Apply waterproof wood glue to the back of the braces and secure with 32mm screws.
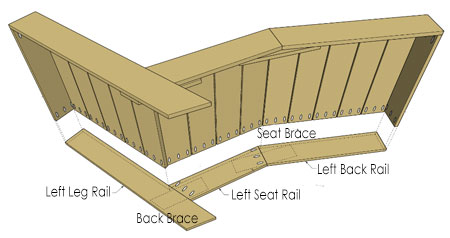
7. Repeat steps 5 and 6 to complete the sun lounger.
Finishing
Do a final sanding on the entire assembly before wiping clean in preparation for sealer coat. If you are using PAR pine for the sun lounger, it is essential to add an exterior product to protect and extend the lifespan. Use an exterior-grade sealer, oil or other suitable wood finishing product. Also, keep in mind that the finishing product should be applied regularly as soon as the wood starts to go dull.