
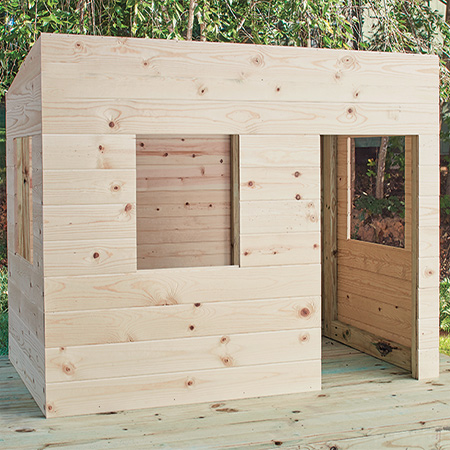
Build a DIY Playhouse
Use shutterply (and stain) or pine plywood to make this outdoor playhouse for your kids.
28/05/2018
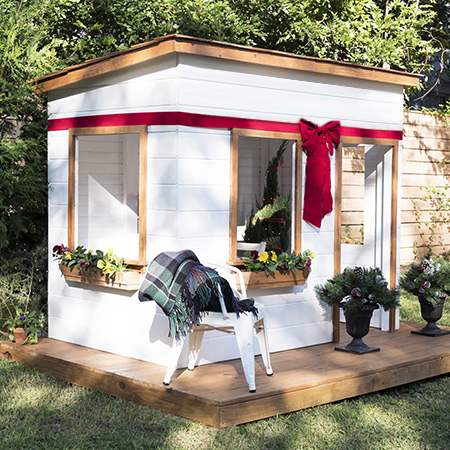
This plywood playhouse might look difficult, but it's actually very simple to assemble if you have all your pieces cut to size at your local Builders Warehouse.
Not responsible for errors and omissions
YOU WILL NEED:
Base/Floor
2 of 32 x 69 x 2438mm pine - frame
5 of 32 x
69 x 1740mm pine - supports
13 of 22 x 152 x 2438mm
- planks
Front
1 of 32 x 69 x
1790mm pine - top cross piece
1 of 32 x
69 x 1652mm pine - cross piece
2 of
32 x 69 x 1479mm pine - uprights
1 of 32 x
69 x 1200mm pine - door upright
1 of 32 x
69 x 1078mm pine - bottom cross piece
4 of
16 x 150 x 1232mm - shutterply planks
1 of 16 x 142 x 1232mm - shutterply plank -
top plank trimmed to fit
6 of 16 x 150 x 410mm - shutterply plank
2 of 15 x 142 x 410mm - shutterply plank -
top of window
3 of 16
x 150 x 1822mm - planks - last plank trimmed to
fit
Back
2 of 32 x 69 x 1790mm pine - cross pieces
4 of
32 x 69 x
1267mm pine - uprights
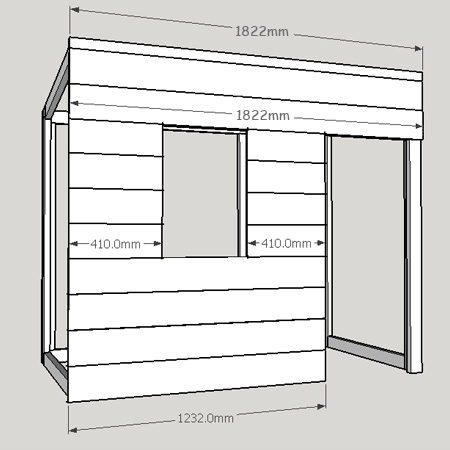
10 of 16 x 150 x 1822mm - planks
- trim top plank to fit
Sides
2 of 32 x 69 x 1548mm
pine - cut top ends 5º
off-square
2 of 32 x 69 x 1415mm
pine - cut top
ends 5º off-square
2 of 32 x 69 x 818mm
pine
2
of 32 x 69 x 843mm pine - cut ends cut 5º off-square
6 of 16 x 150 x 1020mm - planks
8 of
16 x
150 x 300mm - planks
1 of top plank trim from offcut
Roof
3 of 32 x 69 x 1800mm - cut to fit - supports
Roofing of choice (vinyl tiles, corrugated metal, roof panels, etc.)
Trim
5 of 19 x 44 x 1800mm pine or meranti - cut to fit
1 of 19 x 69 x 1800mm pine or meranti - cut to fit
64 and 32 wood screws or deck screws
64mm pocket hole screws
30omm brad nails - if using air nailer
Exterior grade wood glue
TOOLS:
Drill / Driver plus assorted bits
Kreg Pocket hole jig
Air nailer (or hammer and panel pins)
Jigsaw, circular saw or table saw
Carpenter's square
Tape measure and pencil
HERE'S HOW:
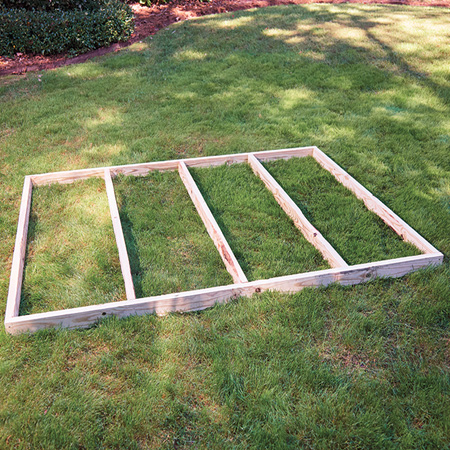
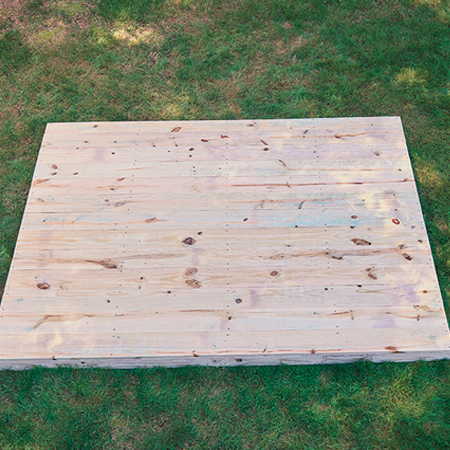
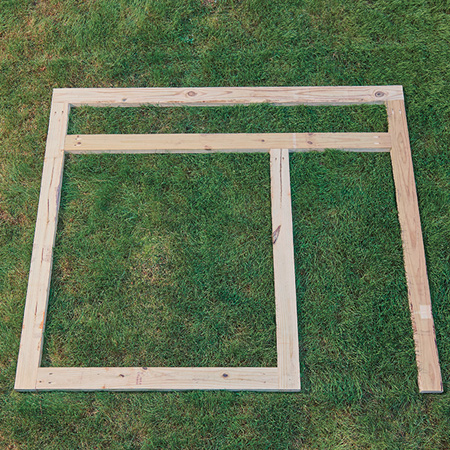
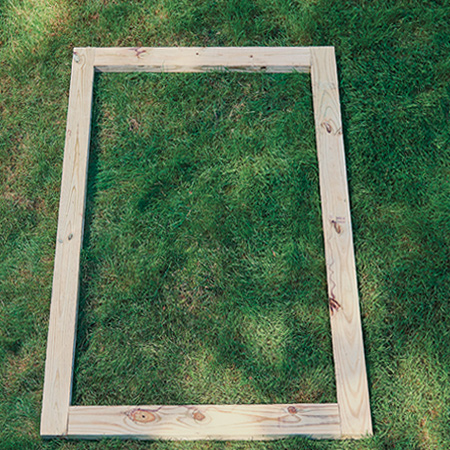
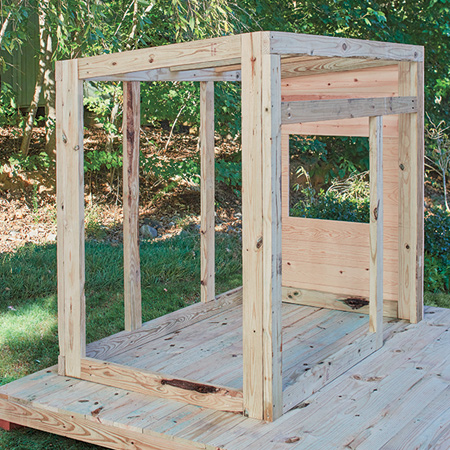
1. Assemble the base/floor
Using the image above as a guide, pre-drill pilot holes and assemble the base/floor with 64mm screws. Secure the planks onto the frame with 32mm wood or deck screws
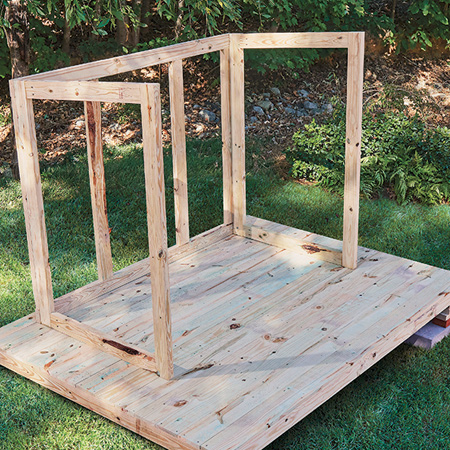
2. Assemble the Front
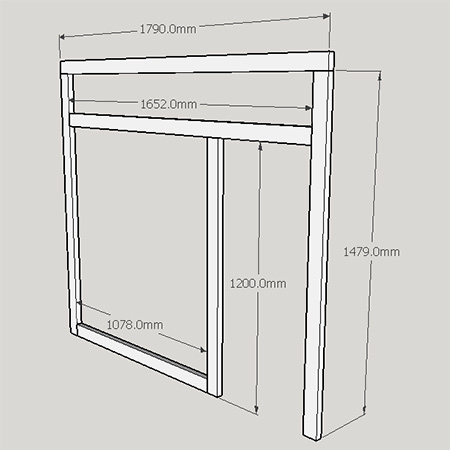
Construct the front as shown above and below using 64mm screws. If using a Kreg pocket hole jig, the screws should be placed on the outside, as this will be covered by the planks you add later on.
3. Assemble the back
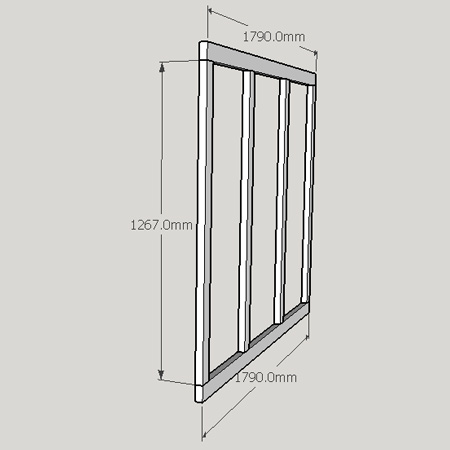
Construct the back panel in the same way as the front, using the image above and below as a guide.
4. Assemble the [2] sides
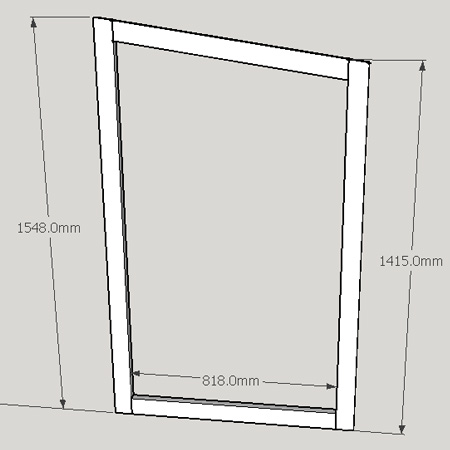
The sides are mirror images and assembled in the same way using 64mm pocket hole screws.
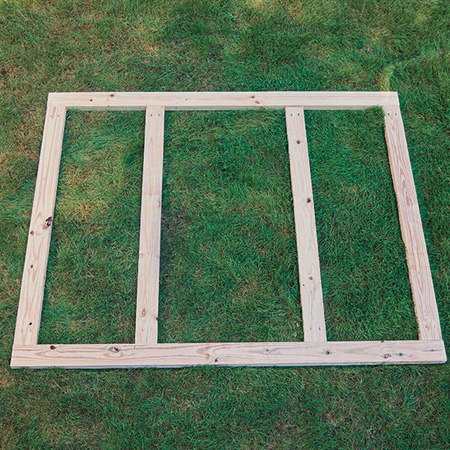
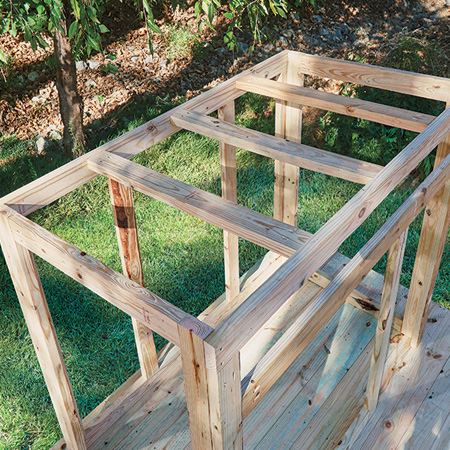
5. Complete the frame
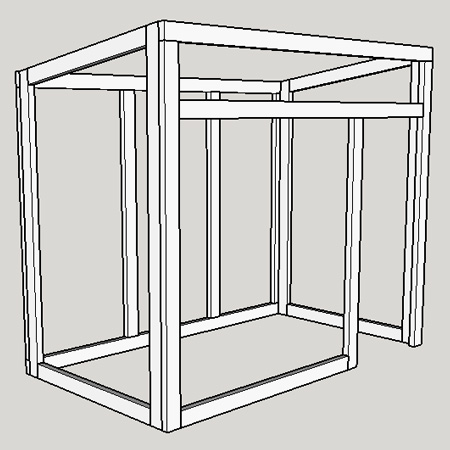
Place the sides with the lowest angle at the back, as shown above and below. Secure the back to each side using 64mm screws. Also secure the assembled frame to the base. Attach the front panel in the same way.
6. Assemble and attach roof
Fit the roof supports inside the frame. These are cut to fit after measuring up. Drive 64mm screws through the front and back sections, or drill pocket holes at the ends of the supports to secure in place.
Finishing
Now you ready to attach the planks to the assembled frame. Use a nail gun or hammer and panel pins to secure all the planks in place to the outside of the frame.
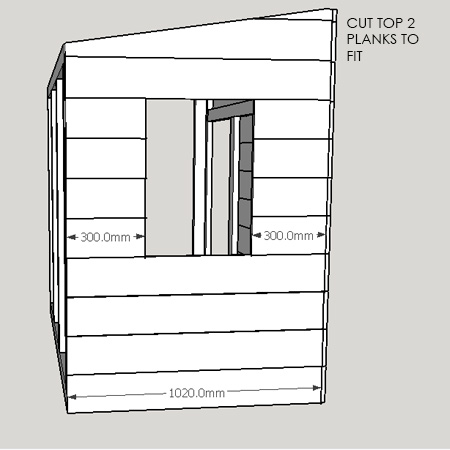
GOOD TO KNOW: The top planks will need to be trimmed to match the pitch of the roof.
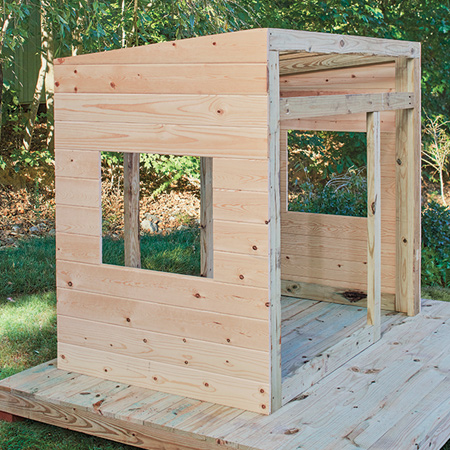
The front planks overhang at both ends by 16mm to cover the edge of the sides.
Continue adding planks to clad the entire outside frame.
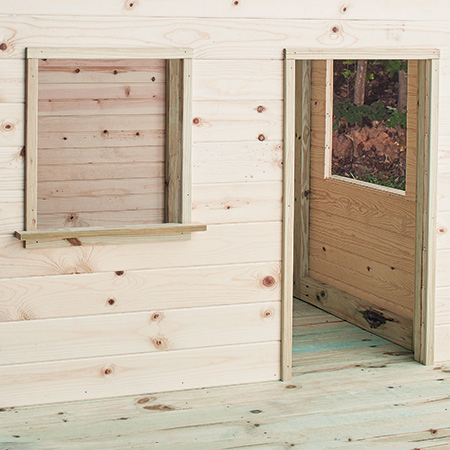
You can allow for a wider window in the front panel by adjusting the length of the planks on either side.
Now you can start adding window and door trim using wood glue, nail gun or hammer and panel pins.
Fit the roof over the frame, aligning all around before securing to the frame with 32mm screws. You can choose your choice of finish for the roof, as this adds the finishing touch to the new playhouse and will extend the life of the structure.

home depot
Paint the interior and exterior with a quality exterior-grade acrylic paint and apply a clear or tinted sealer to any exposed plywood.