DIY wooden plant stand
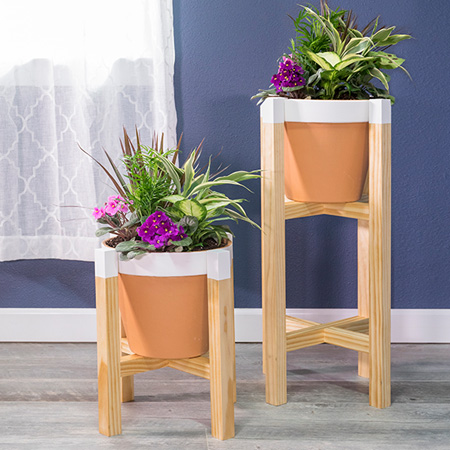
Build this attractive plant stand using pine planks that you can buy at your local Builders. Create an eye-catching display with plant stands in different heights.
09/10/2017
This easy project from www.BuildSomething.com only requires some PAR pine and a few simple pocket hole joints and you're done.

Once assembled, add your own personal touch with paint.
YOU WILL NEED:
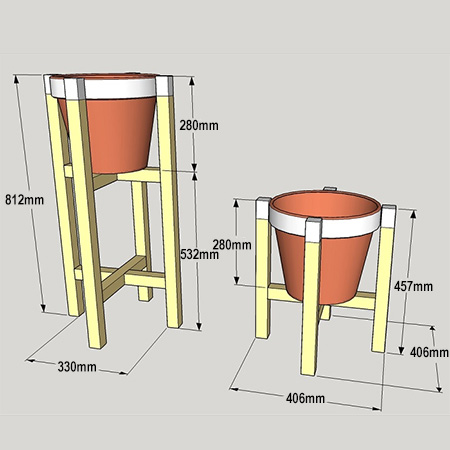
4 of 44 x 44 x 457mm pine - low stand, leg
1 of 44 x 44 x 330mm pine - long stand, cross
2 of 44 x 44 x 146mm pine - short stand, cross
4 of 44 x 44 x 812mm pine - high stand, leg
2 of 44 x 44 x 330mm pine - long stand, cross
4 of 44 x 44 x 146mm pine - short stand, cross
Terra cotta or plastic pots
50mm coarse-thread pocket-hole screws [50]
Wood glue
Paint and equipment to finish
TOOLS:
Kreg Pocket Hole Jig
Drill/Driver plus assorted bits
Cordless screwdriver with right-angle attachment
Orbital Sander plus 120-grit sanding pads
Tape measure and pencil
Buy pine and all the tools and supplies for this project at Builders Warehouse.
HERE'S HOW:
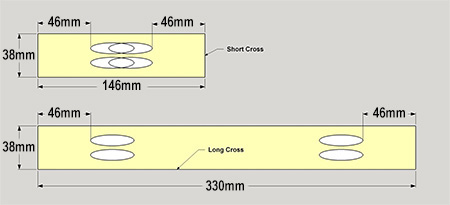
1. Begin by building the cross braces. Set your pockethole jig for 1 1/2"-thick material, and then drill pocket holes at the locations shown in the diagram below. On the Short Cross pieces, the upper ends of the pocket holes will overlap.
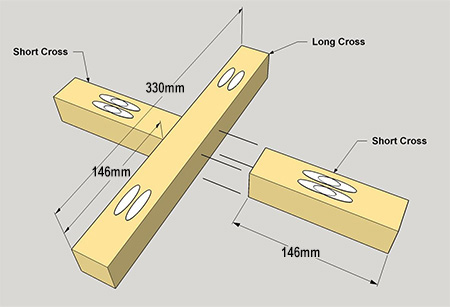
2. To assemble, align the Short Cross brace to the Long Cross brace as shown below. Secure with pocket-hole screws. Align the second Short Cross brace and repeat the process.
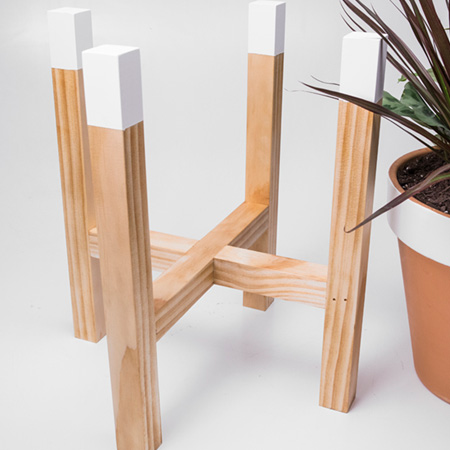
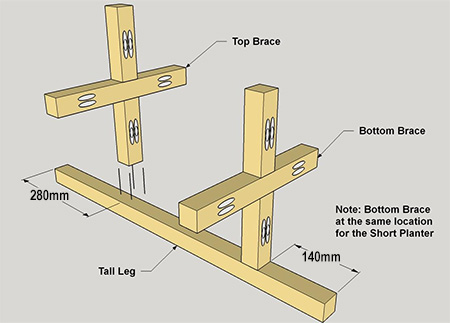
3. Assemble the stand by attaching the brace assembly to the Legs. Be sure to check the height of your pots - if yours are taller or shorter, you may want to adjust the position of the brace assembly.
- For the high stand, place the brace assemblies on one Leg as shown below.
- For the low stand, place the brace assembly at the lower position.
Secure the brace/s to the Leg using pocket-hole screws and repeat to add the remaining Legs.
GOOD TO KNOW
Due to the tight space, you will need to use a cordless screwdriver with right-angle attachment.
Finishing
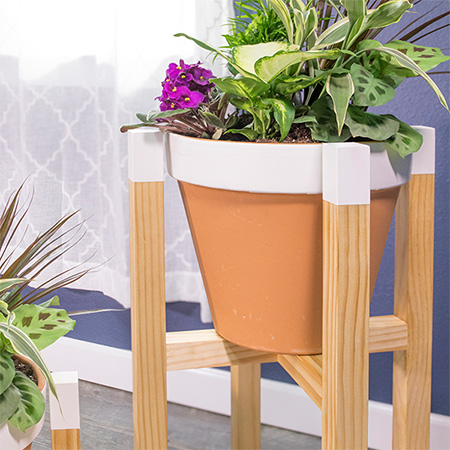
Once finished you can add your choice of finish. We painted the upper rim of the pots and upper end of each Leg with chalk paint to match. Woodoc 5 clear indoor, matt sealer was applied on the rest of the stand.