
Quick Project: DIY Plant Seating Bench
Easy to make using a variety of materials, this simple bench allows you to place plants at either side for a decorative seating feature that is perfect for an entrance hall or on a patio.
03/08/2021
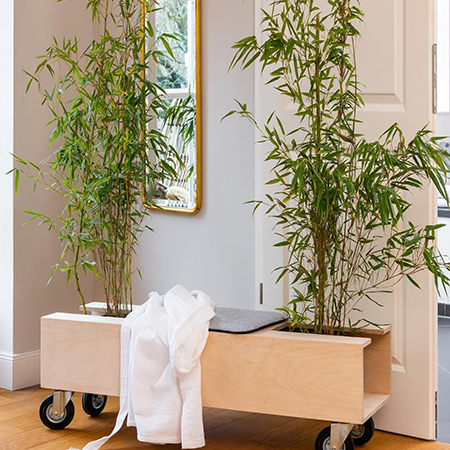
This decorative planter-seating bench would look perfect in an entrace or at the end of a long passageway or even on your patio.
The simple design of this seating bench with side planters allows you to use a variety of materials to make one. Our seating bench is made using beech-veneered plywood but you can use SupaWood if you want a painted finish, pine if you prefer a stained and varnished version of the planter bench, or you can use your choice of hardwoods.
You only need basic DIY power tools to make the planter seating bench so grab your drill/driver, a jigsaw and sander, tools and supplies and let's get started.
YOU WILL NEED:
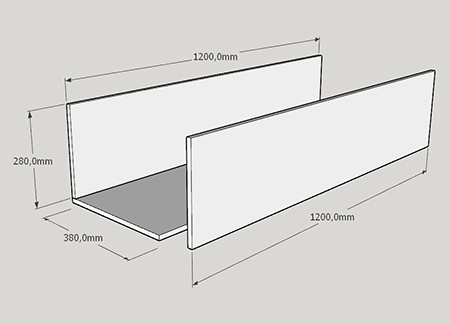
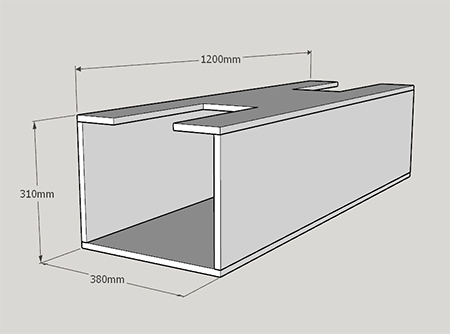
2 of 1200 x 280mm Plywood or choice of board or timber - base and top
2 of 1200 x 380mm Plywood or choice of board or timber - sides
4 caster wheels and 16mm screws
12 steel angle braces or brackets and 16mm screws
Wood glue
Sealer or varnish to finish
TOOLS:
Drill/Driver plus assorted bits
Jigsaw plus clean-cut blade
Sander plus 120-grit sanding pads
Corner clamps
Tape measure and pencil
Safety gear
HERE'S HOW:
Step 1
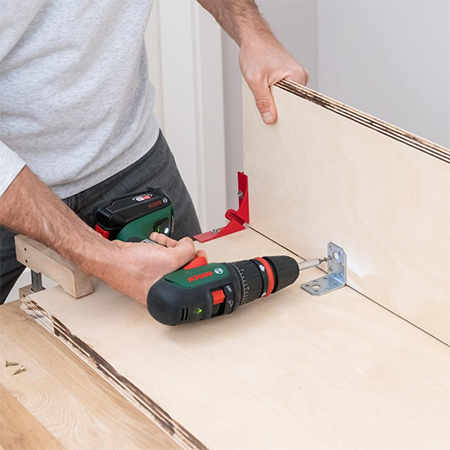
It helps to have all your pieces cut to size beforehand for quick and easy assembly. Apply wood glue along the bottom edge of [1] side and place it on top of the base. Secure in place with steel angle brackets or braces and 16mm screws. Repeat this process to add the other side onto the base.
GOOD TO KNOW: Use a slightly damp rag or cloth to wipe away any excess wood glue that oozes out along the edges as this will spoil the finish.
Corner clamps are handy for holding the sections firmly in place and leaving your hands free.
Step 2
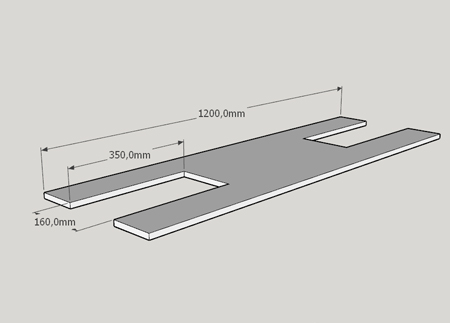
Before adding the top of the bench seat, you need to cut openings at both ends. Determine the centre (190mm) and then measure 80mm on either side of this. Cut out an opening that is a total of 160mm wide and 350mm in length.
Step 3
To secure the top section in position, apply a bead of wood glue along the top edges of both sides before using steel angle braces or brackets and 16mm screws to secure. Clean away any excess wood glue.
Step 4
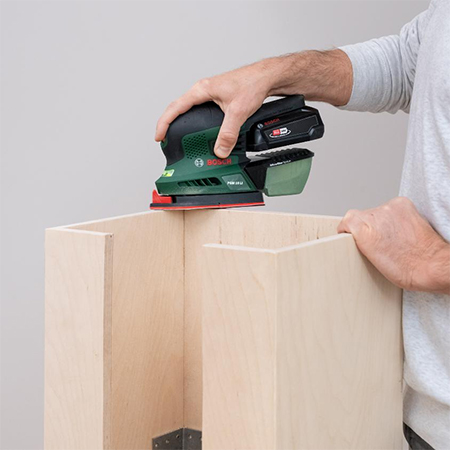
Use your sander and 120-grit sanding pads to smooth any rough edges. Wipe clean once you are done to remove all traces of dust before finishing off the planter bench.
Step 5
Flip the planter bench upside down in order to secure the casters to the base using 16mm screws. Make sure to place all 4 casters in the same position on the base.
FINISHING:
After assembling the planter bench, the finishing will depend on the material used for the bench. If you used pine or veneered plywood you can apply a clear or tinted sealer or varnish in matt or gloss finish. If you used SupaWood, you can now paint the bench with your choice of paint. For other hardwoods, treat as you would for pine or plywood.

all about diy