Make a Pine Dining Table
After seeing the R6000 price tag for a wood dining table, I decided to make my own at a fraction of what it would cost to buy one. The project was actually very easy and only took a weekend.
05/2016
In this project, you will find instructions for making the pine dining table as well as an easy method for whitewashing the table to take away the naturally yellow colour of pine.
BELOW: My dining table and chairs is dated and does nothing for the space. Even though the chairs are super comfortable, I decided it was time for a change.
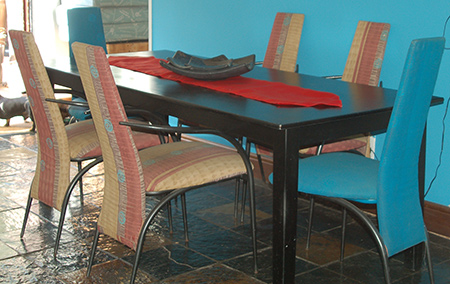
I won't mention names, but the below dining table retails at R6000. I was interested in buying the table, but upon close inspection (and as you can clearly see in the photo) the table on display was warped and there were quite a lot of cracks already starting to appear in the wood. Give it a few more months and the entire table would need to be refinished - not quite worth the R6000 asking price.
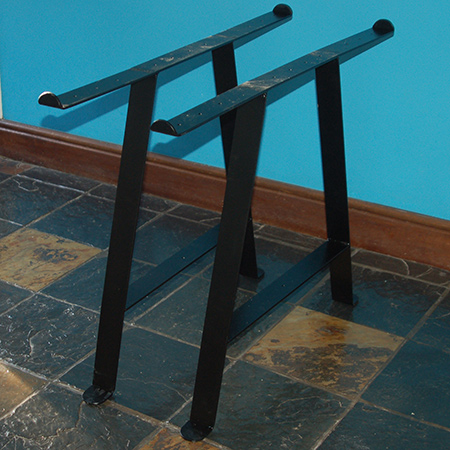
I enlisted the help of a friend who does welding to make the steel leg frames for the table, and these only cost R800 for the pair. The wood for the table cost R1100 at my local Builders Warehouse, and that includes the fact that I used a 32mm thick pine rather than go for a thinner 20/22mm pine. So, at the end of the day my much stronger and sturdier table came in at a cost of around R2000.
YOU WILL NEED:
11 of 32 x 94 x 1800mm PAR pine planks*
1 of 67 x 67 x 1800mm PAR pine
2 steel leg frames
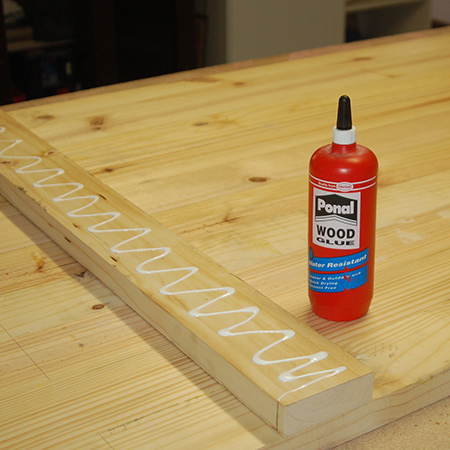
Ponal wood glue
4,5 x 50mm screws [20]
4,5 x 60mm screws [2]
TOOLS:
Drill / Driver plus assorted bits
Biscuit Joiner and #20 biscuits (or see below for alternatives)
Orbital Sander plus 120- and 240-grit sanding pads
Quick clamps [2]
OPTIONAL: Bessey Clamps used below for laminating planks
OPTIONAL: Dremel Trio or Router
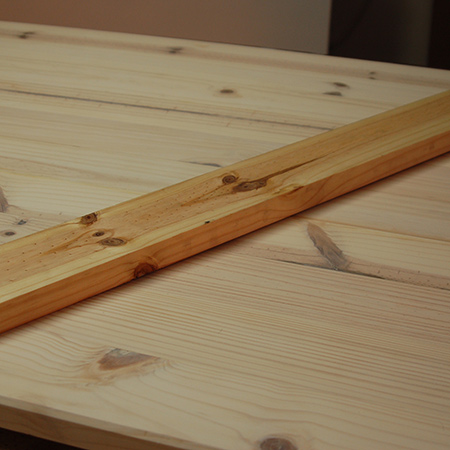
*Make sure that all the planks are straight and now bowed, and that there is little or no knots in the planks. You can work with a few knots here and there, but larger ones will eventually end up being a problem.
You will find all the materials and tools for this project at your local Builders Warehouse.
HERE'S HOW:
Preparation
Trim a 3mm edge at both ends of each plank to remove the protective sealer and give you a nice, smooth edge. Also check that all the planks are exactly the same length, or trim as required.
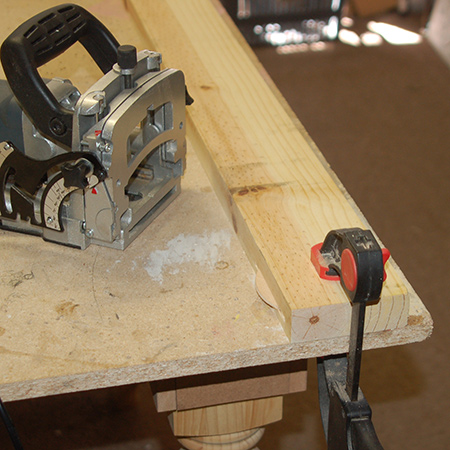
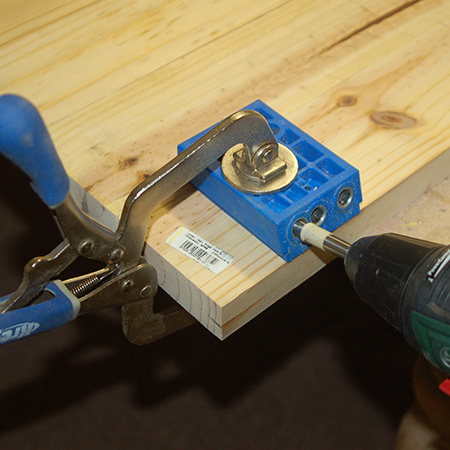
1. To join the individual planks together I will be using biscuit joints. If you don't have a Biscuit Joiner you can use a Kreg Pockethole Jig, or simply glue the planks together. All these methods use Ponal wood glue between the planks and are clamped overnight. Place the planks with their face down on a flat work surface.
2. When cutting the slots, or using a pockethole jig, it is important to make sure the planks are absolutely flat. To do this I placed a clamp at every position where slots will be cut. If you don't do this, you run the risk of having the planks at differing heights across the width of the table.
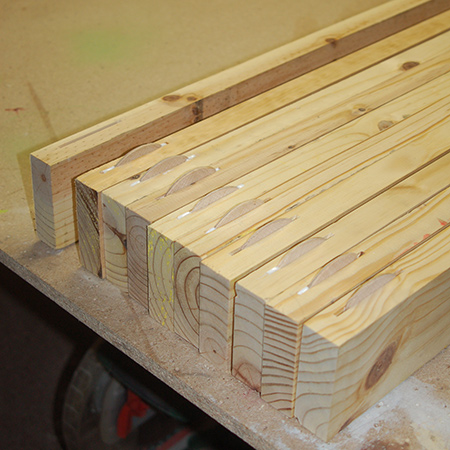
3. I cut four slots along the total length of each plank. After cutting, the planks were placed with the slots facing up, Ponal wood glue poured into the slots and the biscuits inserted. These were then left to settle for a couple of hours.
GOOD TO KNOW: This method allowed me to clean away any glue that oozed out and also let the biscuits absorb and swell to lock in place before joining to the other side. Since I am using a particleboard work surface, I don't want the glued planks to stick to the work top as well.
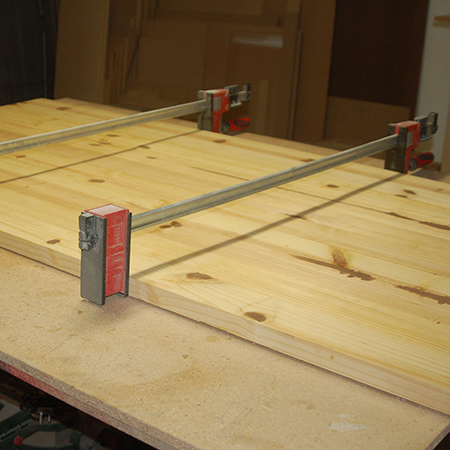
4. After leaving for an hour or two, glue was poured into the opposing slots and all the planks slotted together. You may need a rubber mallet on hand when joining the planks together to give them a bit of help. I clamped the entire table with my Bessey clamps overnight. If you don't have monsters like these in your workshop, place something heavy on either side hold everything together while the glue dries.
BELOW: An alternative to using a Biscuit Joiner is to use a Kreg Pockethole Jig.
GOOD TO KNOW: The reason it was important to place the planks face-side down was to allow for fitting a crossbeam across the glued planks, and you don't have to move the planks to do this if they are already face down.
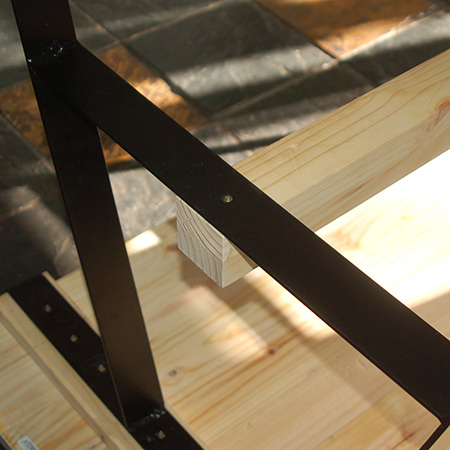
5. For this next step there has been a bit of controversy. When placing this project in Easy DIY magazine a comment received stated that this method for joining the table would not work - there would be too much movement. For the past year I have closely checked the table to see the amount of movement - and we have experienced hot and wet weather - and there has been hardly any. So, glue the cross piece to the underside of the table and then insert [2] screws through the cross piece into each plank - at either side.
GOOD TO KNOW: To reduce the possibility of warping or bowing, regularly apply a wax finish or polish to your table top.
![glue the cross piece to the underside of the table and then insert [2] screws through the cross piece into each plank - at either side.](../2016/may/145a.jpg)
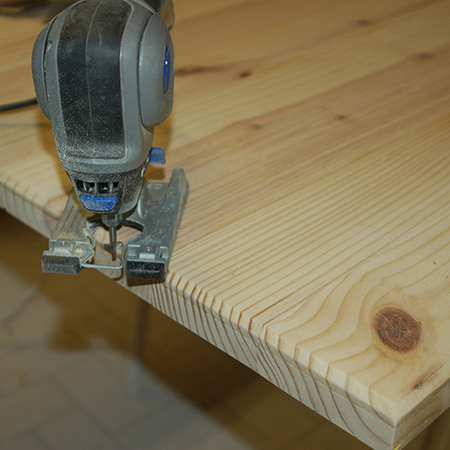
6. To finish off the edges around the table I used my Dremel Trio and a 'V' cutting bit to chamfer the edge at a 45-degree angle - or use a router.
7. The entire table was then sanded, first with 120-grit to ensure an even finish and then with 240-grit to make it nice and smooth.
Finishing
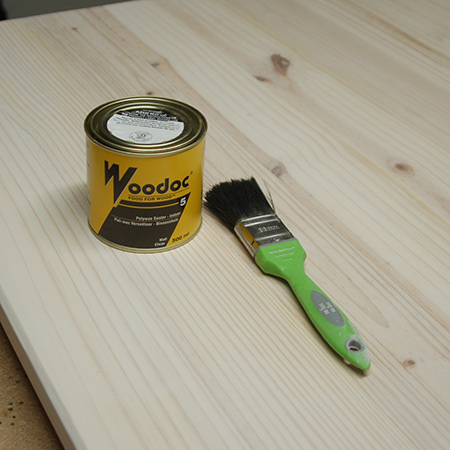
I'm not a big fan of pine purely because I don't like the yellow colour. Then I came up with the idea to give the table a very light whitewash finish to diminish the naturally yellow colour. Note: If you want a darker finish, apply Woodoc Gel Stain in your choice of wood tint and then apply a Woodoc Interior Sealer.
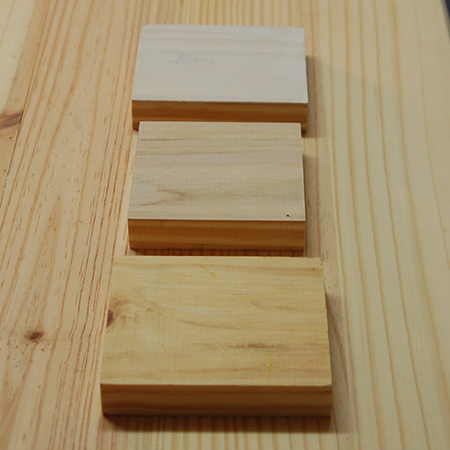
I used Prominent Paints Select matt white and poured this into a container, slowly adding water and testing this on scrap blocks of wood until I achieved the level of whiteness necessary to take away the yellow.
BELOW: Bottom block is raw pine - Top block is too white - I went with the middle block
Some whitewashing methods require that you use a wire brush over the surface to raise the grain before applying the paint. Pine, however, is a softwood and the paint is easily and quickly absorbed into the surface. I used a sponge to apply and had a second (dry) sponge on hand to wipe away excess as quickly as possible.
GOOD TO KNOW: Continuously stir the watered-down paint as you work.
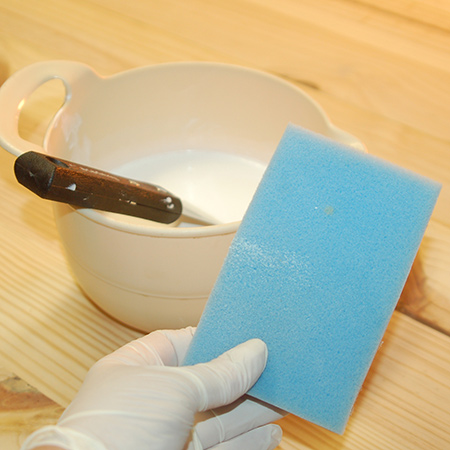
Working from one end to the other - one plank at a time - dip the sponge into the paint and squeeze out excess before wiping along the length as quickly as possible.

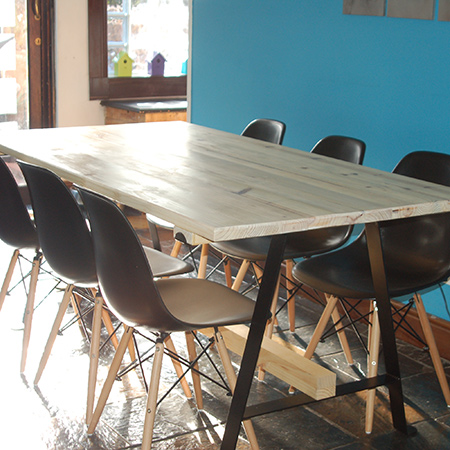
BELOW: The table after whitewashing. I put an unpainted piece of pine on top so that you can see the difference. The white paint has taken away most of the yellow.
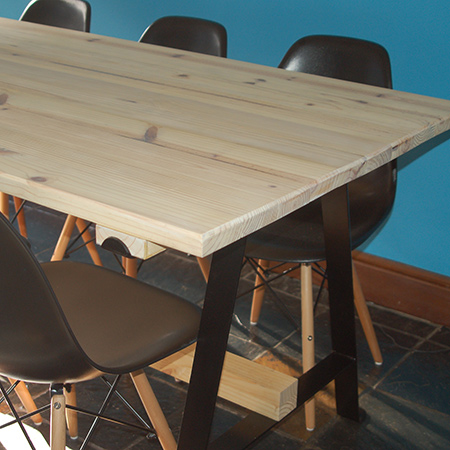
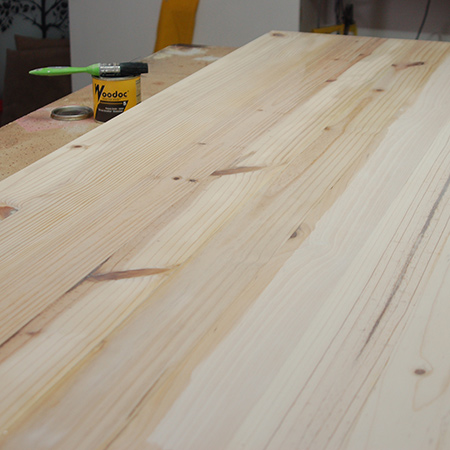
To ensure the table is protected, I applied 3 coats of Woodoc 5 Polywax matt sealer. I don't want a gloss finish on the table and the matt is more natural once dry. Follow the instructions on the can for proper application.
BELOW: You can see that the sealer has not yellowed once applied and will ensure the table is adequately protected. Periodic application, say every 18 to 24 months is necessary.
Assembly
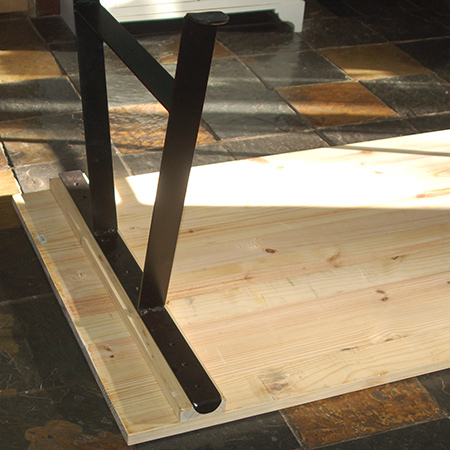
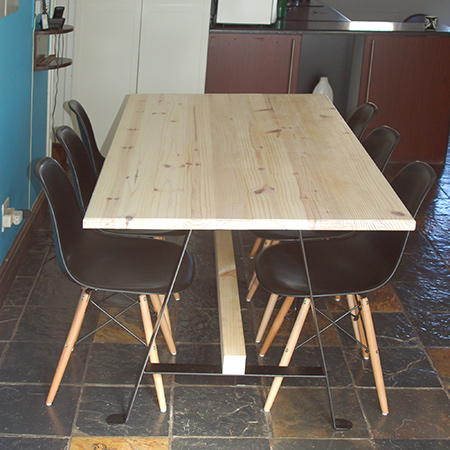
The steel leg frames are 700mm high and 940mm wide, excluding the lip at the edge. This is the exact width of the finished table.
Place the tabletop face down in order to mount the steel leg frames onto the crossbeam using 4,5 x 50mm screws.