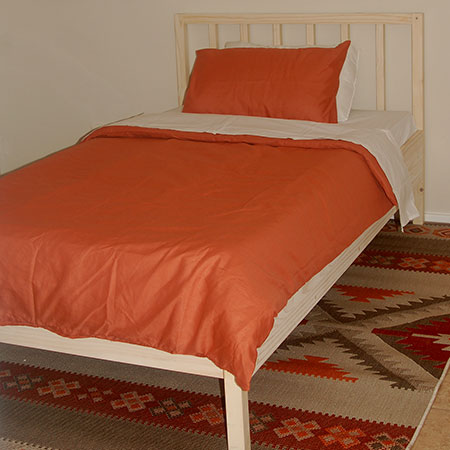
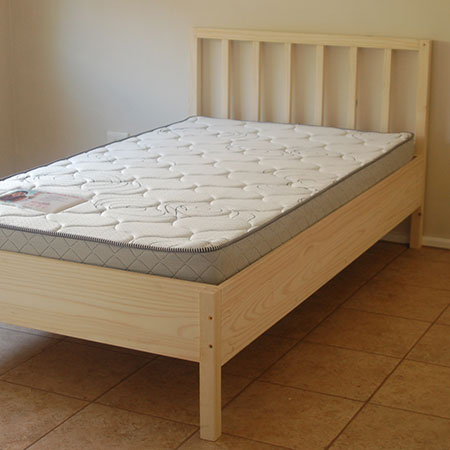
How To Make a 3/4 Pine Bed for under R2000!
Having a guest for the holidays I had to make a 3/4 pine bed as quickly as possible - and it had to be affordable!
31/12/2018
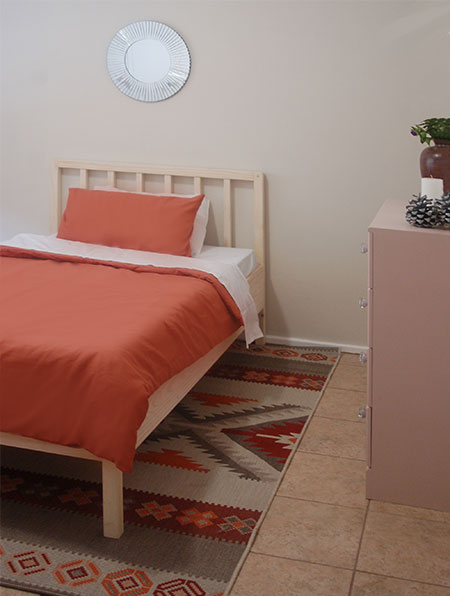
My dad decided to pop in over New Year - at the last minute - and I needed to make a bed for the guest room PDQ. With a limited budget (since it was Christmas), I decided to make a 3/4 pine bed that would cost under R2000 and leave enough to buy a quality spring mattress to fit the bed.
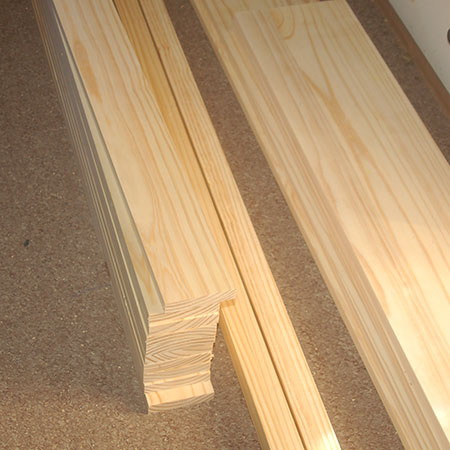
YOU WILL NEED:
2 of 44 x 44 x 1040mm - headboard top/bottom rails
2 of 44 x 44 x 900mm - headboard sides
6 of 32 x 32 x 394mm - headboard slats
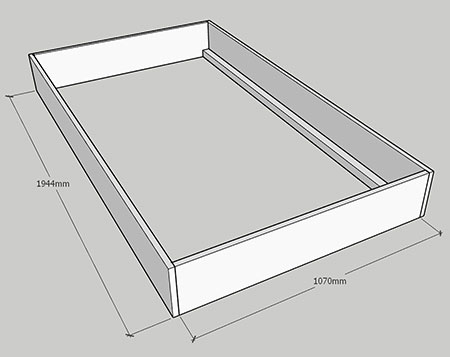
2 of 19 x 220 x 1090mm - base bottom rails
2 of 19 x 220 x 1944mm - base side rails
2 of 44 x 44 x 1944mm - base supports
2 of 44 x 44 x 420mm pine - legs
10 of 19 x 94 x 1090mm - base slats
3mm spacers
Wood glue
5 x 50mm screws [30]
6 x 100mm screws [8]
32mm Coarse thread pocket hole screws [24]
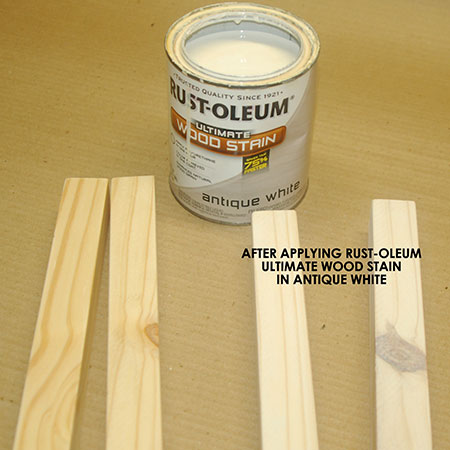
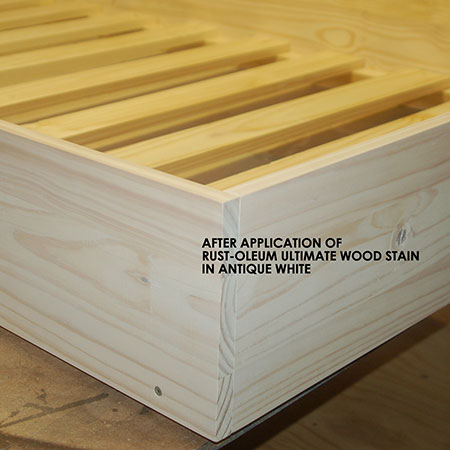
Rust-Oleum Ultimate Wood Stain - antique white
OPTIONAL: Pine pocket hole plugs
TOOLS:
Drill / Driver plus assorted bits
Pocket hole jig
Clamps
Tape measure and pencil
HERE'S HOW:
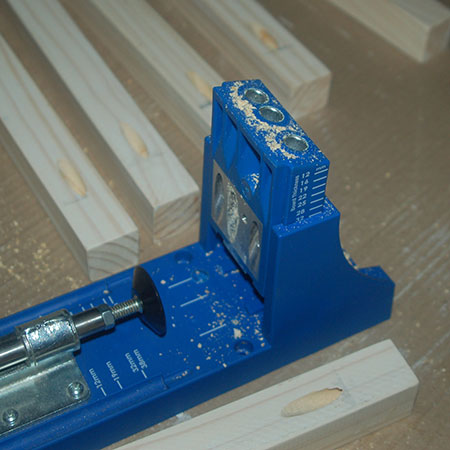
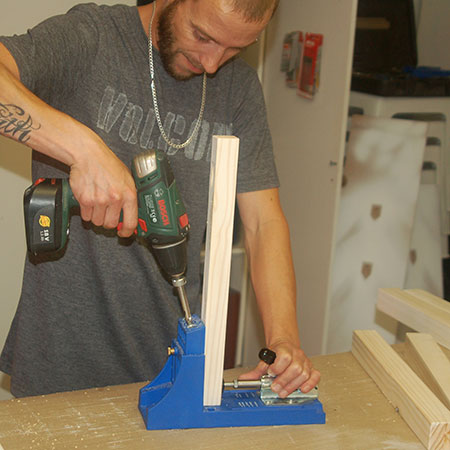
1. Set up your pocket hole jig for 19mm, 32mm or 44mm thick material.
2. After cutting all the pieces to length these were sanded and given a coat of Rust-Oleum Ultimate Wood Stain in Antique White. The reason for applying an antique white wood stain was to remove the yellow from the pine. While I do love working with pine, I don't like the fact that it is so yellow.
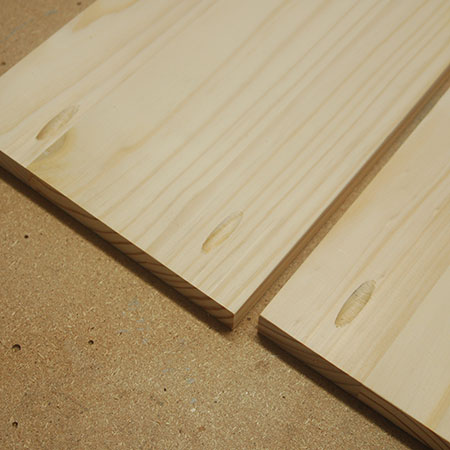
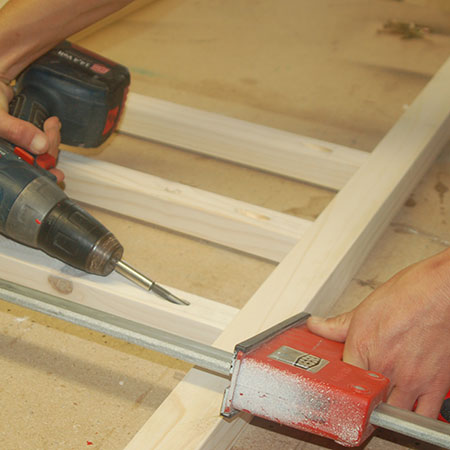
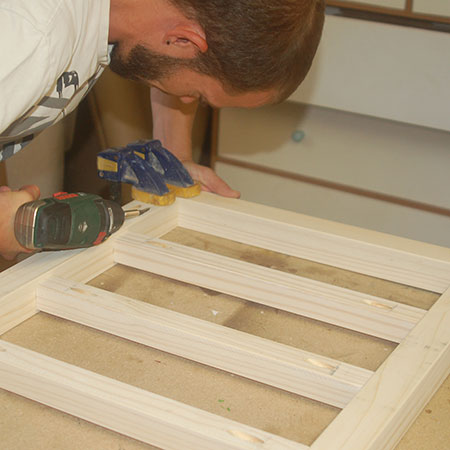
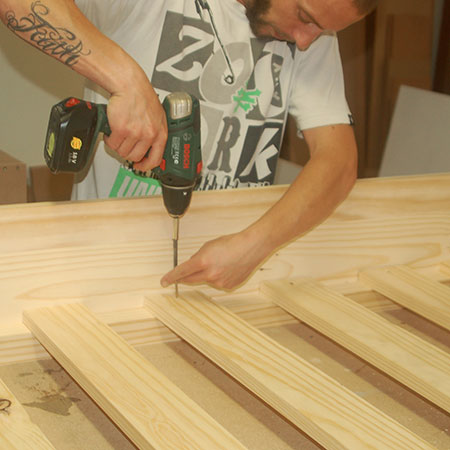
3. Use your pocket hole jig to drill [1] pocket holes at both ends of the headboard slats.
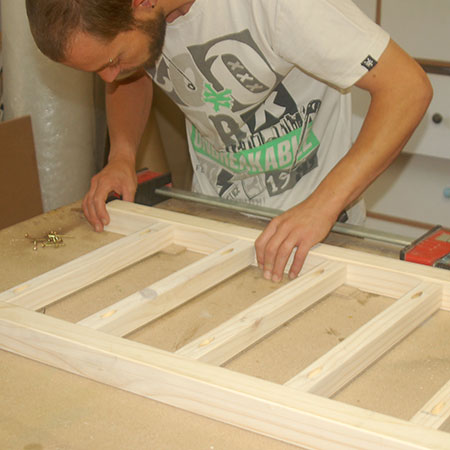
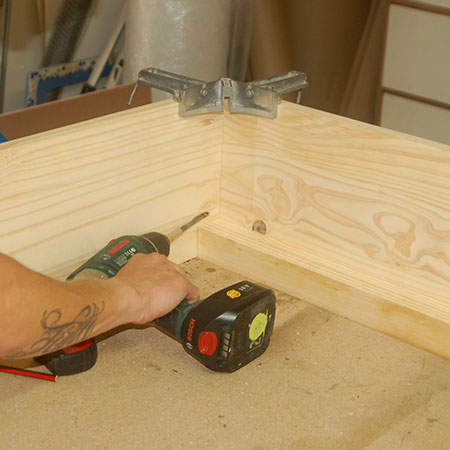
4. We start by assembling the headboard, so while we're doing this we can glue the 44 x 44mm base support to the front and back rails of the bed. Clamp this in place.
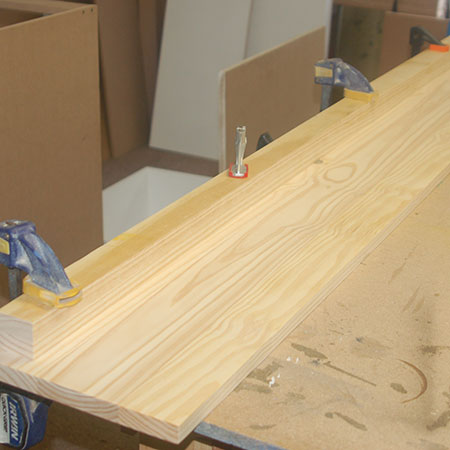
5. Drill [2] pocket holes at both ends of the bottom rails, as show below. This is for attaching the side rails to the front and back rails to make the base of the bed.
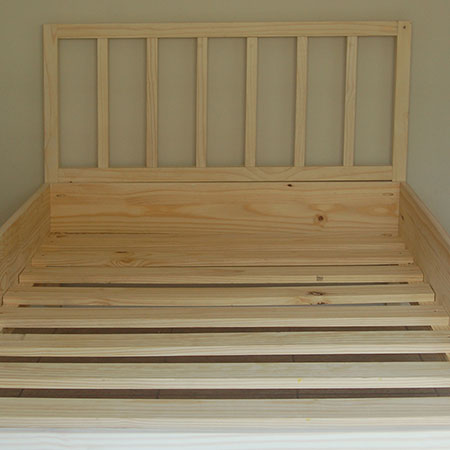
Assemble the headboard
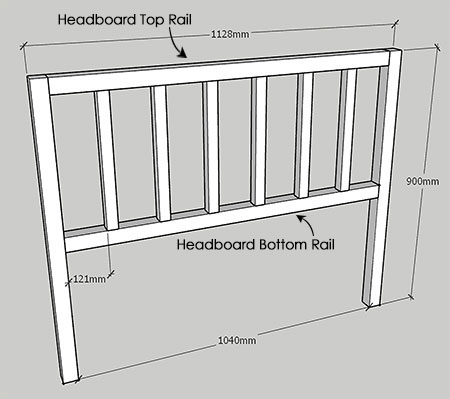
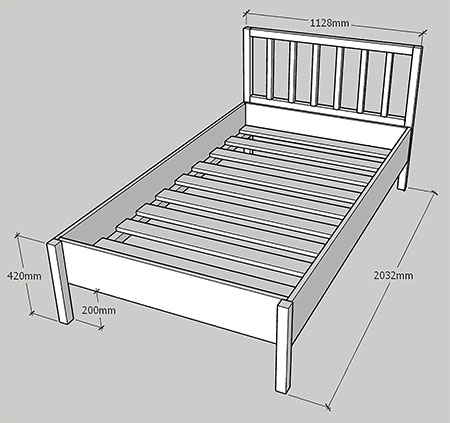
6. Measure and mark the position for the headboard slats - see diagram above.
7. You already drilled pocket holes at both ends of the headboard slats, so now you attach these to the headboard top and bottom rails.
GOOD TO KNOW: The headboard slats are 32mm wide, while the headboard top and bottom rails are 44mm wide. Use spacers to lift the slats slightly to offset (or centre) these when mounting to the top and bottom rails.
GOOD TO KNOW: Clamp the top and bottom rails to make it easier to install the headboard slats.
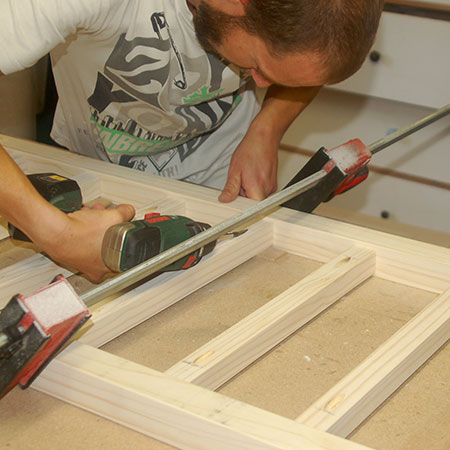
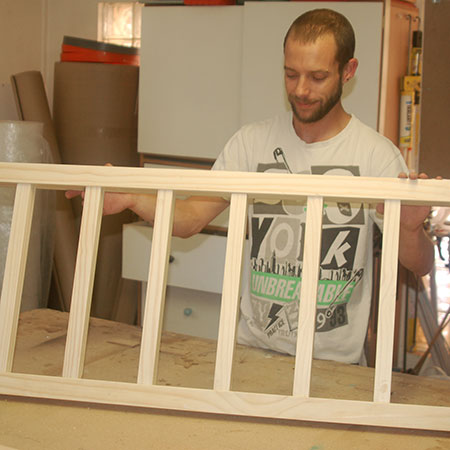
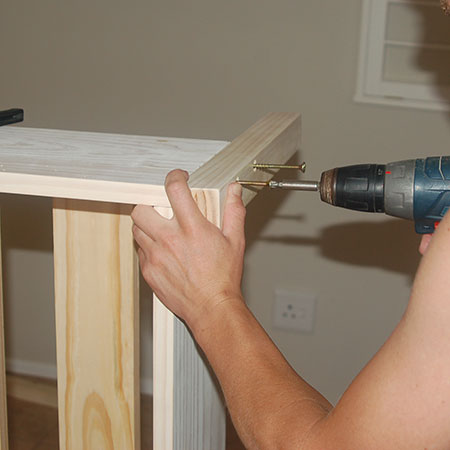
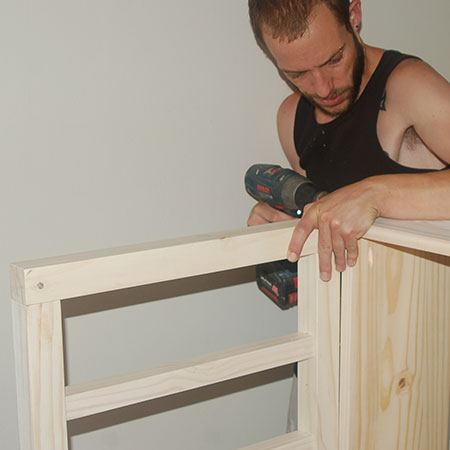
8. Place the headboard sides against the ends of the top and bottom rails and clamp down at the corners to join the headboard top and bottom rails to the sides (legs).
Assemble the base
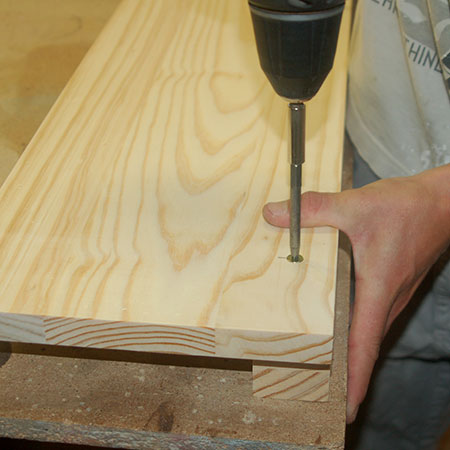
9. To ensure a strong, stable base, drill [5] 3mm countersunk pilot holes along the length of the side rails and into the base support and drive in 5 x 50mm screws.
10. Secure the bottom rails to the side rails using wood glue and 32mm pocket hole screws.
11. Evenly space the base slats along the base supports.
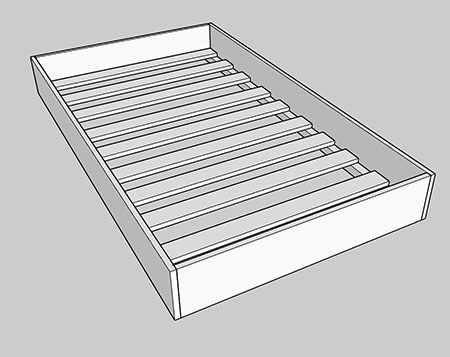
12. Secure the base slats to the base supports with 5 x 50mm screws.
13. The bed was placed in the room and set on one side to make it easier to attach the headboard with [2] 6 x 100mm screws through each leg into the bed base.
14. The bottom legs were attached to the base using [2] 6 x 100mm screws through each leg into the bed base.