
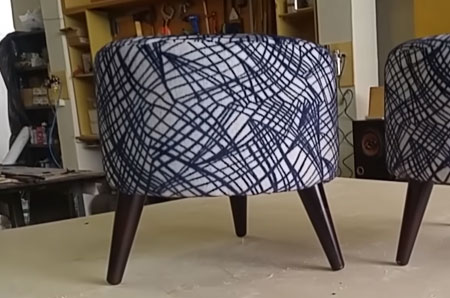
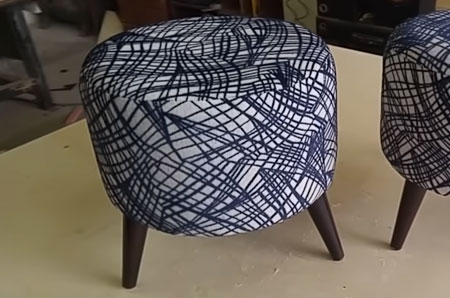
Make a Pair of Upholstered Footstools
Add a pair of upholstered footstools to your living spaces for a unique design element, plus they are also great for kid's rooms.
25/04/2019
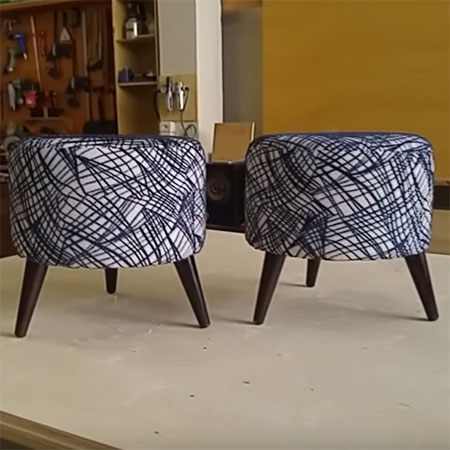
These upholstered footstools are an easy way to add a new design element to your living spaces, and they are also great for adding to a kid's bedroom or playroom. Making these upholstered footstools is a fairly simple DIY project that you can easily complete in a couple of hours, and you get to choose your own fabric for the upholstery.
All you need to make these footstools is some pieces of 12mm or 15mm plywood, some thin board or plywood for wrapping the footstools, some foam and your choice of fabric for the upholstery, And don't forget that they offer a wide selection of modern and rustic leg designs at your nearest Gelmar store.
If you are interested, there is a video here that shows the entire project but, unfortunately, it's in Portuguese.
YOU WILL NEED:
12mm or 15mm plywood for the frame
3mm board of plywood to wrap the frame
Scrap pieces of pine
4 legs in your choice of design plus fasteners
Foam and fabric for upholstery and liner fabric for base
Sprayable adhesive
Wood glue
TOOLS:
Pneumatic nailer and stapler - or hammer and nails
Sewing machine and sewing supplies
Jigsaw
Tape measure and pencil
Not responsible for errors or omissions
HERE'S HOW:
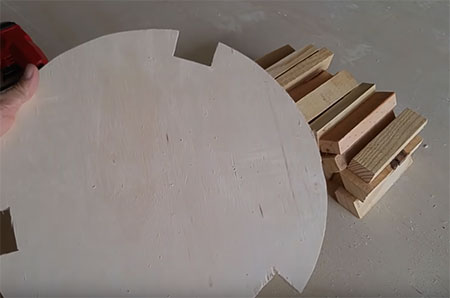
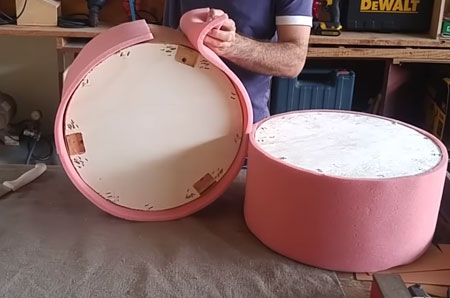
1. Cut [2] circles for each footstool to the required dimensions. You also need to cut [3] notches in one of the circles in order to screw the legs in place.
2. Also cut some 200mm lengths of pine for the battens that will be fitted between the top and bottom circles to give the footstool their shape.
3. If you are using screw-on legs, you will also need to add [3] angled blocks (with inserted screw thread) to screw the legs onto the bottom circle.
GOOD TO KNOW
If you are adding legs or feet that have screw supports, these can be installed once the stools are finished.
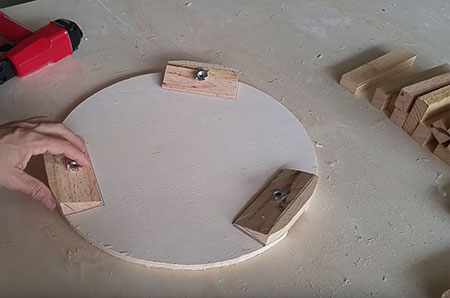
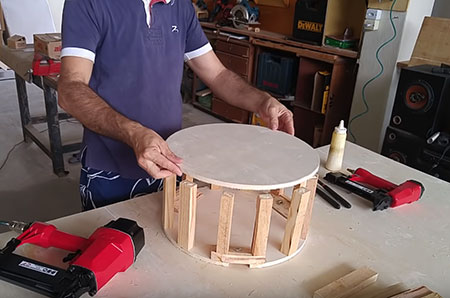
4. The angled blocks are glued onto the bottom frame with a few nails added. Once the blocks are secured, you can begin to attach the pine battens. Note the battens that fit over the blocks are shorter than the remaining battens (to compensate for the thickness of the block).
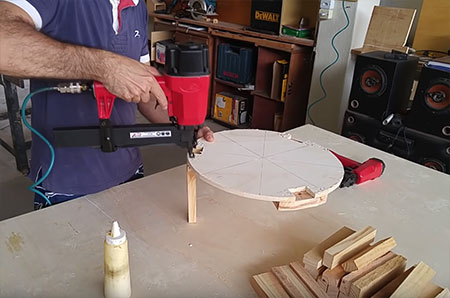
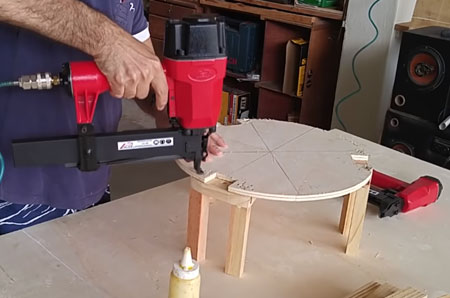
5. Continue adding battens around the bottom frame, as shown below.
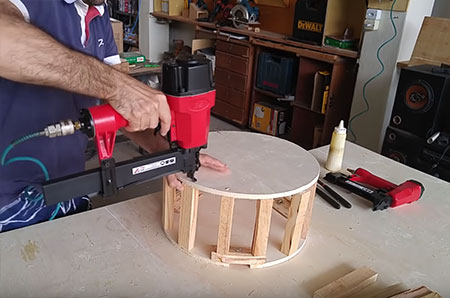
6. Apply wood glue to the end of the battens and then place the top circle over these.
7. Add nails through the top into the battens.
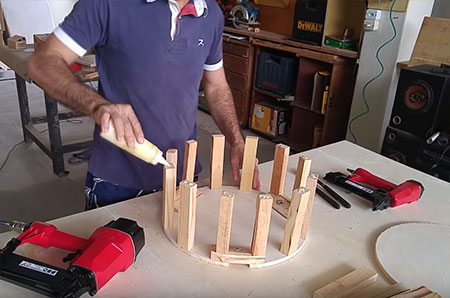
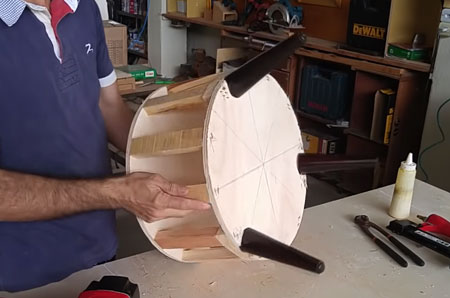
8. Complete the assembly and then test fit the legs. Remove these until the upholstery is complete.
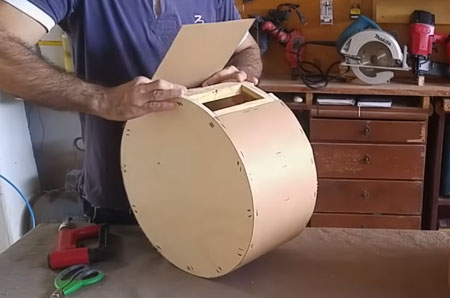
9. Wrap the sides of the footstool with 3mm board or plywood. This is nailed to the battens and the edge of the top and bottom circles.
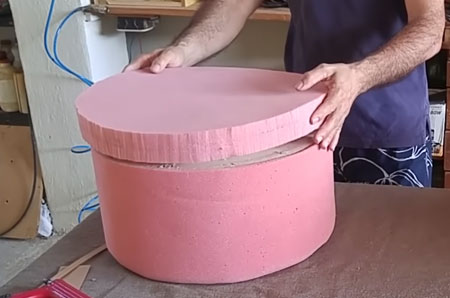
10. Cut pieces of foam to fit around the circular frames and secure with sprayable adhesive.
11. Cut a thicker piece of foam for the tops and secure with sprayable adhesive.
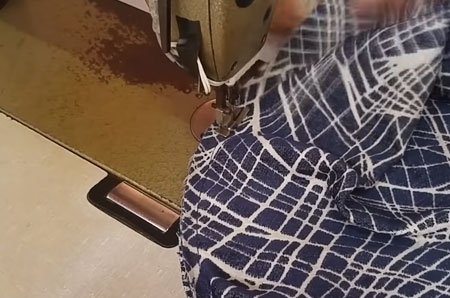
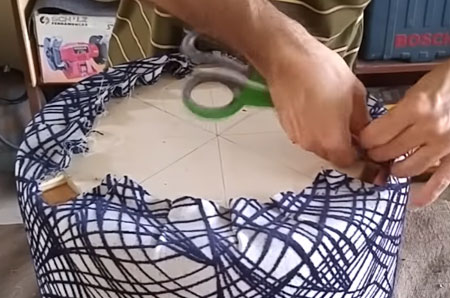
12. Cut the fabric to fit, allowing extra for seams and for fastening to the underside of the bottom circle.

13. Sew all the seams using a running stitch and also a zigzag stitch along the edges to prevent fraying.
14. Fit the sewn fabric over the footstool to test fit and make any adjustments and then secure to the underside of the bottom with staples.
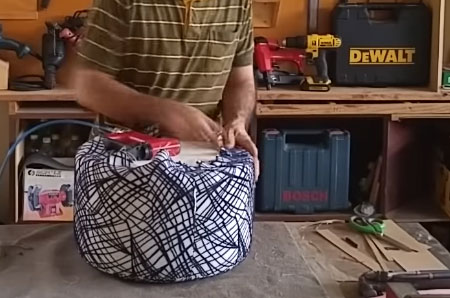
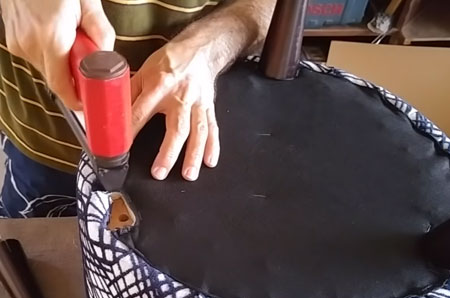
15. Make cut outs where the legs or feet will be mounted and staple around the cut-outs..
16. Cut a piece of liner fabric to fit around the base, making a slit where the legs will be placed.

17. Staple around the slit to secure.
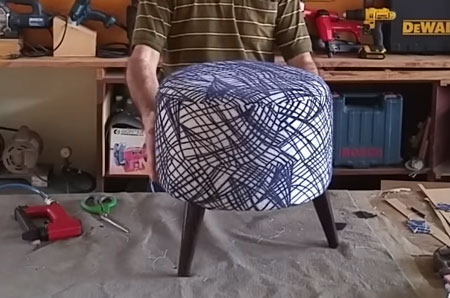
18. Now you can re-attach the legs or feet for your footstools to finish off.
instagram.com/eudesoliveirawork