
Make a Floating Day Bed for a Playroom, Living Room or Patio
Gently swing yourself to sleep with this floating day bed that can be installed in a playroom, living room, or out on a patio.
18/06/2020

A floating day bed is just the place to relax after work or on the weekends. This floating day bed is so comfortable you can mount it indoors in a playroom or living room, or install it on a patio. It's the perfect place to lie back and relax while you while away your stress.
YOU WILL NEED:
2 of 2 metres reclaimed wood beams or 69 x 69mm PAR pine
2 of 910mm lengths wood beams or 69 x 69mm PAR pine
2 of 32 x 32 x 1862mm PAR pine - supports
9 of 19 x 140 x 910mm PAR pine - supporting planks
4 of heavy-duty hooks with wall anchors
12 metres of 12mm-thick rope
4 of 12mm dia. closed eye-bolts
6 x 200mm screws [8]
4 x 40mm screws
OPTIONAL: Acrylic paint, white or choice or colour
TOOLS:
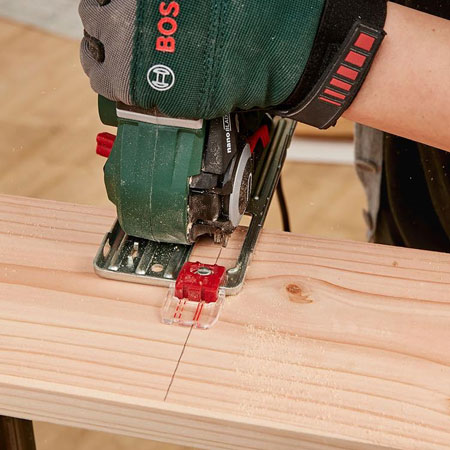
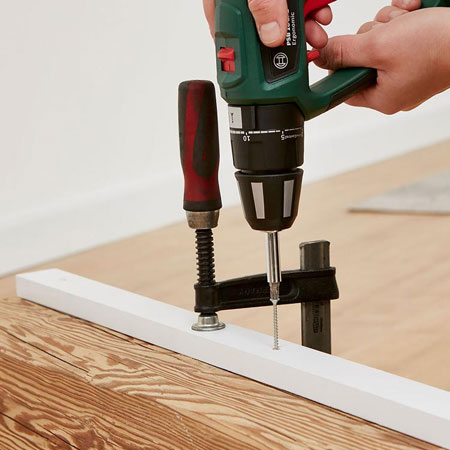
Combi drill plus assorted bits
Jigsaw or NanoBlade saw
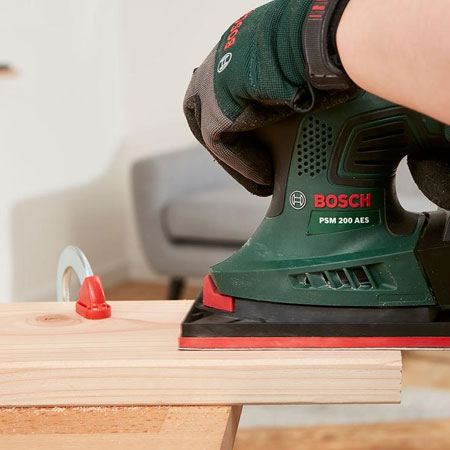
Orbital or multi sander plus assorted sanding pads
OPTIONAL: Bosch PFS spray system
G-clamps
Tape measure and pencil or laser measure
Safety gear
Stepladder
Craft or utility knife
Carpenter's square
Not responsible for errors or omissions
HERE'S HOW:
1. Have cut - or cut - all the pieces to size yourself. You can use reclaimed wood beams or laminated PAR pine beams that you can buy at Builders stores or timber merchants around the country. Most of these stores offer a cutting service where you can have everything pre-cut to size for easy assembly.
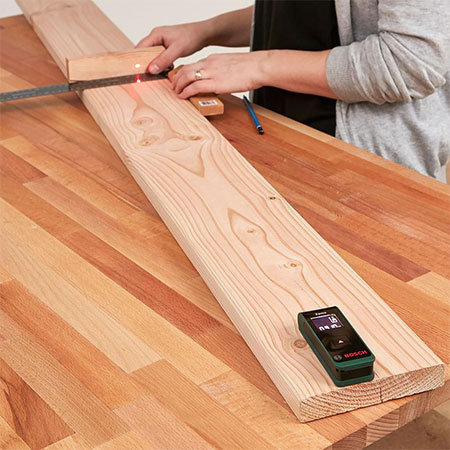
2. If you are cutting the PAR pine or reclaimed beams yourself, measure and mark before cutting with a jigsaw or NanoBlade saw.
3. Sand all the pieces to remove splinters and smooth. Start with 120-grit sandpaper and finish with 240-grit sandpaper to prepare the PAR pine for painting.
4. If you are painting the supporting slats or supports, take these outside and place on a drop cloth before spraying. Apply the paint in even strokes over the pieces before leaving them to dry.

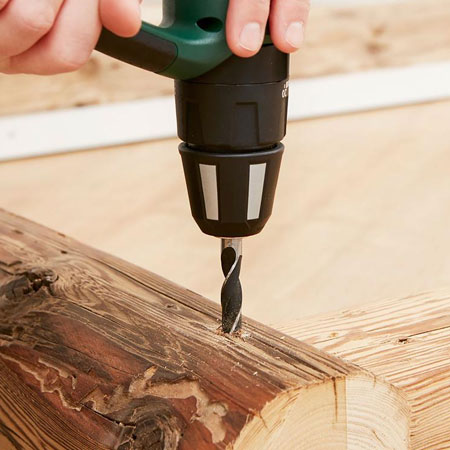
5. Use your combi drill to pre-drill countersunk pilot holes to attach the painted slats to the underside of the beams. These will form the supporting structure for the swing bed. Use clamps to hold the pieces firmly in place while you screw the 40mm screws into the wood.
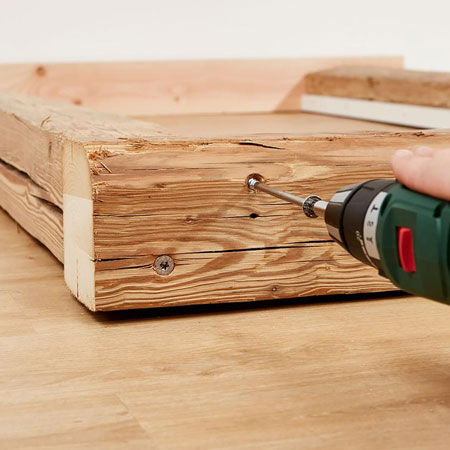
6. Now you can assemble the frame for your floating bed. Form a right-angle at the corners with a long and short section of beams. Pre-drill countersunk pilot holes to make joining the pieces easier and use 6mm screws to secure.
GOOD TO KNOW: Place against a wall to secure while you screw together.
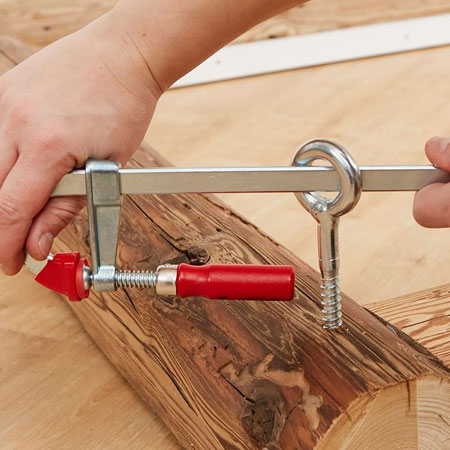
7. To hang the floating bed from the ceiling, you need to screw closed eye-bolts into the corners of the frame. Pre-drill a 12mm pilot hole in all 4 corners.
8. Use a lever to help twist the eye-bolts firmly in place.
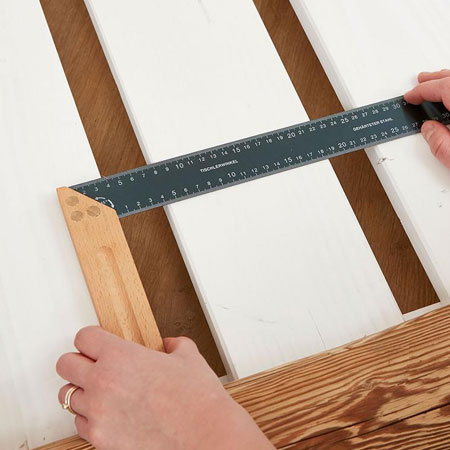
9. Position the slat planks onto the frame, leaving an equal distance between all the slats - approximately 40mm.
10. To find the perfect location to hang your floating bed you need to mark the positioning for the ceiling hooks. Measure the distance between the location of the eye-bolts on the bed frame and transfer this to the ceiling. A laser measure comes in extremely handy for this project.
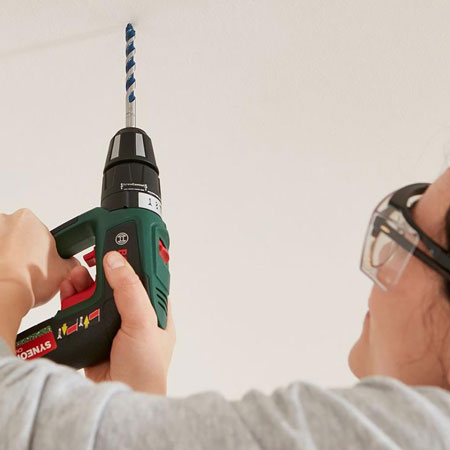
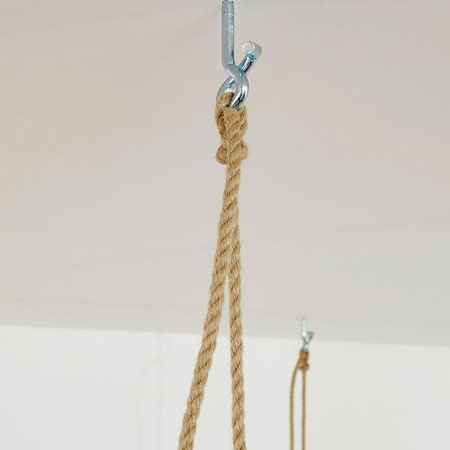
11. Drill the holes to screw in the ceiling hooks securely. The ceiling hooks should only be screwed in to larger load-bearing ceiling beams - if you are unsure about this, ask someone who knows for advice.
GOOD TO KNOW: Do not do any drilling before checking that it is safe. Make sure that there are no plumbing or electrical conduits or wires, or any other objects.
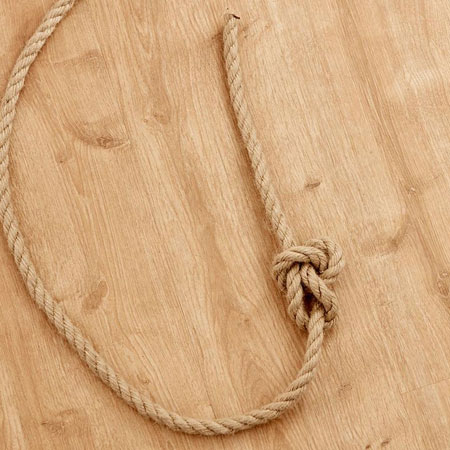
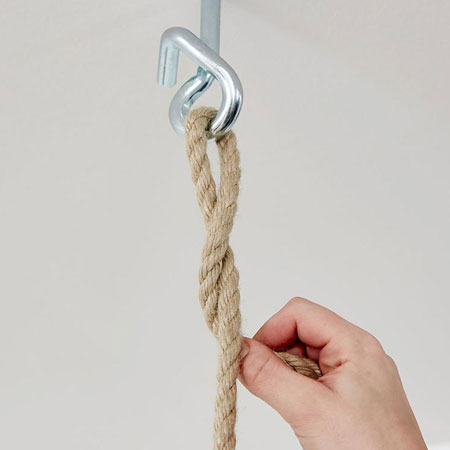
TYING A BOWLINE KNOT
Measure the height of the ceiling to work out the height for your floating bed and the length of rope you will need to suspend it from the ceiling. Calculate additional length to tie the bowline knots, approx. an extra metre.
Use a craft or utility knife to cut the ropes to length.
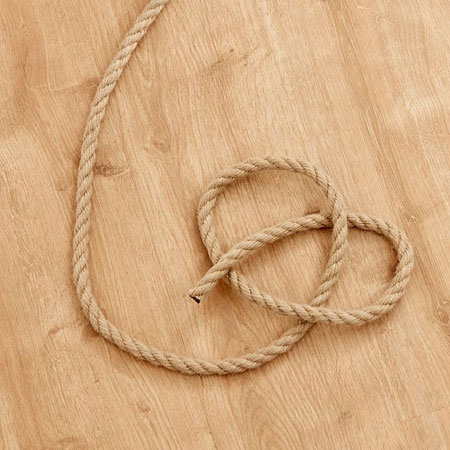
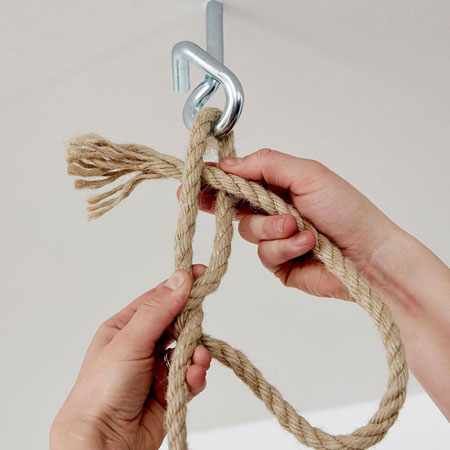
For a bowline knot, thread the rope through the eyelet attached to the floating bed and make a loop.
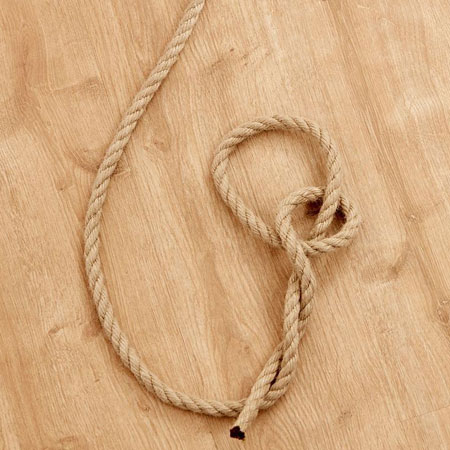
Thread the end of the rope through the loop from behind and wrap the rope once around the long end of the rope. Now thread it through the loop again before pulling the rope tight.
HANGING THE BED
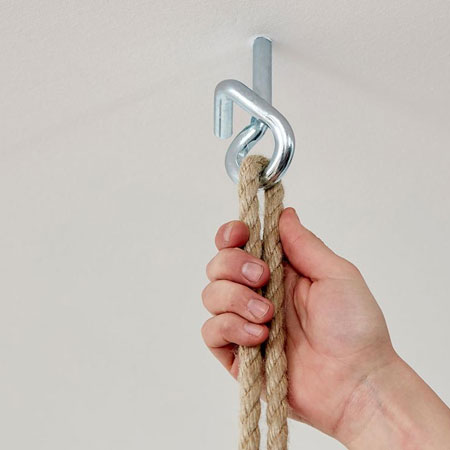
Have someone to assist you to lift the bed. Rest it on a bench or chair while you climb up a stepladder to secure the ropes on the hooks.
Thread each corner rope through a ceiling hook so that you can slowly lift the bed, with your assistant lifting the bed at the same time.
TYING A HANGMAN'S KNOT
To knot the ropes securely onto the ceiling hooks use a hangman's knot by threading the rope through the ceiling hooks. Lay the end of the rope the longer part of the rope, first from the front and then from behind.
Thread the end of the rope through the loop and pull everything tight.
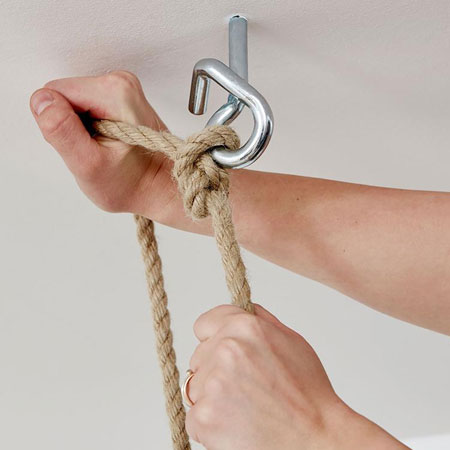
Make sure that all the knots are tight and secure.
all about diy