
Quick Project: Make An Easy and Stylish Wall Shelf
This easy DIY wall shelf is perfect for decorative storage in a living room, family room or even a home office - plus it's simple to make and you don't need a pegboard for this one.
06/06/2021
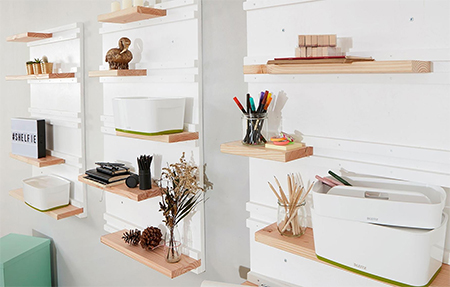
While pegboard wall shelves are an easy way to add wall shelves to a room, this decorative wall shelf is an even easier option and you don't need to search high and low to find pegboard to make it. Use the shelf to create an interesting display in your living room or family room, or use it to set up storage in your home office.
Not everyone has access to pegboard and this practical wall shelf can be made with SupaWood or plywood with pine shelves (or your choice of material if you prefer hardwood for the shelves).
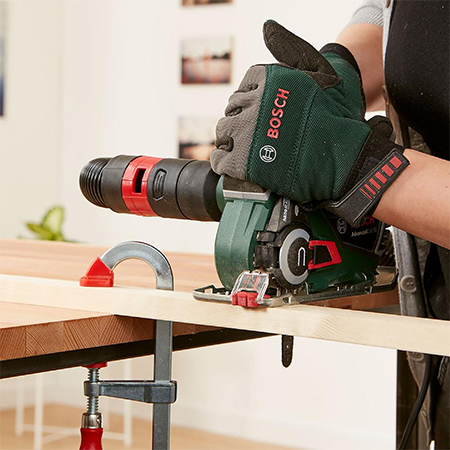
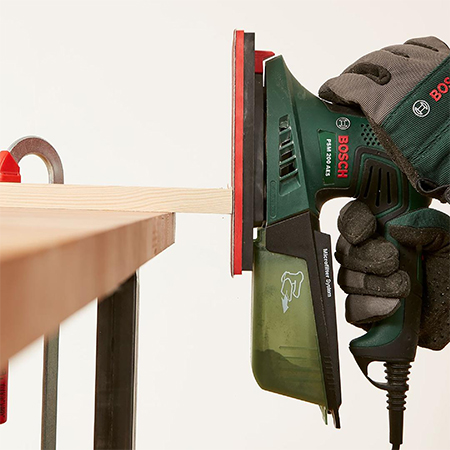
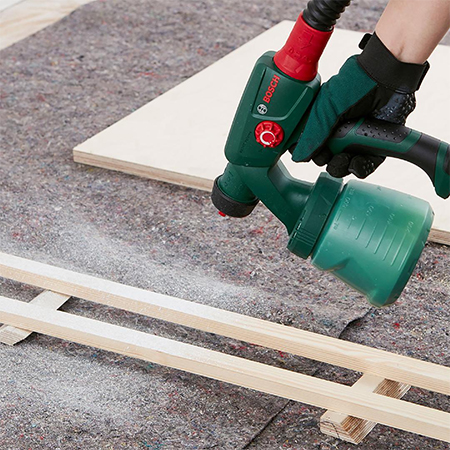
Have everything you need cut to size at your nearest Builders or timber merchant to make assembly even quicker and easier. You don't need any special tools to make the wall shelf, just a drill/driver, sander and jigsaw. If you have a spray painting gun it makes painting easy but you can also do the painting by hand if you don't.
YOU WILL NEED:
3 of 16 x 600 x 1000mm SupaWood or plywood boards - backing boards
30 of 22 x 44 x 3000mm PAR pine (or have cut out of the SupaWood or plywood sheet) - shelf supports
7 of 22 x 350 x 3000mm PAR pine (or your choice of hardwood) - shelves
4 x 30mm cut screws
Nylon wall plugs and screws for mounting onto wall
Paint to finish and painting equipment
TOOLS:
Combi or Impact Drill plus assorted bits
Sander plus 120-grit and 240-grit sanding pads
Jigsaw and blade for steel (if cutting plywood) or clean-cut blade
Electronic detector
Spirit level or cross-line laser level
Corner square
Clamps
Tape measure and pencil
Safety gear
HERE'S HOW:
Step 1
Measure and mark to cut the shelf supports to fit onto the backing boards, each one 600mm in length. If you are having these cut from the SupaWood or plywood board everything is all ready to be mounted on the backing boards. Each backing board has 5 shelves = 10 shelf supports.
Step 2
Sand around the edges of the backing boards and shelf supports so that they are nice and smooth and ready for painting. Take note that SupaWood is very absorbent along the cut edges so you will need to apply extra paint in these areas. You will find tips for painting SupaWood in this article and should also read this article for safety tips when working with SupaWood.
Step 3
Spray paint or paint the backing board and shelf supports if you are using SupaWood. If using plywood, you can stain and seal of varnish if you prefer this instead of painting. However, painting the backing board and strips make them far less visible when hung on the wall.
Step 4
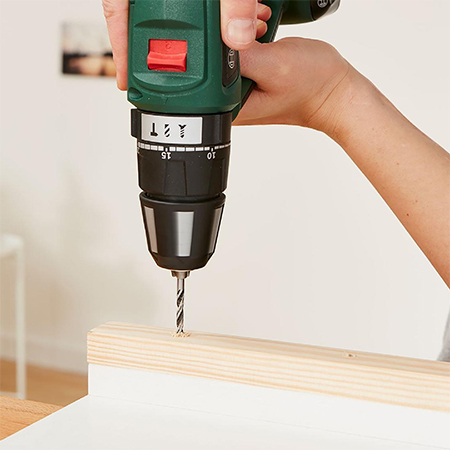
Drill 2.5/3mm pilot holes in the shelf supports. You should drill a countersunk pilot hole at each end of the shelf supports at 100mm in from the end. Drill a further 2 holes spaced evenly in the centre.
Step 5
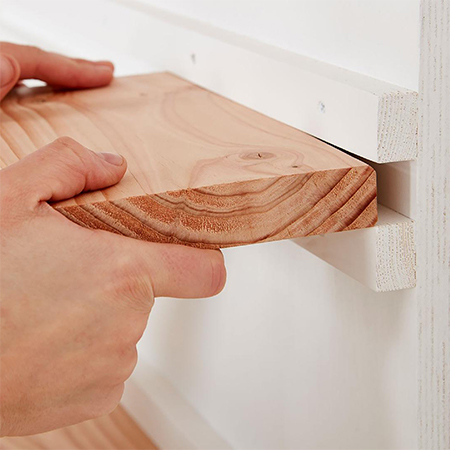
Secure the shelf supports to the backing board with 30mm cut screws, allowing a gap between each set of two for fitting the width of the shelves - depending on the material used. For this project there is a 22mm gap between each set of 2 shelf supports to allow for the pine shelves. Place the shelf supports as you wish them to be spaced, especially if you want to allow for certain items on the shelves.
Step 6
For secure mounting of the backing boards onto a wall, measure and mark 150mm in from the sides and 150mm from the top and bottom. Transfer this measurement onto the wall where the backing boards will be mounted.

SAFETY FIRST:
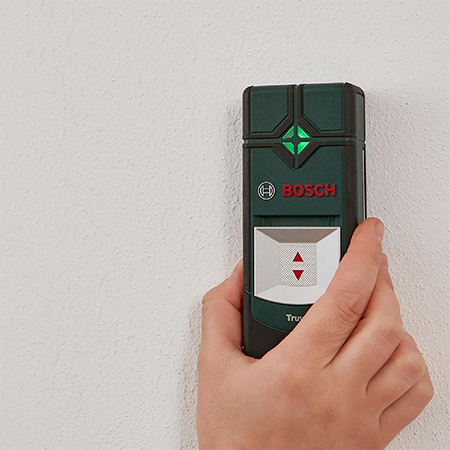
Before drilling into walls, use an electronic detector to ensure safe drilling. You never know what might be hiding in the wall.
Step 7
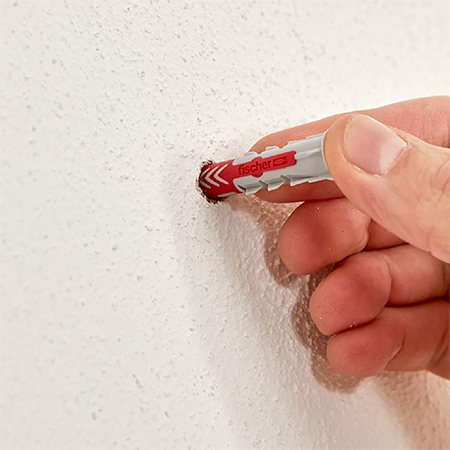
Drill holes for the nylon wall plugs and then secure the backing board onto the wall with screws.
Step 8
Before adding the shelves, sand them smooth and wipe clean to apply your choice of clear or tinted sealer or varnish or leave them raw if you prefer.
all about DIY