Make a stylish Bread Bin
I saw this project on Build Something and decided to make my own display bread bin, with a few modifications to allow for local materials.
12/07/2019
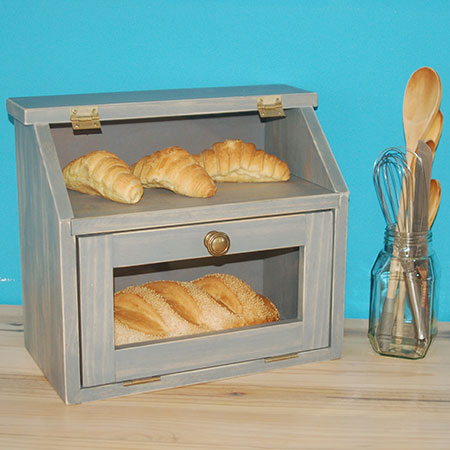
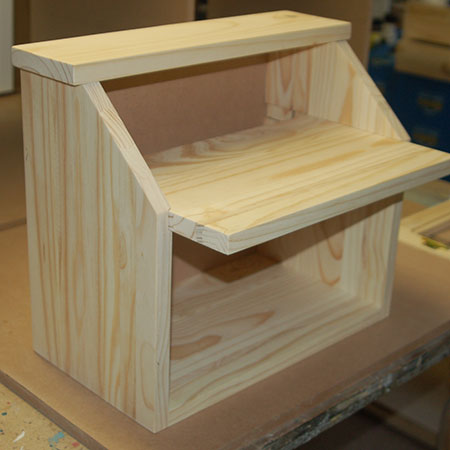
I love this idea for a bread bin. The designs allows you to see through the front of the door, and has a plexiglass top for displaying your home baked goodies or pastries.
Very simple to make, I made this bread bin using PAR pine that I purchased at my local Builders Warehouse, and I also managed to find clear plexiglass for the doors at a reasonable price.
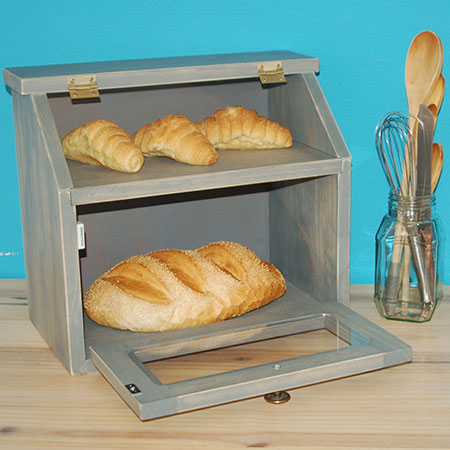
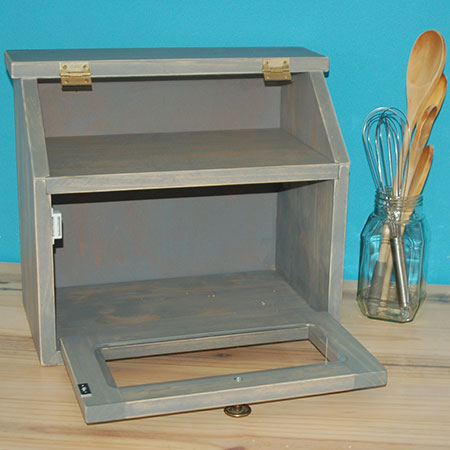
The bottom of the pine bread bin features a perspex door that lets you see inside, while the top of the bread bin has a perspex flap that lets you display your baked goodies.

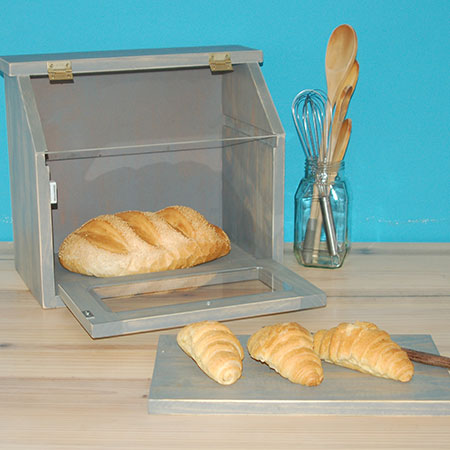
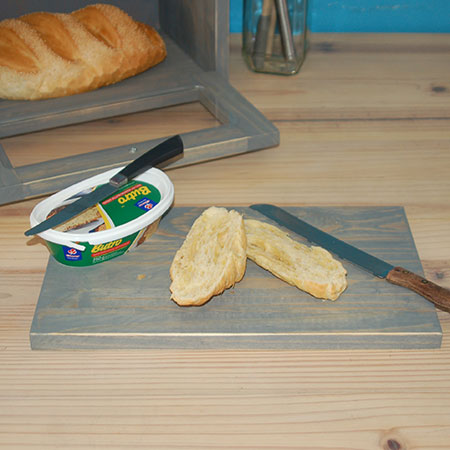
Another feature on this DIY bread bin is that it has a removable cutting board at the top. While I did apply stain to this to match the rest of the bread bin, I applied Howard Butcher Block Conditioner, so that it has a food-friendly finish.
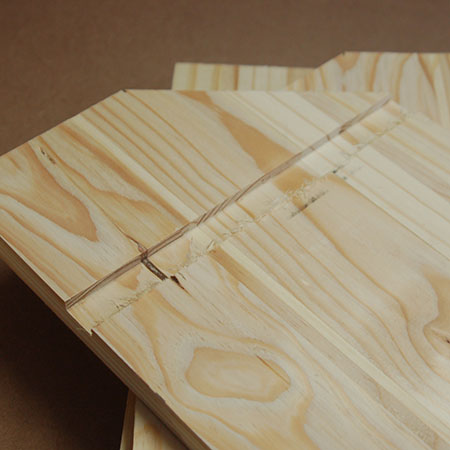
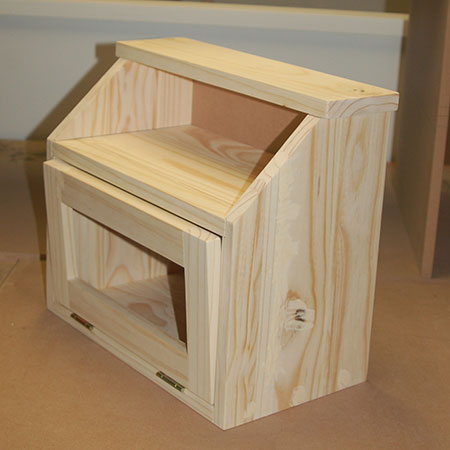
The main components of the bread bin are cut from a sheet of laminated pine shelving, while the door frame is made up of 22 x 44mm PAR pine.
YOU WILL NEED:
Laminated pine shelving cut to the following sizes:
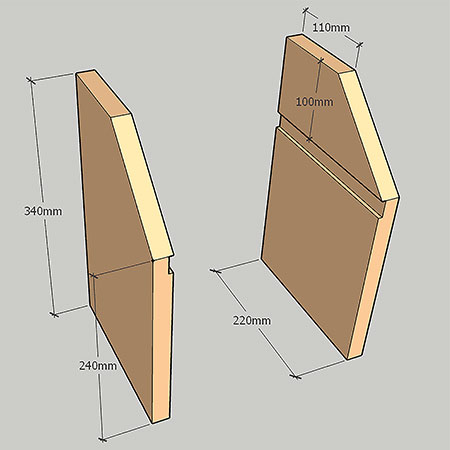
2 of 340 x 220mm - sides
1 of 360 x 220mm - bottom
1 of 420 x 110mm - top
1 of 370 x 200mm - shelf
2 of 44 x 270mm PAR pine - door (top/bottom)
2 of 44 x 194mm PAR pine - door (sides)
1 of 360 x 320mm 3mm plywood, SupaWood or Masonite backing
32mm coarse-thread pocket hole screws + pocket hole plugs
Wood glue
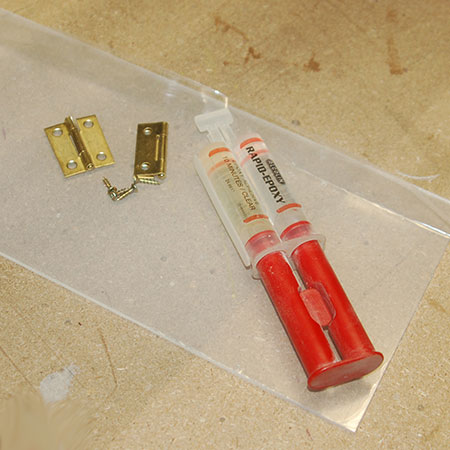
4 of Butt hinges and 16mm screws
Door knob or handle of choice
Plexiglass, measure for a perfect fit and cut to size
Epoxy glue
TOOLS:
Drill / Driver plus assorted bits
Jigsaw, table saw or mitre saw
Router plus assorted router bits
Pneumatic nail gun OR hammer and panel pins
Orbital sander plus 120- and 240-grit sanding pads
Tape measure and pencil
HERE'S HOW:
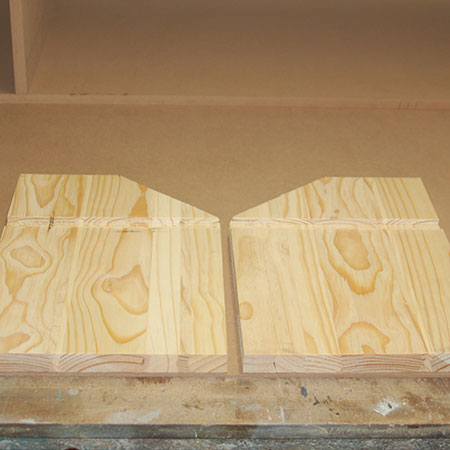
1. Some advance prep work is required before assembling the components for the bread bin.
2. Use the measurements above to mark and cut out a slot with your router. This slot allows for the cutting board to be removed for use.
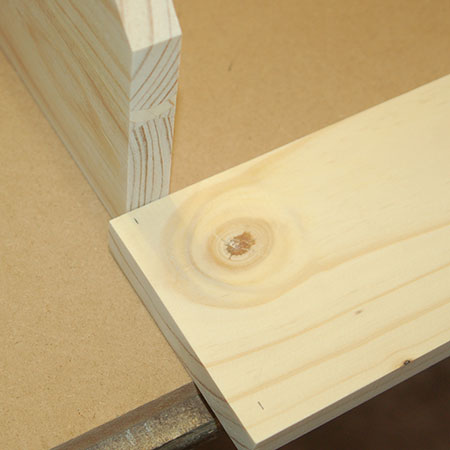
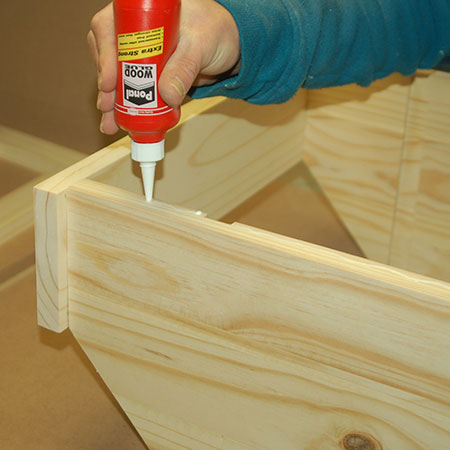
3. Apply a bead of wood glue to the base of one side and place next to the base, as shown below.
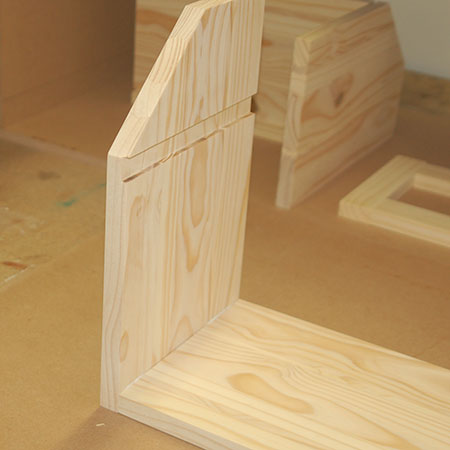
4. Repeat for the other side. Leave for about 10 minutes before securing in place using a nail gun or hammer and panel pins.
GOOD TO KNOW: If you prefer, you can drill pocket holes in the base to add the side secttions to the base.
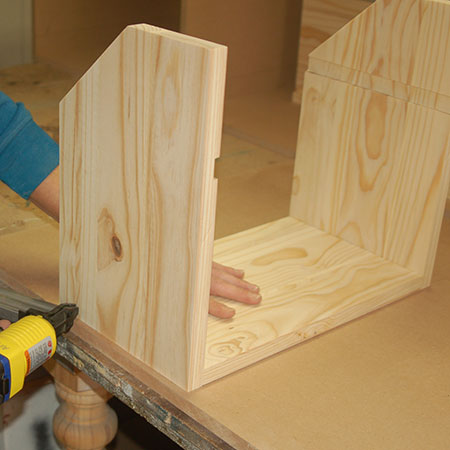
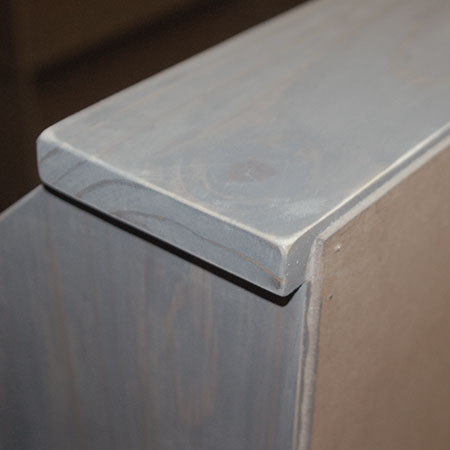
5. To add the top, place the assembled unit on its back and position the top section equally. Mark so that you know exactly where to glue and stick down.
6. Apply a bead of wood glue to both ends of the top.
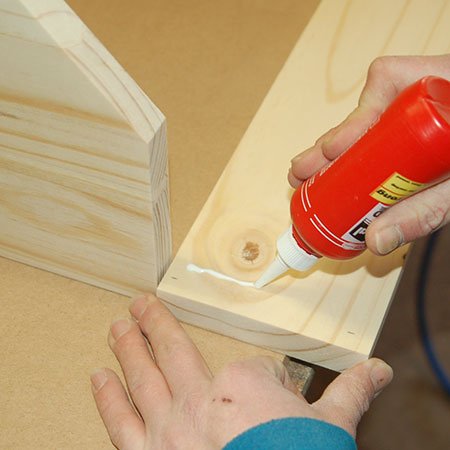
7. Glue the top in place and then add a couple of nails, or use a hammer and panel pins. Do angle the nails or pins slightly for a firm fitting that will never come loose.
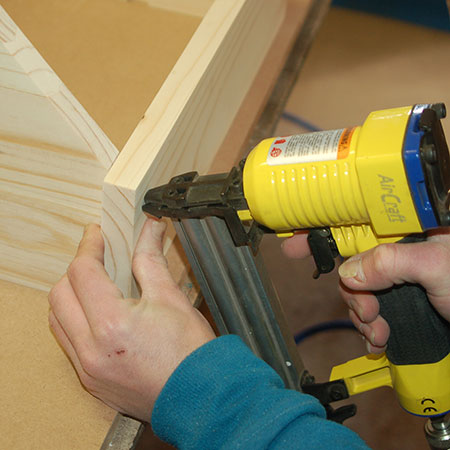
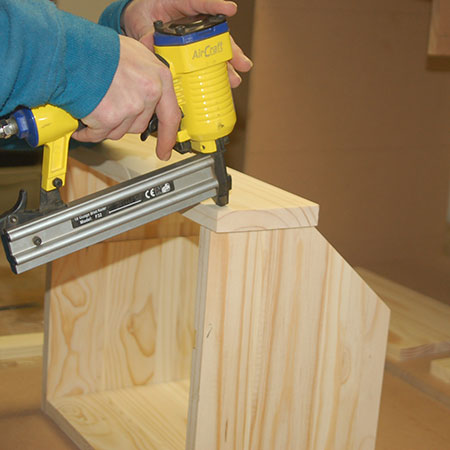

8. Secure the back with wood glue and nails.
9. Make sure to add plenty of nails or panel pins to hold the backing in place.

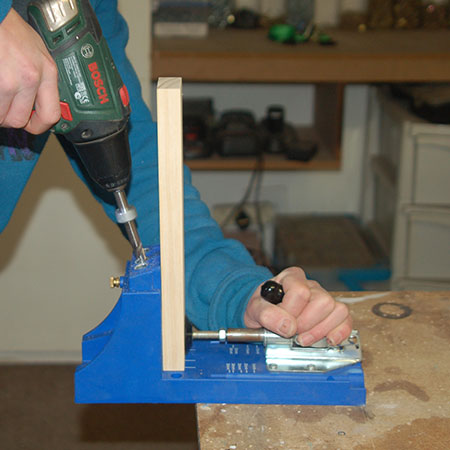
10. Make the door for the bread bin using a Kreg pocket hole jig and wood glue. Drill a single pocket hole at both ends of the top and bottom door sections (270mm long). Join the top and bottom to the sides with wood glue and 32mm screws
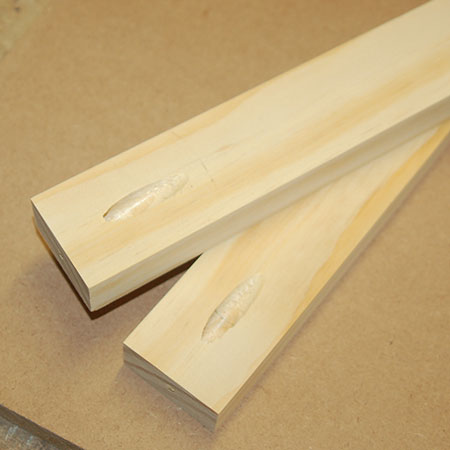
GOOD TO KNOW: I used pocket hole plugs and wood glue to disguise the pocket holes in the door.
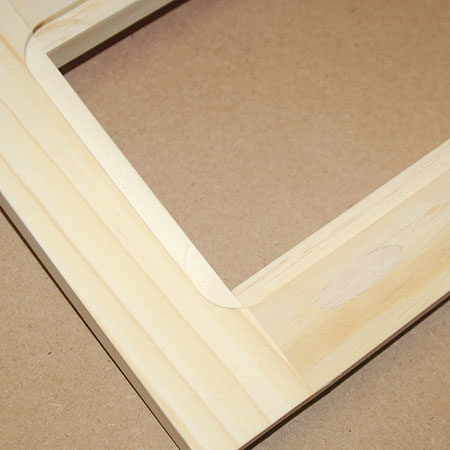
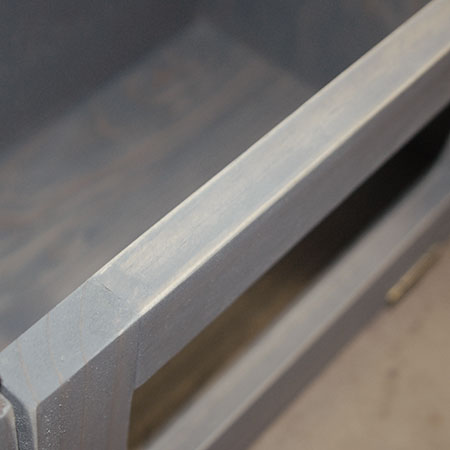
11. In order to fit the plexiglass to the door, use your router to rout a ledge on the back of the door, 5mm deep (or as deep as the thickness of the plexiglass)
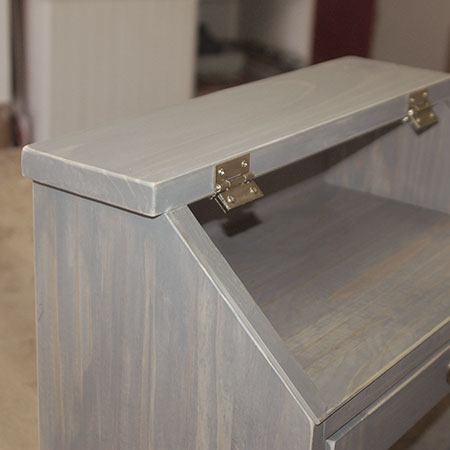
12. Secure the door hinges with 16mm screws, see above and below.
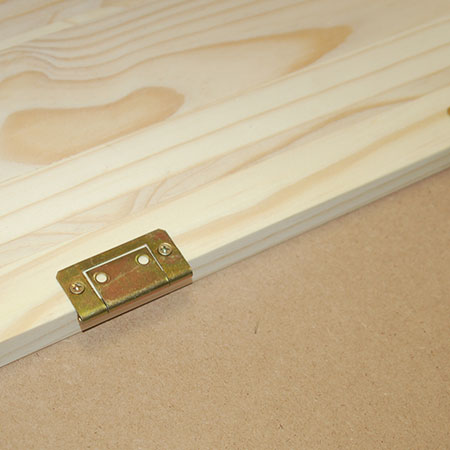
11. Secure the door hinges with 16mm screws, see above and below.
Finishing
I opted to finish the bread bin with Rust-Oleum Ultimate Wood Stain in weathered Grey, this will complement the finished design. I also applied [2] coats of Rust-Oleum Ultimate Polyurethane, matte finish.
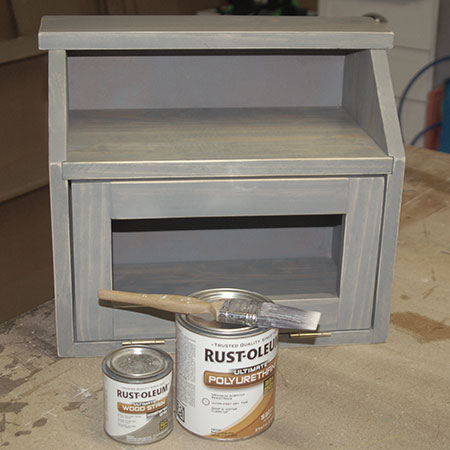
Add a Distressed Effect
After staining but before applying sealer, I roughed up the edges of all the pine with 120-grit sandpaper.
Condition the Cutting Block
The cutting block that also serves as a shelf, was treated with Howard Butcher Block Conditioner.

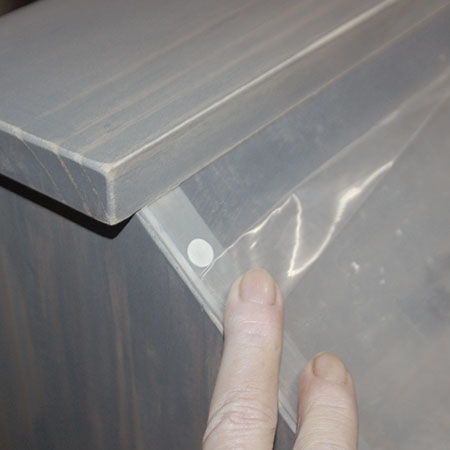
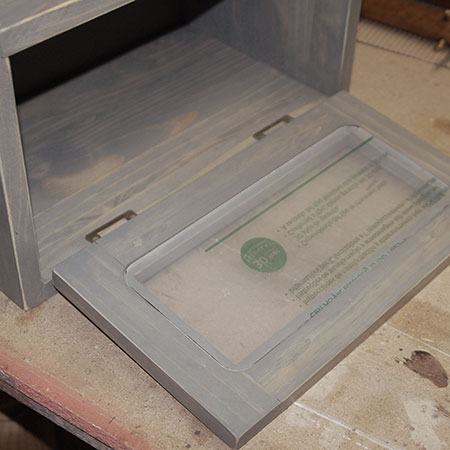
Add the Plexiglass Panels
The plexiglass panel for the door was cut to fit using a jigsaw. It was secured inside the rebate at the back of the door with epoxy glue.
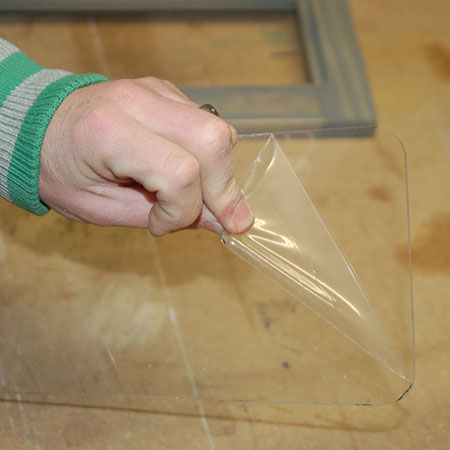
Once cut, you can carefully peel off the protective plastic layers.
The door panel was secured in place using epoxy glue, while the top panel was secured with hinges and epoxy glue.
GOOD TO KNOW: To hold the top panel in place, use a bit of Prestik.