How To Make A Large Or Small Lego Table
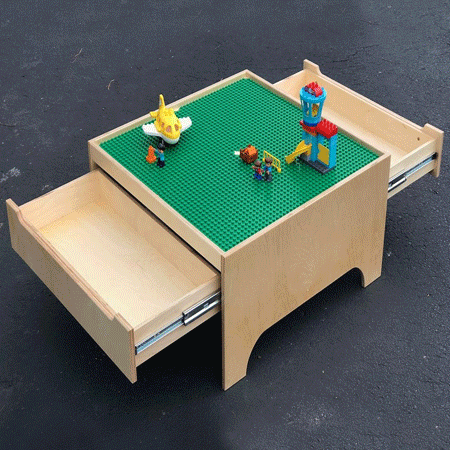
Kids love to play with Lego but the pieces can end up all over the floor while this Lego table has a play area and plenty of storage.
23/04/2021
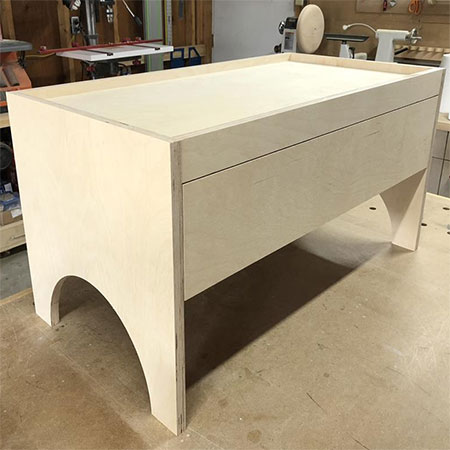
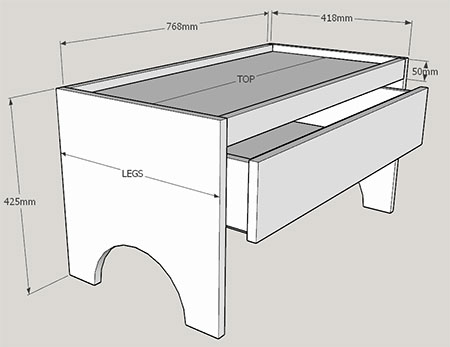
In this project, we show you how to make a Lego table using 19mm plywood. The Lego table has a play area on the top and a drawer for storage of all your child's Lego pieces. It's a great way to keep Lego off the floor and also keep everything in one place.
If you want to make the larger Lego table with two drawers, simply increase the width of the table to accommodate an extra drawer - as easy as that!

LEGO TABLE WITH SINGLE DRAWER
If cutting the plywood pieces to size yourself, make sure to use a jigsaw blade for steel (very small teeth) or one specifically for cutting laminate (also with very small teeth), as this will keep the cut edges neat and reduce splintering. Once the table is finished, take the time to sand well to ensure there are no splinters and the edges are slightly rounded off.
This project is courtesy of kregtool.com and you will find more easy projects on their website.
YOU WILL NEED:
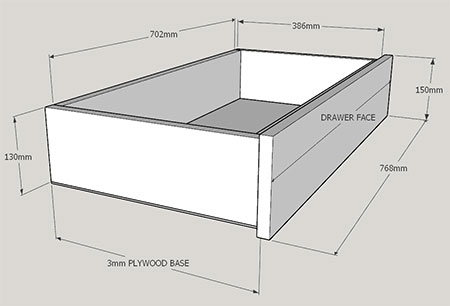
All pieces 19mm plywood with the exception of the 3mm plywood base:
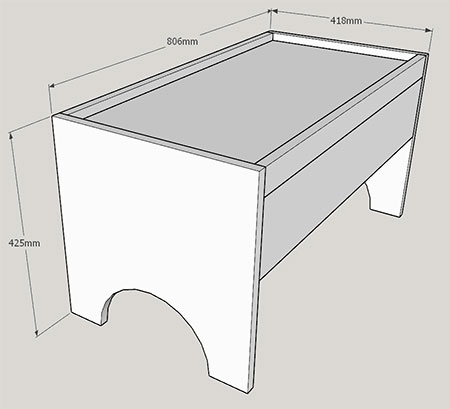
1 of 19 x 768 x 380mm - top
1 of 19 x 768 x 203mm - back
1 of 19 x 768 x 50mm - front
2 of 19 x 425 x 418mm - legs
2 of 19 x 702 x 130mm - drawer front/back
2 of 19 x 385 x 130mm - drawer sides
1 of 19 x 768 x 150mm - drawer face
1 of 3 x 740 x 385mm - drawer base
32mm pocket-hole screws
350mm length ball-bearing drawer runners plus 16mm screws
Wood glue
Double-sided tape
TOOLS:
Drill/Driver plus assorted bits
Kreg Pocket-hole Jig
Jigsaw
Orbital or Random Orbit Sander plus 120-grit sanding pads
Circular template
Heavy-duty Stapler or Pneumatic Stapler
Clamps
Tape measure and pencil
Safety gear
HERE'S HOW:
The instructions for making a Lego table are very simple and the assembly is quick and easy if you are using a Kreg pocket-hole jig. If you don't yet have a Kreg pocket-hole jig, join the pieces together using basic butt joints.
GOOD TO KNOW: Having all the pieces cut to the required size at your local Builders store cuts down on assembly time.
Step 1
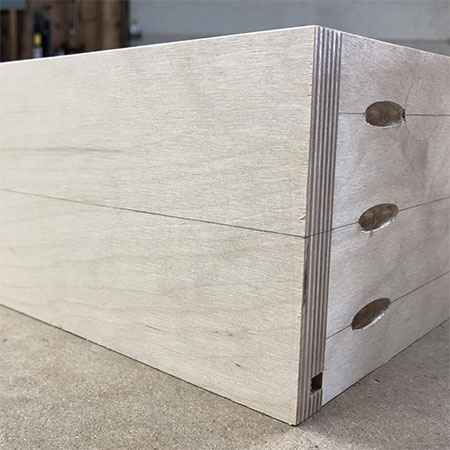
Using a circular template, mark and cut out the curved pieces on the legs. Cut out the shape with a jigsaw and jigsaw blade for cutting steel or laminate to reduce ripping along the edges.
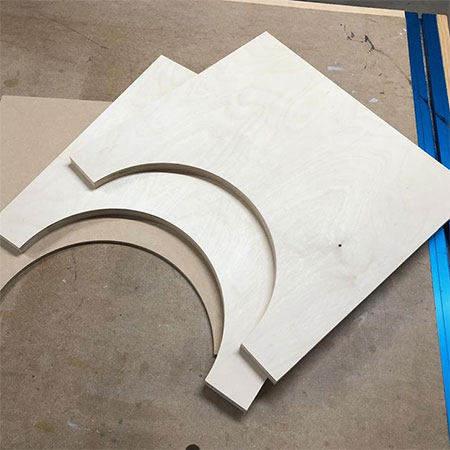
DIAGRAM FOR TABLE ASSEMBLY
Step 2
Set up your pocket-hole jig for 19mm-thick material so that you can drill pocket-holes in the Top and Front sections, as shown below.
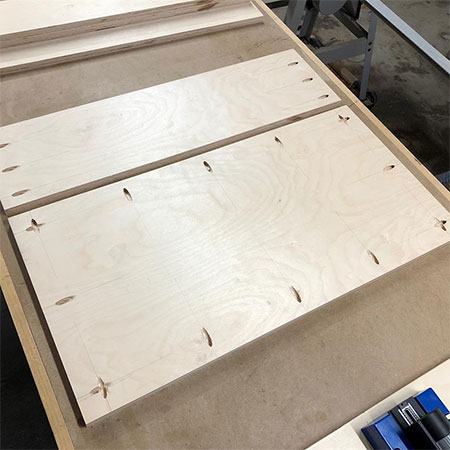
Step 3
Assemble the top section by joining the Front and Back sections to the Top, as shown below. Note that the Front and Back sections are raised and you can use scrap pieces of plywood to elevate these while you join them together. Use wood glue and screws to assemble.
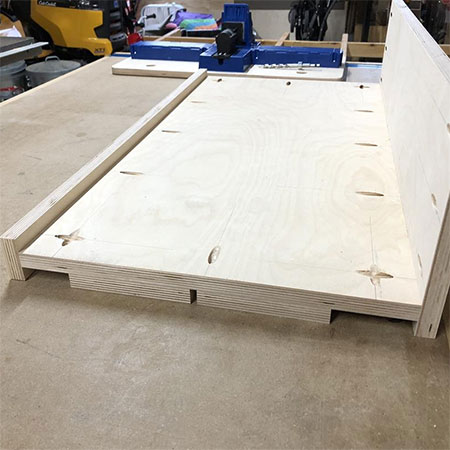
Step 4
Now you can add the Legs to the completed top section. Using clamps make the process easier and stops the pieces from moving around while you work. Use wood glue and screws to assemble.
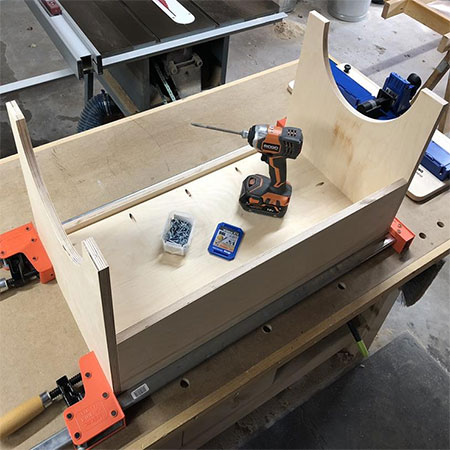
DIAGRAM FOR DRAWER ASSEMBLY
Step 5
Drill pocket-holes in the Drawer Front and Back, as shown below.
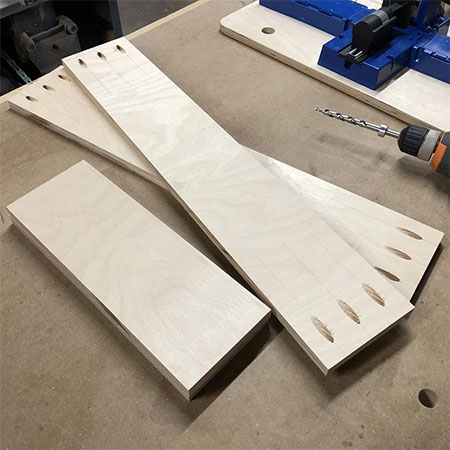
Step 6
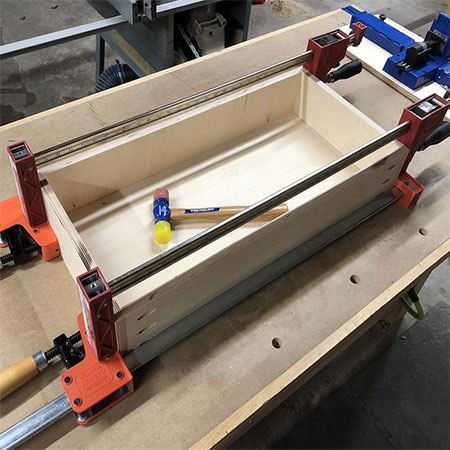
Assemble the individual pieces of the drawer using wood glue and screws. Again, clamps come in handy for holding everything firmly in place while you work.
Step 7
Attach the drawer base to the underside of the complete drawer using wood glue and either a heavy-duty stapler or pneumatic stapler.
Step 8
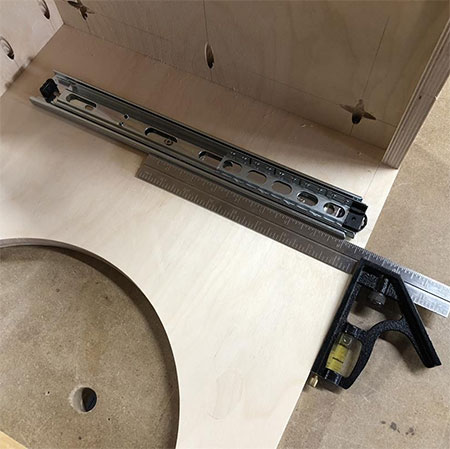
Measure and mark the locations for attaching the drawer runners. Draw a centre line across the side of the drawer side and then transfer this onto the side of the table.
Step 9
Check that the lines are 100% straight before securing the runners onto the table and drawer with 16mm screws.
Step 10
Test that everything fits perfectly or make the necessary adjustments.

Step 11
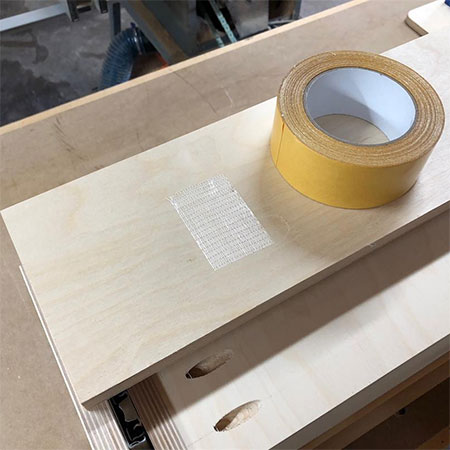
To secure the drawer Face on the assembled drawer, use double-sided tape to position and affix the drawer face and then screw through the back side of the drawer front to secure with [2] screws at either side.
FINISHING
A protective finish is required to make it easy to clean the Lego table. You can apply a clear or tinted varnish and apply with a paintbrush or spray it on.