
Make a handy computer keypad holder
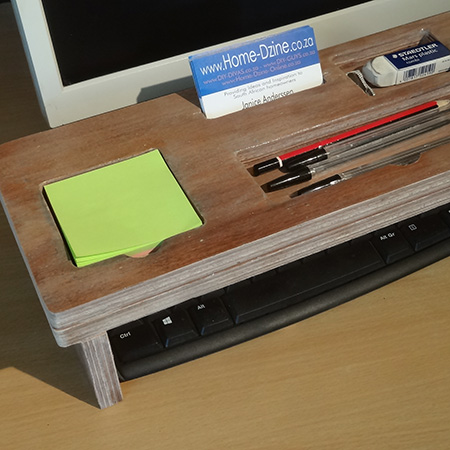
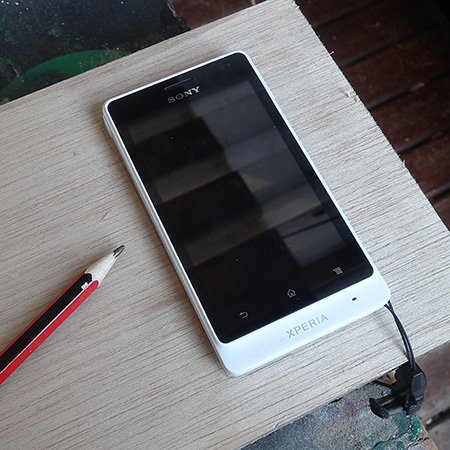
My desk is usually choc full of stuff and it reaches the stage where I have to move piles around just to find a pen. I decided to make a holder to fit over the top of my PC keypad where I can conveniently store items I use everyday - including a place for my cellphone.
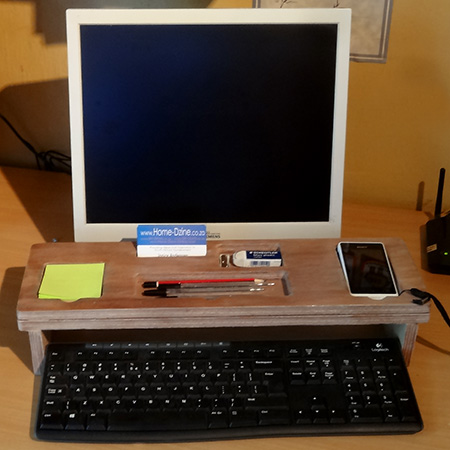
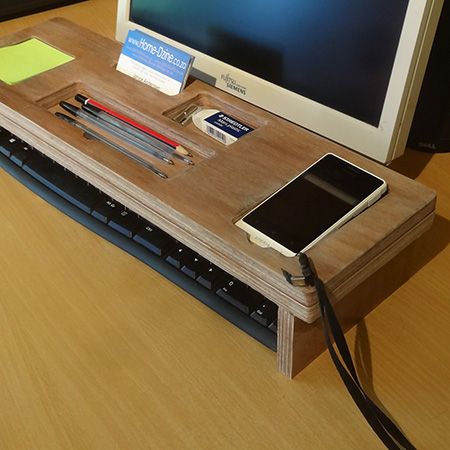
Now everything I need is close at hand and I don't have to rummage through the piles on my desk to find a pen or notepad. There is space for a small notepad, a handy slot to hold business cards and, most importantly, a place to hold my cellphone.
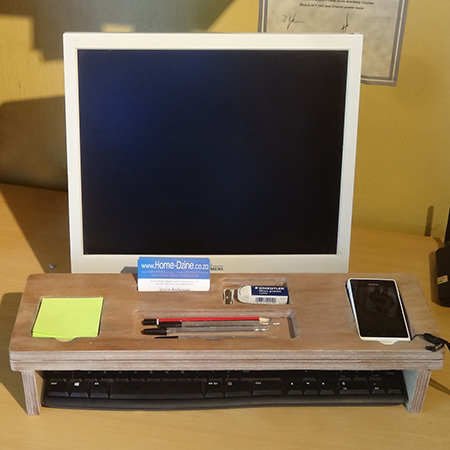
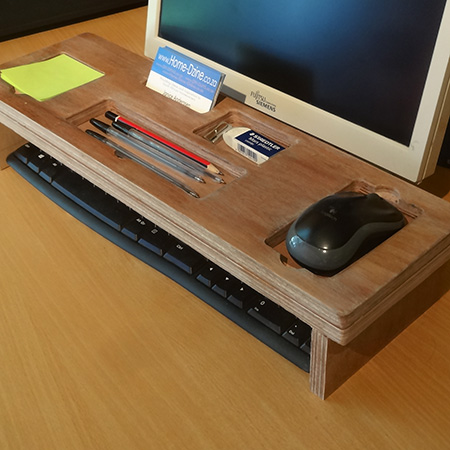
If you don't need to have your cellphone close at hand, you can always use this slot for a mouse.
YOU WILL NEED:
To make the stand you can use any board or timber. I used 16mm marine plywood left over from a previous project.
2 of 150 x 530mm - double-layer top
2 of 70 x 150mm - legs
Woodoc gel stain - we used traditional teak - and a sponge
Woodoc 25W water-borne sealer - matt white
400-grit sandpaper
Pattex No More Nails adhesive
Paintbrush
TOOLS:
Drill/ Driver plus 8mm wood bit - we use a Bosch PSR 18 LI-2 for all our projects
Tork Craft 35mm MAD or spade bit
Jigsaw and clean-cut blade
Sander plus 120-grit sanding pads
Tape measure and pencil
Quick clamps
Optional: Dremel Multitool and fine sanding ring
Buy everything you need for this project at your local Builders store.
HERE'S HOW:
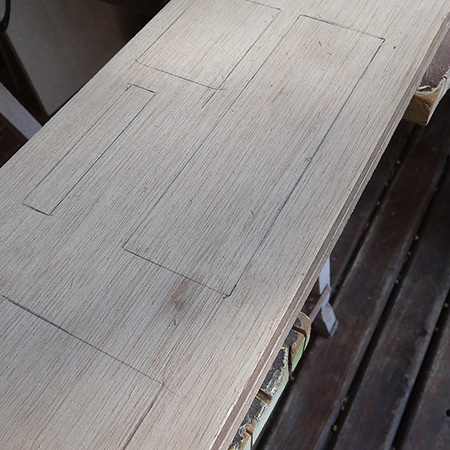
1. Have the items you want to store handy so that you can use them to draw guides on the top piece of the stand.
2. Draw guides for all the holders that you want to cut out.
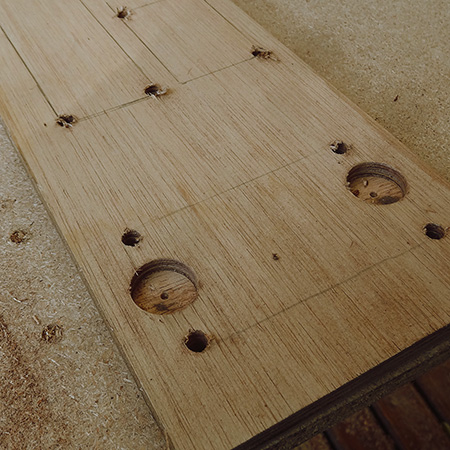
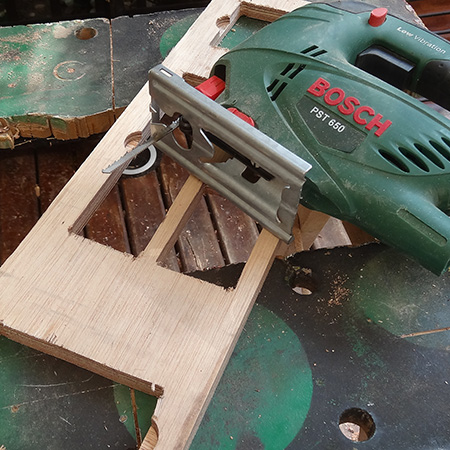
3. Use a Tork Craft MAD or spade bit to drill a slot halfway through the board to make it easy to take items out of the holder. The slots should be drilled with the tip of the bit on the line, so that only half a slot remains when you cut out.
GOOD TO KNOW
Place a scrap piece of board underneath the board
being drilled to reduce chipping and protect your worktop.

4. Use an 8mm wood bit to drill out the corners on all the slots.
5. Now you can insert the jigsaw blade and cut out all the slots.
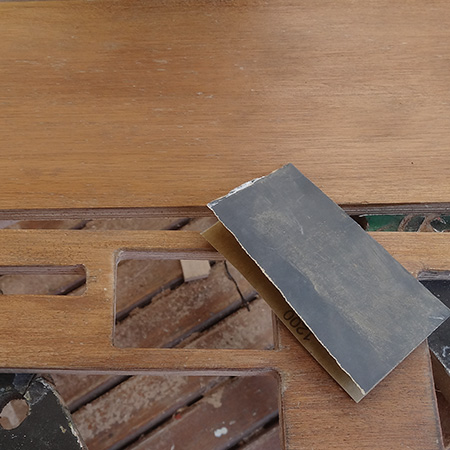
6. Sand both sides with 120-grit and remove the sanding pad to sand inside the cut outs. I used my Dremel Multitool and find sanding ring around the inside of the cut outs.
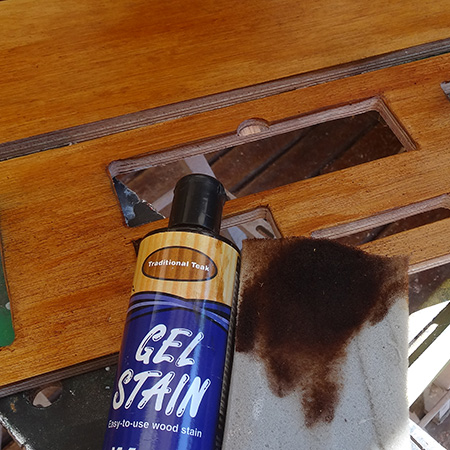
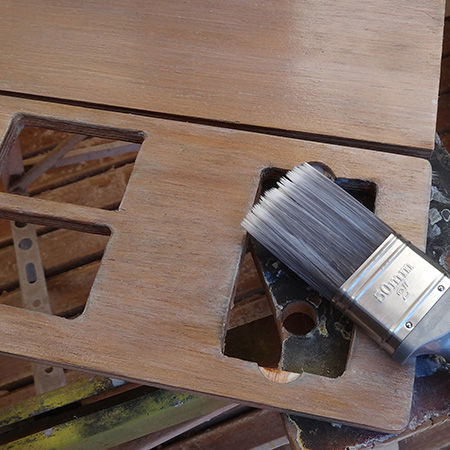
7. For this project I am trying out the new Woodoc 25W water-borne sealer in matt white to give the project a whitewashed finish. I applied Woodoc gel stain (traditional teak) so that it is easier to see how the whitewashed finish looks.
GOOD TO KNOW
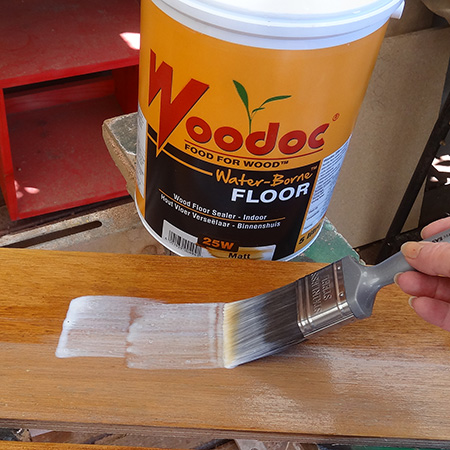
Because
Woodoc 25W is water-borne it is extremely easy to apply and dries quickly. You can rinse brushes under a running tap
- while still wet - to clean them.
8. Apply the first coat, let dry and then sand with 400-grit sandpaper before applying a further two coats.
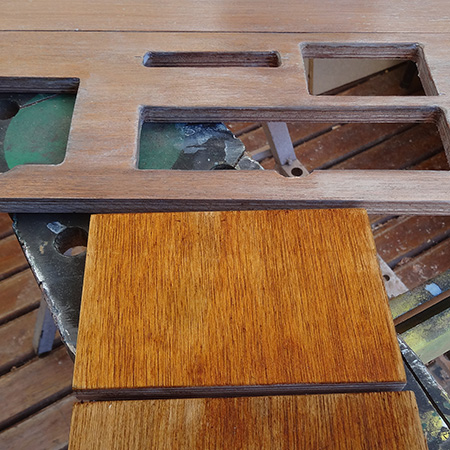
9. Use Pattex No More Nails adhesive to glue the two top sections together and to glue the legs in place underneath. It's a good idea to turn upside down and clamp the legs overnight.
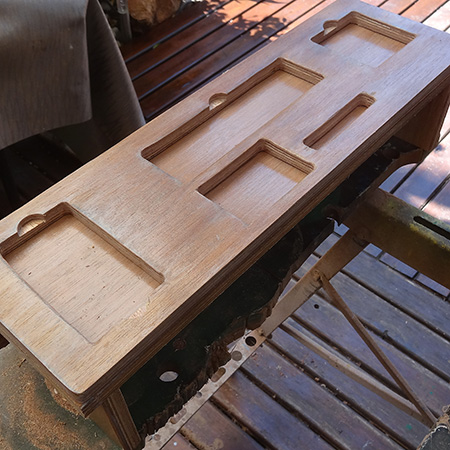
Now your keypad holder is ready for use!