
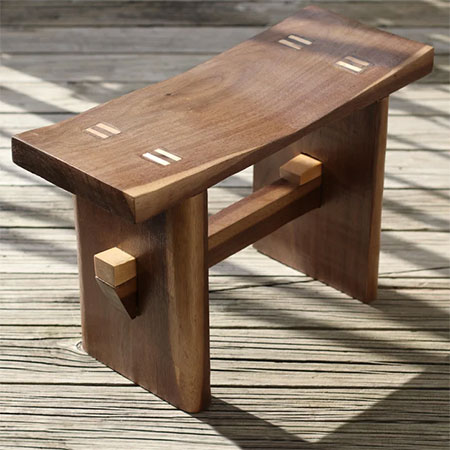
Make A Japanese Stool With Hand Tools
There is a simplicity in using hand tools rather than power tools and this Japanese stool lets you create a wonderfully unique piece for your home.
24/11/2020
I love the joy of working with wood and any carpenter or woodworker will agree that there is nothing more satisfying than getting your hands dirty - usually full of sawdust - to create a piece using only hand tools. Yes, it takes a bit longer than it would if you were using power tools, but nothing beats the satisfaction of completing a job without even putting in a plug.
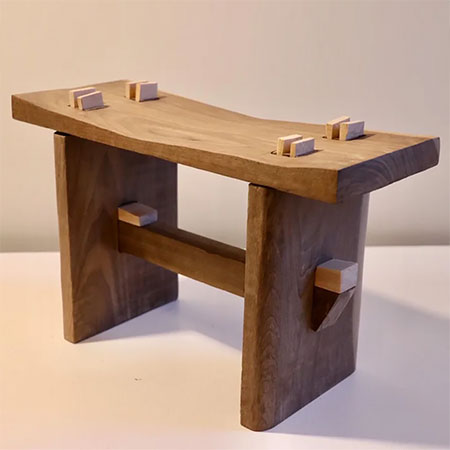
This Japanese stool is a great way to get in touch with hand tools if you haven't used them before, or to reconnect with your beginnings - where you started out. It's also a nice way to make something simple that looks anything but. The Japanese stool shown here is made using walnut and maple, but if you are worried about the cost of these exotic hardwoods, you can always substitute with pine, meranti and saligna, to name a few more affordable wood options. So let's get started and make a Japanese stool.
YOU WILL NEED:
Choice of 2 hardwoods approximately 25mm in thickness
Wood glue
Wood file or steel scraper
120 and 240-grit sandpaper
Oil, sealer or varnish of choice
TOOLS:
Hand saw or Ryoba or Kataba saw
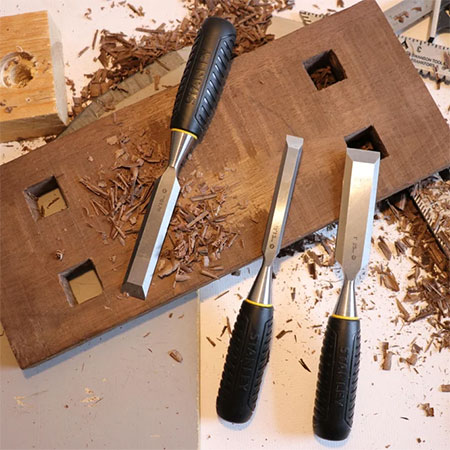
Assorted wood chisels (sharp)
Wood hammer or rubber mallet
Tape measure and pencil
HERE'S HOW:
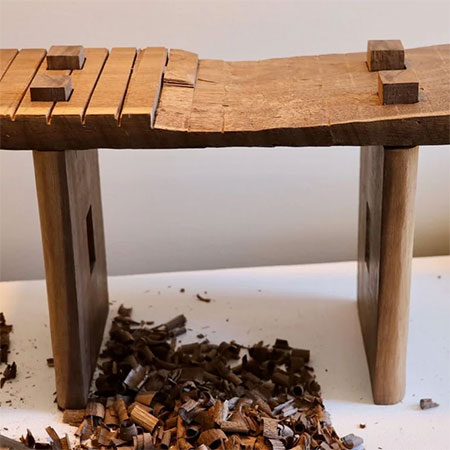
1. The first step will be cutting all the pieces to size. You will need [1] of 356 x 152mm for the seat, [2] of 230 x 152mm for the legs, [1] of 356 x 38mm for the cross piece and a couple of wedges approximately 76 x 25mm and about [8] shims 25 x 25 x 6mm for fixing the legs. All these will be cut using a hand saw or Japanese saw.
2. With all the pieces cut, you can start cutting out the holes with the wood chisels. To assemble the stool you need [4] holes of 25 x 25mm in the seat and [1] in both legs 25 x 64mm. If this is your first time using a wood chisel, be precise as possible and work slowly to avoid spoiling the square holes.
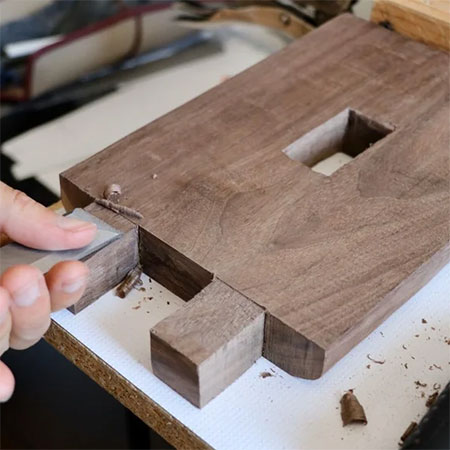
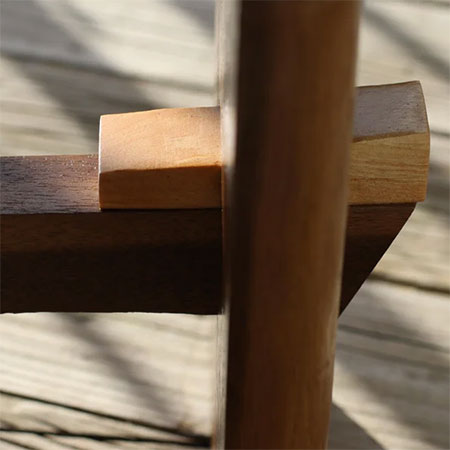
3. Using the cut holes in the seat as a guide, transfer the measurements onto the legs to cut the tenons that fit into the seat - see below for more information on how this should look. You also need to cut [2] slots in the tenons on the sides.
4. This step is optional, but at this stage you can round off the corners of the legs to give a rounded effect. This lends to the overall look of the finished stool.
5. To give the stool seat its curved shape, use your saw to cut through the wood to the desired depth to make the curve. Cutting into the wood in this way makes it easier to remove the waste wood with a wood chisel.
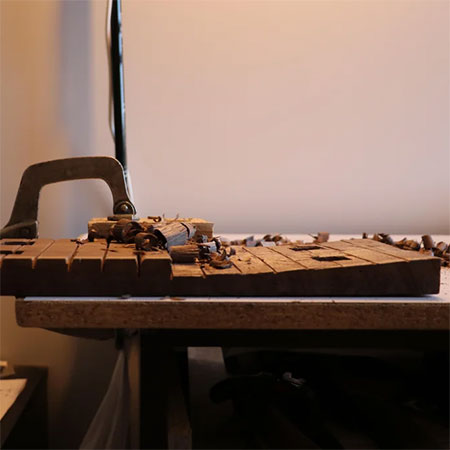
6. After removing all the waste wood, use a wood file or wood scraper to remove any remaining wood pieces and reveal the curved shape. Test fit onto the legs to check the outline and be careful not to remove too much wood from the seat, as this will weaken it.
7. To complete the assembly, you still need to cut the cross piece. Cut a 30-degree angle at both ends of the cross piece, as shown below.
8. Test that all pieces fit together nicely before using wood glue and wood hammer or rubber mallet to tightly insert all the shims that hold the sides and cross piece firmly in place.
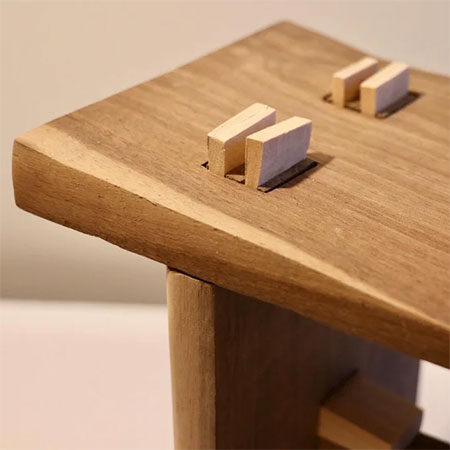
9. Cut all the wedges and shims into spikes at one end until the fit nicely in-between the slots and gaps to lock all the pieces in place. Cut away the excess wood flush with the top of the seat.
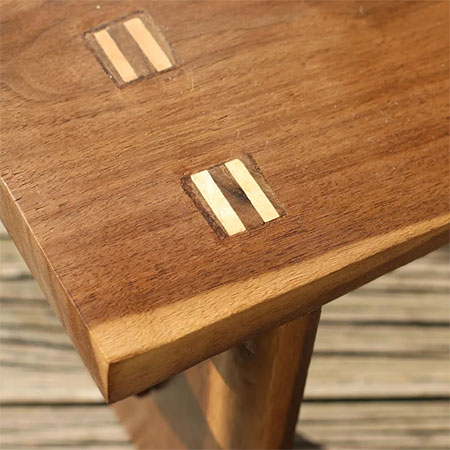
Trim all the wedges and shims to a sharp edge on one end so that they firmly lock all the pieces into position. Trim away excess wood on the seat.
Finishing
Now that the Japanese stool is assembled, sand down with 120- and then 240-grit sandpaper and wipe clean before applying your choice of oil, sealer or varnish.

Adapted via article on Instructables.com