
DIY Industrial Style Shelf
Here's an easy way to make an industrial style shelf without using steel or welding. This easy project shows how to make an industrial style shelf using wood.
30/11/2017
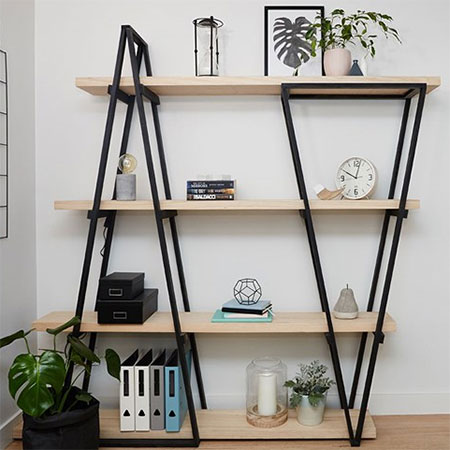
Make your own industrial style shelf without using steel or welding. This DIY project shows how to make an industrial style shelf using wood and clever use of spray paint.
YOU WILL NEED:
Large triangular frame - 19 x 44mm pine cut to size:
- 7 of 330mm - 2 of 245mm - 2 of 700mm - 4 of 2030mm
Small triangular frame - 19 x 44mm pine cut to size:
- 5 of 330mm - 2 of 245mm - 2 of 700mm - 4 of 1750mm
4 of 2030mm laminated pine shelving
4 x 50mm cut screws
3.5 x 30mm cut screws
Wood glue
Wood filler
Rust-Oleum 2X - satin canyon black
TOOLS:
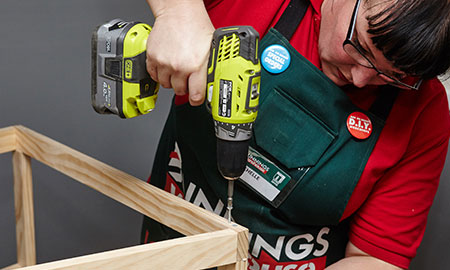
Drill / Driver plus assorted bits
Mitre saw
Orbital sander
Tape measure and pencil
Have all your timber cut to size at your local Builders.
HERE'S HOW:
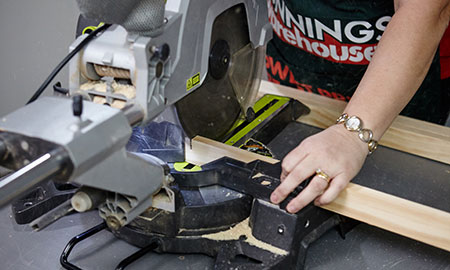
1. Set the cutting angle on your mitre saw to 10-degrees to cut the 2030mm lengths of timber with a 10-degree mitre cut at the end. Do this for all four pieces. All angles should be exactly the same at the top and bottom.

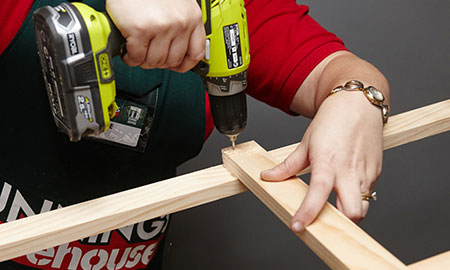
2. To assemble the A-frame sections, take the two longer (2030mm) pieces and a 700mm piece and lay them out to form a triangle. Clamp the pieces to your workbench to drill 3mm pilot holes. Use wood glue and 50mm screws to assemble. Repeat for the other A-frame.
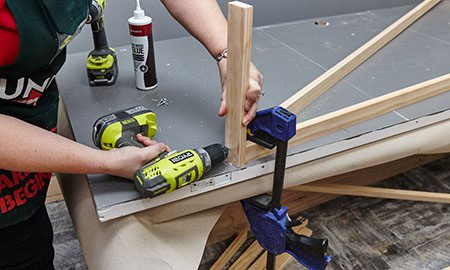
3. Place the 330mm brace at the apex of the triangle and drill pilot holes before gluing and screwing onto the top of the triangle. Attach two 245mm pieces to the base using the same method.
4. To join the A-frames, place one frame on top of the other. You can use an offcut to support the frame while you work. Drill pilot holes before securing with wood glue and screws at each corner of the A-frame.
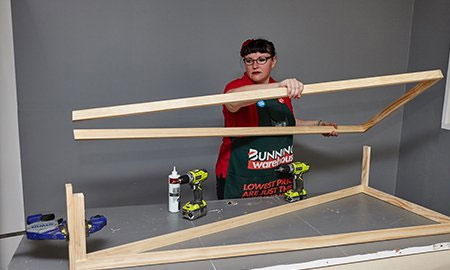
5. Use the steps above to make the smaller A-frame with 1750mm lengths.
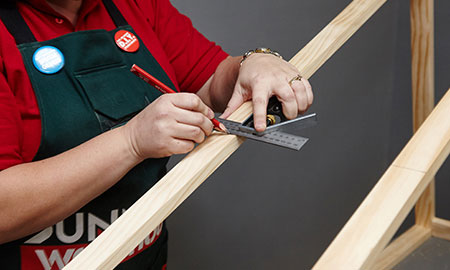
6. Measure and mark where you would like the shelf supports to be mounted. Do ensure that the measurements align on both the large and small A-frame. For our project: The first shelf on the smaller A-frame measured 510mm from the base or apex. The next shelf measured 610mm from the bottom of the first shelf to the bottom of the second. From the bottom of the second shelf to the top of the frame measured 660mm.
GOOD TO KNOW: To ensure accurate measurement on both large and small A-frames, take the inverted (smaller) A-frame and place a straight edge across the top to establish where the supports should go for the larger triangle. Repeat this step for each support along the height of the A-frame.
7. Attach the supports to the outside of the A-frames, using the marks as your guide. Drill pilot holes and secure in place with wood glue and 30mm screws. For this project two supports were attached to the smaller A-frame - the top of the frame formed a shelf support in its own right. For the larger A-frame we attached three shelf supports to the outer frame.
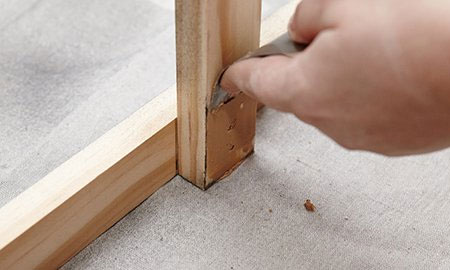
8. Fill all the screw holes with wood filler. Leave to dry and lightly sand with 120-grit sanding pads. Also sand the entire frame with 220-grit sanding pads to smooth off ready for painting. Wipe clean to remove all dust.
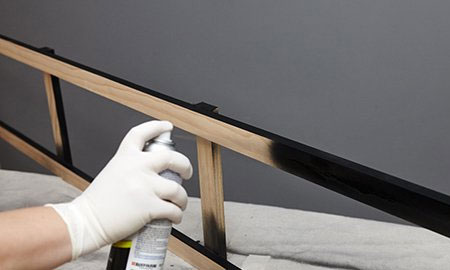
9. To give the shelf supports an industrial theme, we applied Rust-Oleum 2X spray paint in satin canyon black. Use smooth, even slightly overlapping strokes to ensure a seamless finish.
GOOD TO KNOW: When using spray paint work in a well ventilated room.
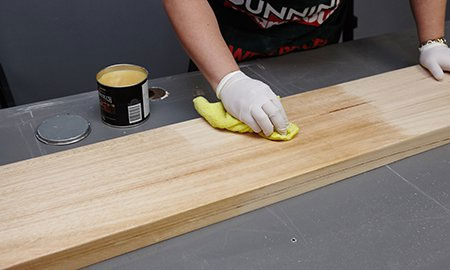
10. Sand the shelves with 220-grit sanding pads, wipe clean and then apply your choice of oil or wax finish., or apply a sealer or polyurethane varnish.
You will need an extra pair of hands to hold the inverted A-frame while you insert the shelves onto the supports. You can secure the entire assembly with screws if you want a sturdier bookshelf. For more details view the video below.