
How to Make an Upholstered and Tufted Ottoman
An upholstered ottoman is a great addition to a room that needs extra storage, and a tufted ottoman adds a touch of elegance to a room.
16/02/2020
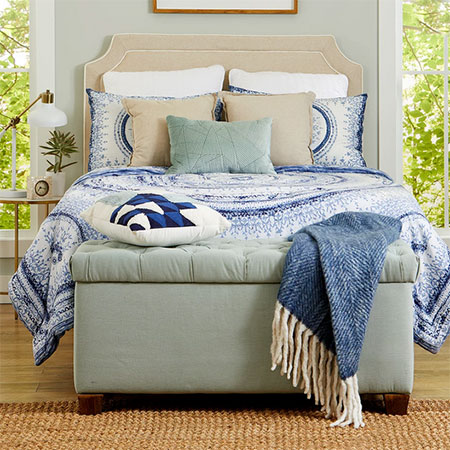
After hosting classes to make upholstered ottomans for the past 14 years, I thought it might be a nice change to do an ottoman project and finish it with a tufted design on the lid. An upholstered ottoman is a great piece of furniture to have in a room that needs extra storage, and the tufted design adds a touch of elegance to a bedroom.
An ottoman is the ideal piece of dual-purpose furniture that not only provides comfortable seating, but also a place to store items.
YOU WILL NEED:
To make the box:
- 4 of 400 x 600mm 16mm SupaWood - base, top, front and back
- 2 of 368 x 400mm 16mm SupaWood - sides
45mm cut screws
Piano hinge, 580mm plus 16mm screws
Foam cut to size for lid
Upholstery fabric and medium-weight batting, see cutting details below
Upholstery buttons plus small metal buttons for the back of the lid
Waxed thread
4 of choice of legs plus 16mm screws
OPTIONAL: Lining fabric
Sprayable adhesive
TOOLS:
Drill / Driver plus assorted bits
Sewing scissors
Upholstery needle, long
Pneumatic staple gun or Bosch Tacker
Tape measure and pencil
HERE'S HOW:
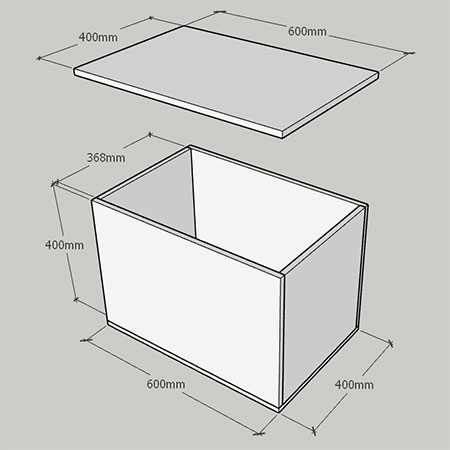
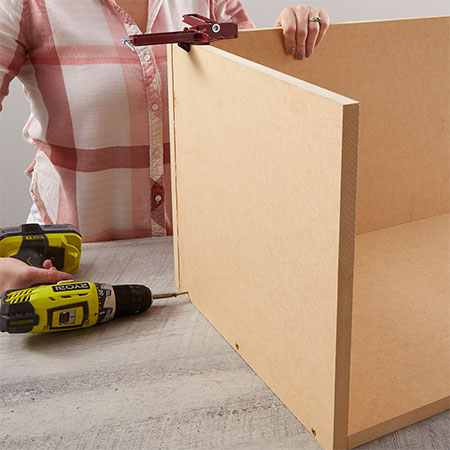
1. Start this project off by assembling the box that forms the structure for the ottoman. You can modify the measurements to make a longer ottoman - if you want to place this at the bottom of your bed. If the size exceeds 1000mm in length, add an additional 2 legs to the base for support.
2. Spray the front, back and sides of the assembled box with sprayable adhesive. Wrap the batting around the front, back and sides of the box and trim to length. Make sure that you have a small amount of batting spare at the top and bottom for folding over.
GOOD TO KNOW: If required, or if you are not using sprayable adhesive, pop a couple of staples along the edge of the batting to hold it in place as you wrap around. Add a further 2 staples along the edge once you're done. This will hold the batting firmly in place.
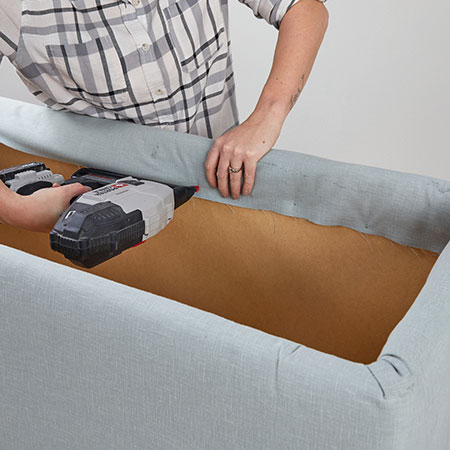
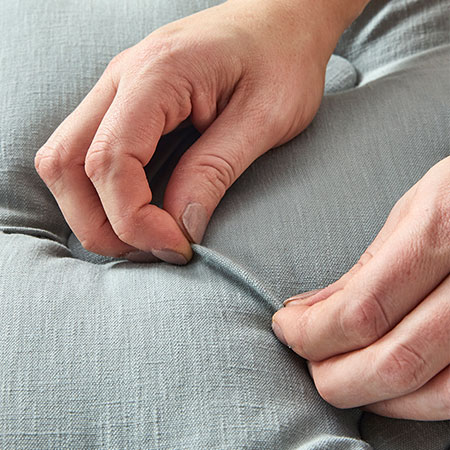
3. As with the batting, the fabric should be cut to allow excess at the top and bottom for folding over. Wrap the fabric over the batting and around the box. Start at the centre back and pop in a couple of staples to hold in place while you continue to wrap the fabric around the box. Make sure the fabric is taut but not too tight and then fold over the edge and staple in place - see below.
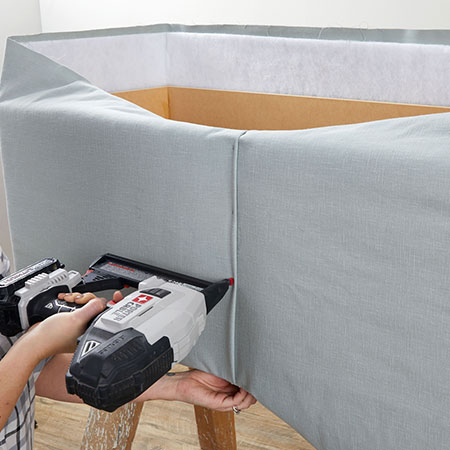
4. Now you will fold both the fabric and batting over the top of the box to the inside and secure with staples all around the inside of the box.
GOOD TO KNOW: Work as neatly as possible and pleat and fold the fabric into the corners for a tidy finish.
5. Flip the box over and fold over the batting and fabric to staple on the base of the box. Pleat and fold neat corners.
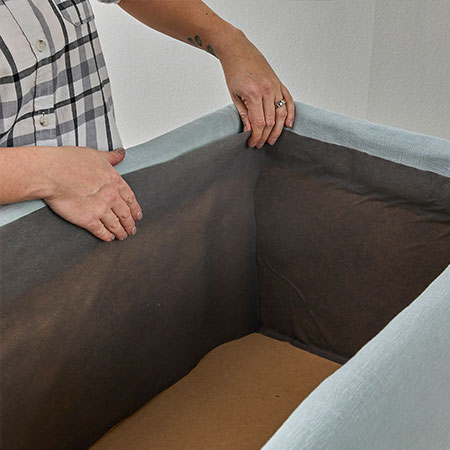
6. This step is optional, but if you want to give your ottoman a professional finish, cut lining fabric to fit inside the box. Use sprayable adhesive to secure. Adding lining fabric gives the inside of the box a neat finish and hides your handiwork. After doing the inside of the box, you can repeat this for the base of the box.
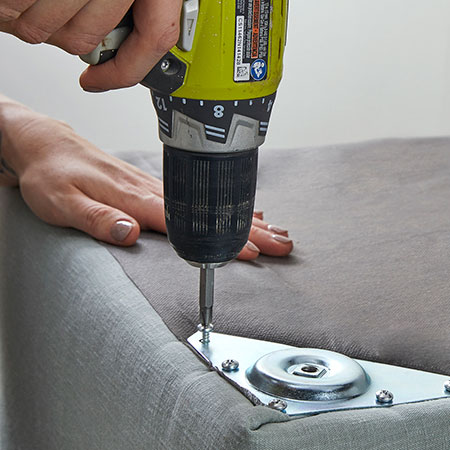
7. Place your choice of feet on the base of the box, making sure they are at equal distance at the four corners and secure with screws,
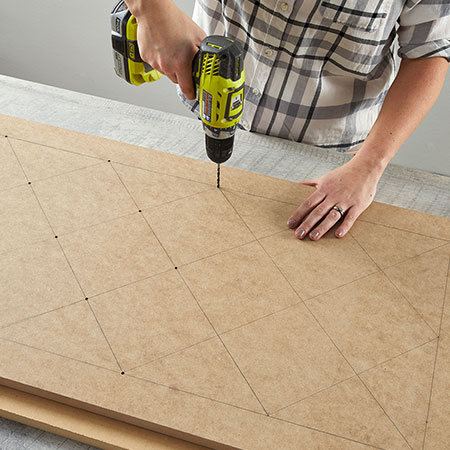
8. For the tufting part of the project, on the back of the lid, measure and mark the diamond pattern. Allow a 50mm gap all the way around so that the holes will not be too close to the edge, as this will spoil the finish.
GOOD TO KNOW: Place a piece of scrap wood underneath where you will drill to protect your work surface.
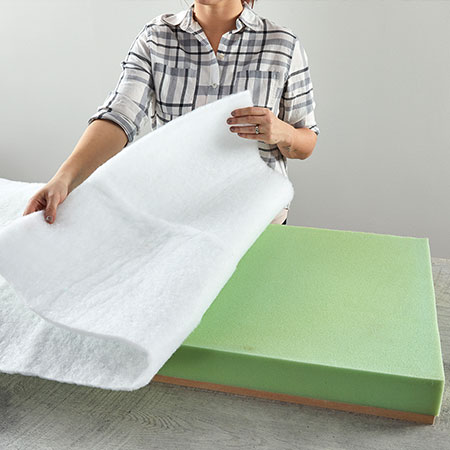
9. On the top of the lid, spray the lid with sprayable adhesive and place the foam on top of this. Cover with batting, ensuring there is plenty of fabric to fold over and under the lid - see next step for more details.
10. To begin the tufting process on the lid, first, cover the buttons with your choice of fabric. The upholstery fabric for the lid should be cut with extra allowance for tufting. Allow enough fabric to cover the top and sides and then double this amount. This will ensure you have plenty of fabric.
11. Position the upholstery fabric over the foam and batting, making sure to centre as best you can. Fold the fabric over the top and bottom edges of the lid to allow you to work with the lid on one side, as shown below. Thread the needle with a 300mm length of waxed thread and add a large knot at the end. Thread a steel button onto the waxed thread. Start the tufting process through the back of the lid to come out at the centre hole. This will leave the button on the back of the lid.
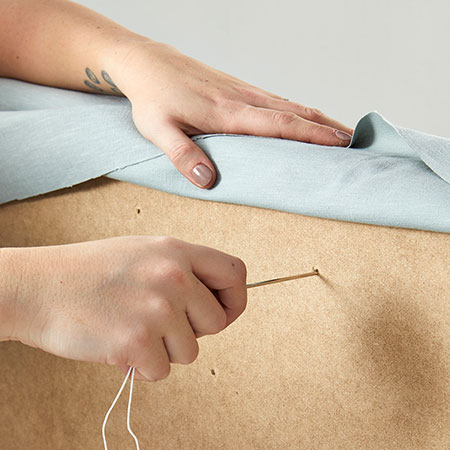
12. Pull the needle through the top fabric and add your first button. Place the thread through the button shank twice and slide the button down to the fabric.
GOOD TO KNOW: For a taut tufting on the top of the lid, I like to have someone help me with this next step.
13. Push down on the fabric and pull the thread as tight as possible to create a depression in the fabric. The tighter you can pull - the deeper the depression and better the finished effect. Cut the thread to tie a double knot and complete the first tuft. Repeat the knot a couple of times and then trim away excess thread. Repeat this process, working from the centre out towards the edges until all the holes are tufted.

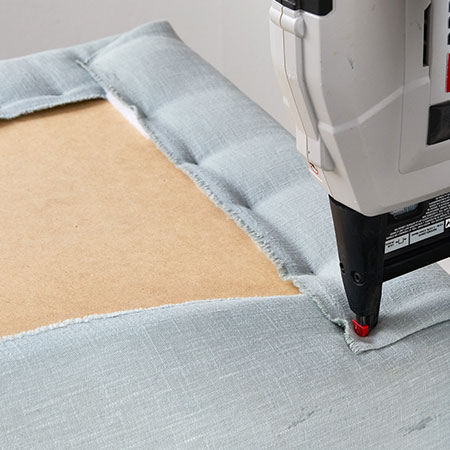
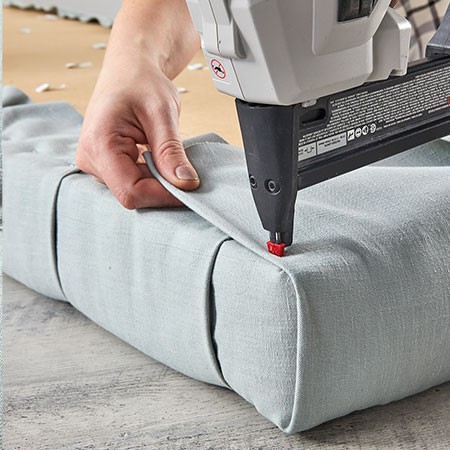
14. Along the top edge of the lid, pleat and fold the excess fabric into a straight fold that runs towards the underside of the lid. Pull the fabric taut as you working and before securing the fabric to the underside of the lid with a staple. Repeat this step to complete the top edge of the lid.
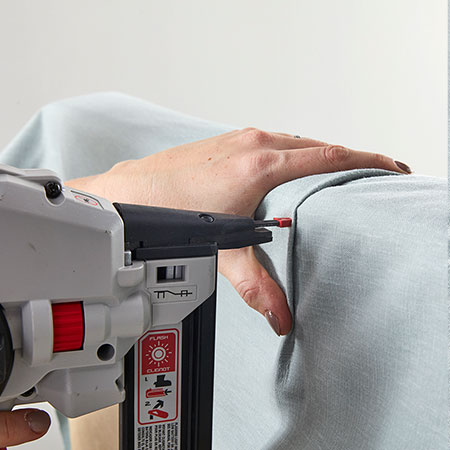
15. With the edge row completed, move down to the second row to continue, pleating and folding as you work towards the bottom edge.
16. As in Step 14, repeat the process to finish off the bottom edge and then do the same with the side edges. Then place the board face down on your work surface to pleat and fold any excess fabric before securing with staples. Make sure your corners are neat before stapling the fabric.
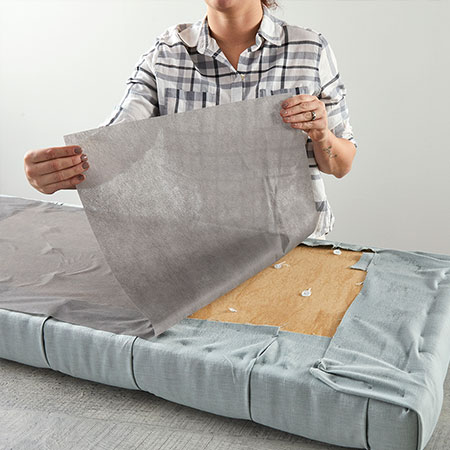
17. To finish off the underside of the lid, apply sprayable adhesive to the lid in order to cover with lining fabric. Press around the edges to secure in place.
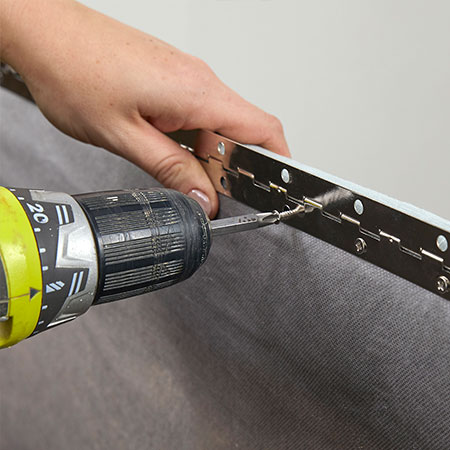
18. Now all that's left to do is to attach the piano hinge using 16mm screws. If the fabric twists as you drive in screws, reverse and try again.
Your finished upholstered and tufted ottoman is now ready for use.
better homes and garden