
How To Make A Pegboard Storage Shelf
This pegboard storage shelf is handy for storage in almost any room in a home and it's easy to make.
02/05/2021

A pegboard is an easily customisable storage solution that can be made in any size or shape to add attractive storage to a room. You can make this pegboard storage shelf using laminated pine shelving, PAR pine for the shelves and pine or meranti dowels, all of which are available at Builders and are not too expensive and the project itself will only take you an hour tops.
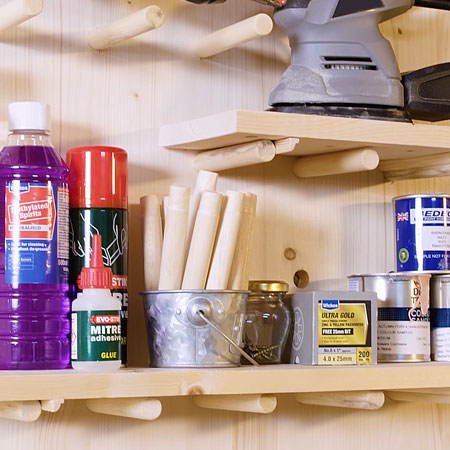
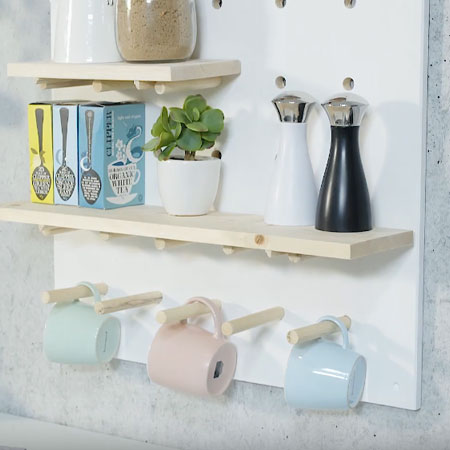
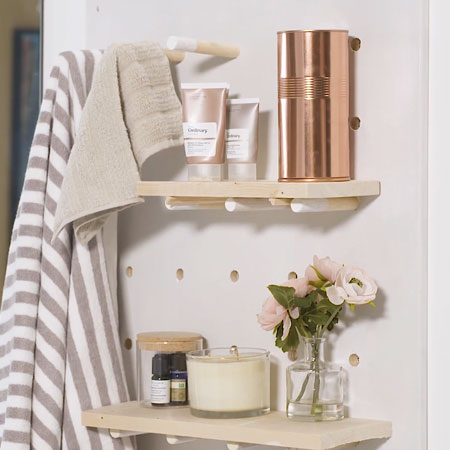
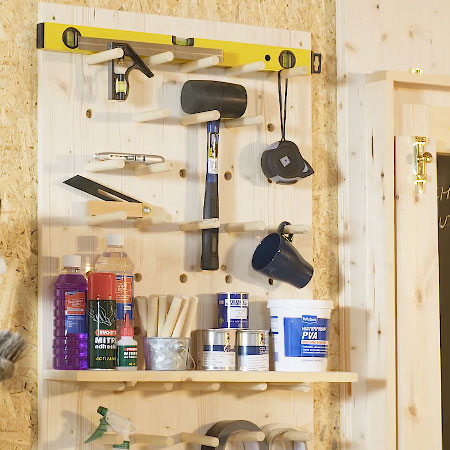
The easy DIY storage solution for a bathroom, kitchen or workshop, you can add or remove pegs in any configuration to allow for fitting shelves to hold accessories or store items. It is great in a workshop for all your smaller items you use on a regular basis or you can use it in a kitchen or bathroom for storage that won't take up floor space and still provide plenty of storage.
Quick and easy to make, this pegboard storage shelf is a practical solution for any room in the home.
This pegboard storage shelf is so easy to make, you will want to make more than one. It is also ideal for storage in your garage or workshop.
After making the pegboard storage shelf, be sure to apply clear or tinted sealer or varnish to protect and preserve your project and make it easier to keep clean.
YOU WILL NEED:
Laminated pine shelving
Pine or meranti dowels, 12mm diameter
PAR pine for the shelves
TOOLS:
Drill/Driver plus assorted bits
12mm spade bit
Sander plus 120-grit sanding pads
Jigsaw, mitre saw or tablesaw
Tape measure and pencil
Clamps
Safety gear
HERE'S HOW:
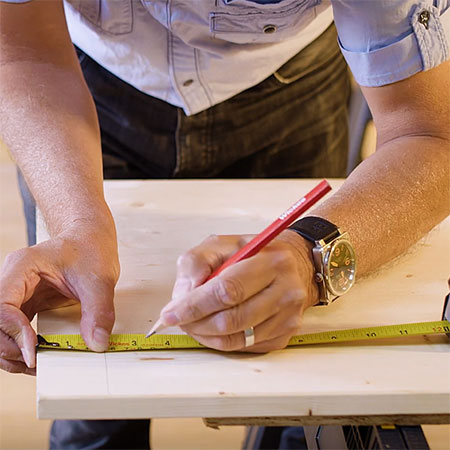
Step 1
Measure and mark to cut the board to size.
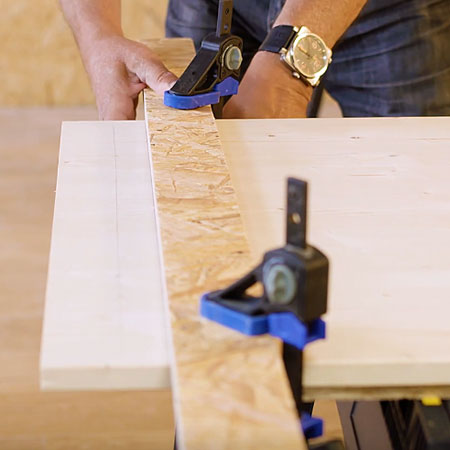
Step 2
Use a piece of board as a straightedge to guide you while you cut the board to size. Clamp firmly on both ends, as shown below.
Step 3
Trim the board to the size required for your project.

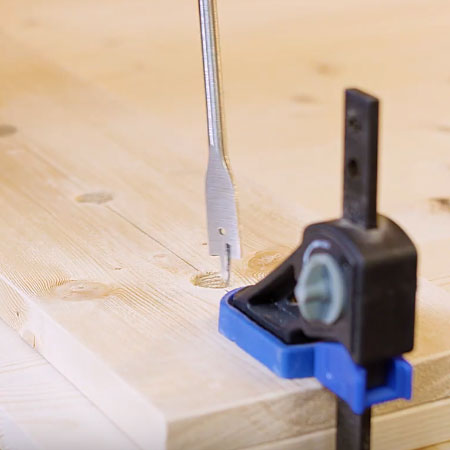
Step 4
Make a jig (template) that is marked and drilled out with 12mm holes. You can use this to drill all the holes in the backing board.
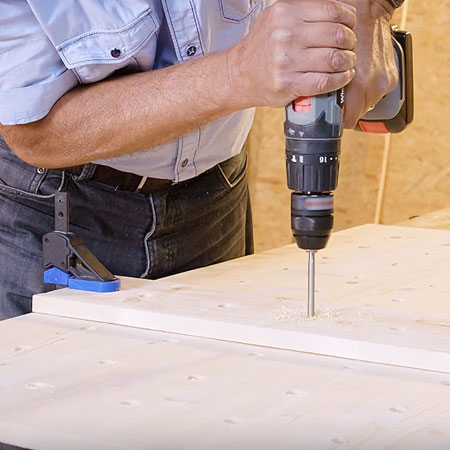
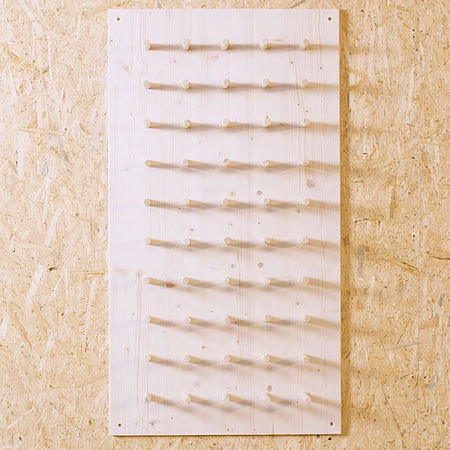
Step 5
Use the jig and a 12mm spade bit in your drill to drill the entire sheet for the dowels that will hold the shelves in place.
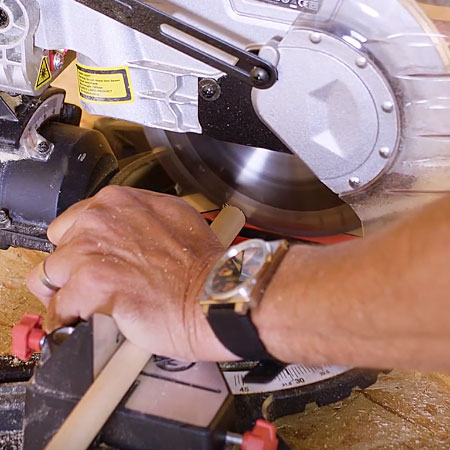
Step 6
Cut the dowels to the required length. This will be determined by the total width of the PAR pine shelves with the pegs being slightly shorter.
Step 7
If the dowels are a tight fit or the dowels are slightly larger, use a craft knife to whittle the bottom for a snug fit into the holes.

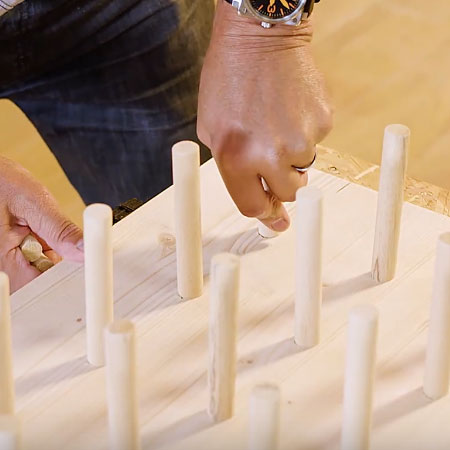
Step 8
Do a test fit to make sure that the dowels fit snugly into the drilled holes.
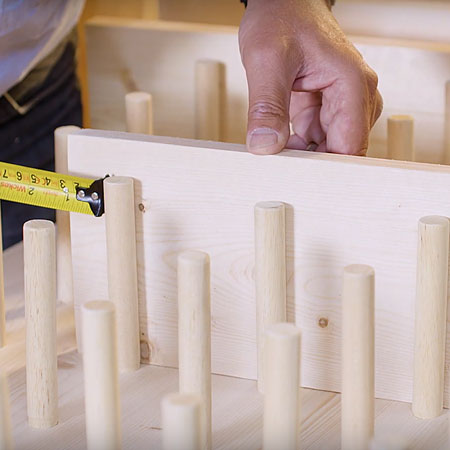
Step 9
Measure and cut the shelves required for your board.
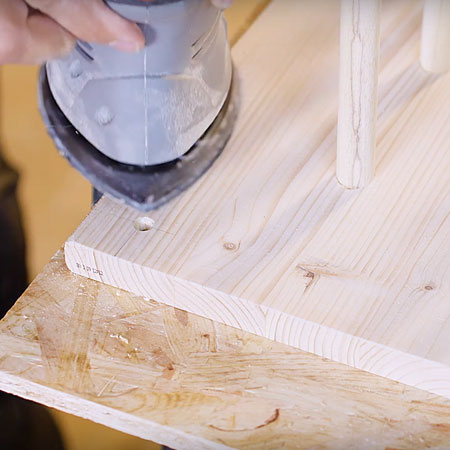
Step 10
Sand all the pieces smooth before finishing with clear or tinted sealer or varnish. Applying a sealer or varnish will not only protect the wood but it will also make it easier to keep the pegboard clean.
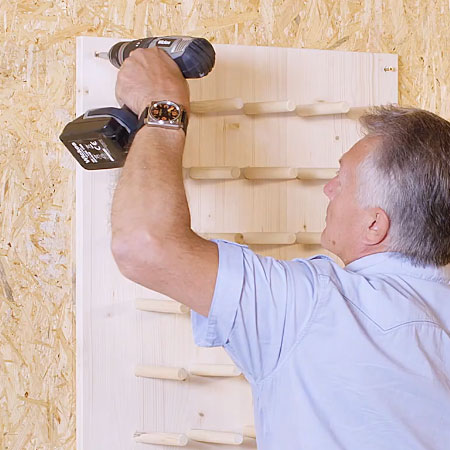
Step 11
Mount the pegboard to the wall using nylon wall plugs and screws. Have a spirit level handy to make sure that everything is level.
And there you have it... an easy pegboard storage solution for your home.
wickes