
DIY Stylish and Unique Serving or Bar Trolley
If you love to entertain, a serving or bar trolley is a must-have and this DIY bar trolley is an easy project that is affordable and stylish at the same time
08/12/2020
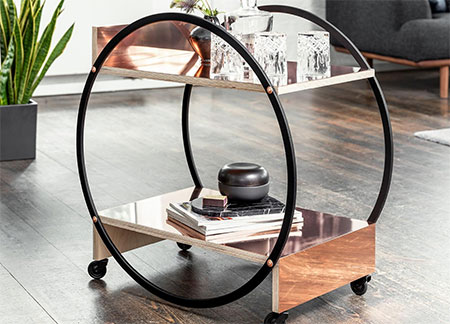
You don't come across many bar or serving trolleys at furniture or home decor stores, and when you do they don't always look great. This DIY serving or bar trolley is stylish and unique and is an easy project you can complete in a couple of hours. The frame is made using two wooden plywood hoops - or you can substitute with plastic hula hoops. The shelves on the trolley are clad in copper sheets but you can also use stainless steel or aluminium sheeting to finish off, depending on your personal preference.
YOU WILL NEED:
Make your own wooden hoops or buy plastic hula hoops - 700mm diameter
2 of 18 x 400 x 600mm plywood - shelves
3 of 18 x 400 x 100mm plywood - aprons
Sheet metal in copper, stainless steel or aluminium, 0,8mm thick cut to:
- 1of 582 x 400mm
- 1of 600 x 400mm
- 3 of 120 x 400mm
- 1 of 100 x 400mm
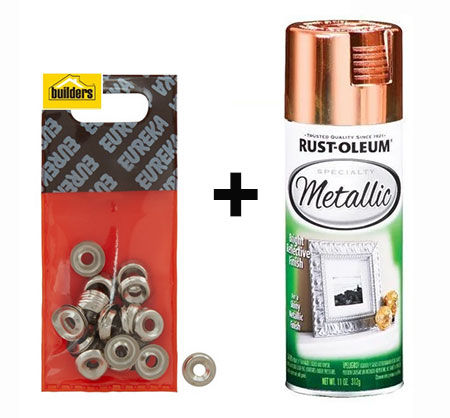
4 of Caster wheels, 40mm, 30kg load capacity
4 x 50mm cut screws and screw cups / finishing washers
4.5 x 60mm screws with washers
Rust-Oleum satin canyon black spray paint
Masking tape
No More Nails adhesive
Painter's Tape
OPTIONAL: Spray the cup or finishing washers with metallic copper spray paint.
TOOLS:
Drill / Driver plus assorted bits
Multi or orbital sander plus 240-grit sanding pads
Bessey Kliklamps or quick clamps
Drop cloth or newspaper
Tape measure and pencil
HERE'S HOW:
1. Start by making the wooden hoops, or skip this step if you are using plastic hula hoops.
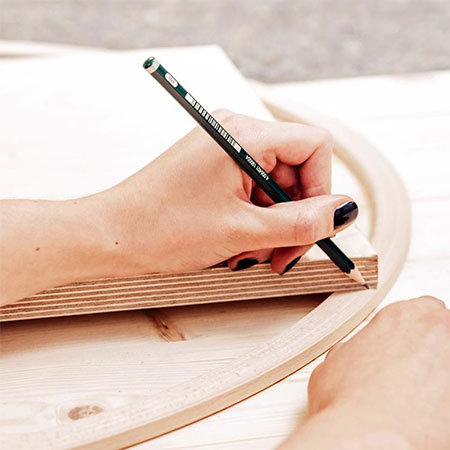
2. Place [1] 400 x 600mm board on top of a hula hoop with the short ends flush with the hula hoop as shown in the image below. Mark the four position on the hoop. Determine the centre point for the four marks.
3. Place two hoop on top of each other on a piece of scrap board and then drill a 3mm pilot hole at the mark centre-points.

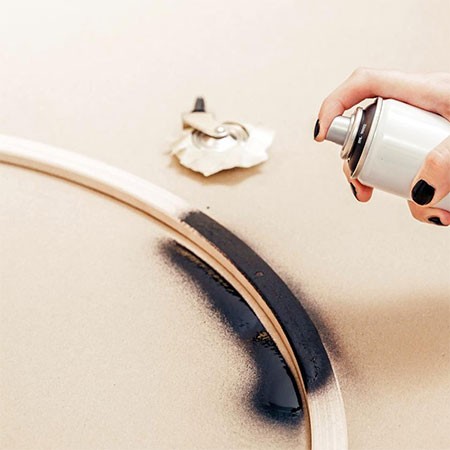
4. Put down a drop cloth or newspaper so that you can spray both hoops. Lightly sand either the wooden or plastic hoops and then wipe clean. Apply a light, even coat of spray paint to the hoops and allow the first coat to dry properly before applying a second coat.
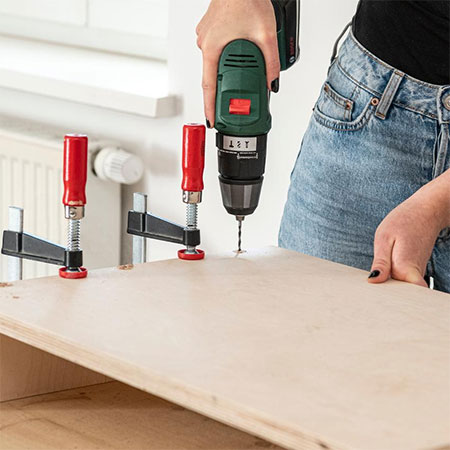
5. Assemble the bottom shelf using 50mm cut screws. Pre-drill and countersink [3] pilot holes through the top of the shelf and into the aprons, as can be seen below. Secure with screws. Repeat for the top shelf, keeping in mind that this only has one apron and it faces upwards.
GOOD TO KNOW: Use clamps to hold the pieces firmly in position as you drill.
6. Sand the assembled shelves with 240-grit sandpaper to remove any uneven edges or loose wood.
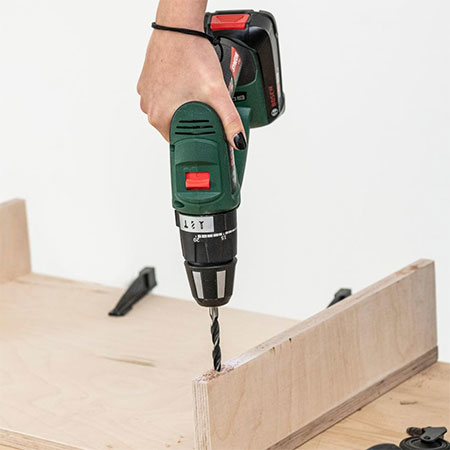
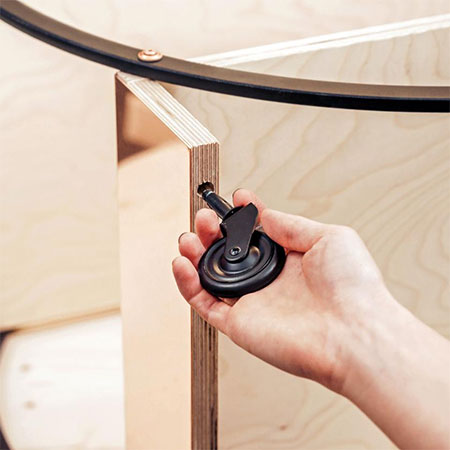
7. Use a suitably sized drill bit to drill [4] holes for the caster wheels.
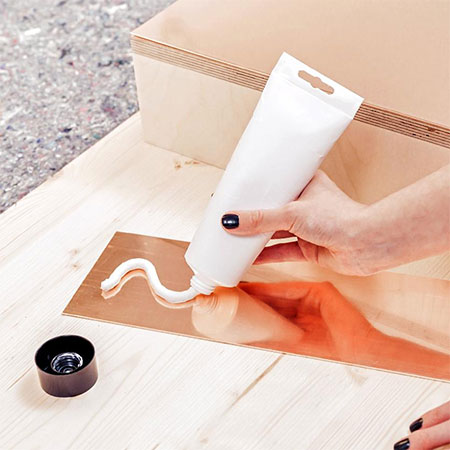
8. Apply adhesive to the back of the metal sheets and affix to the top and ends of the bottom shelf and top shelf. Keep in mind the placing of the shelves and the direction they face. Immediately wipe away any adhesive that oozes out.
GOOD TO KNOW: Use painter's tape to strap down the sheets onto the shelves and leave to dry overnight.
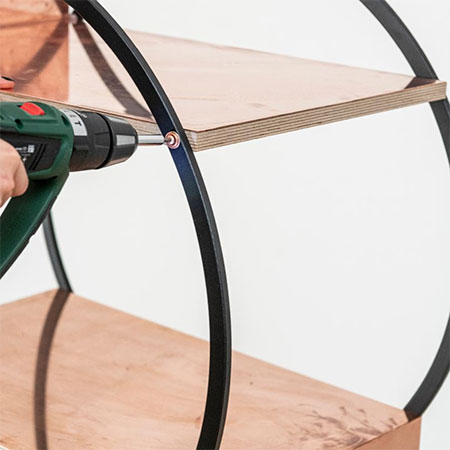
9. Now it's time to secure the hoops to the shelves with screws and cup or finishing washers.
10. Finish off your serving or drinks trolley by adding the caster wheels in the pre-drilled holes and ta-da... your trolley is ready for action!
all about diy