
Make a floating bed
In this step-by-step tutorial we'll show you how to make a hanging bed that's great for a patio, den, or just a place to drift off to sleep.
24/07/2018
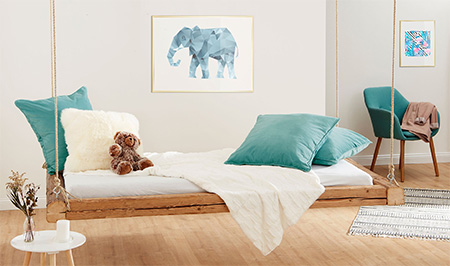
You can make this hanging bed using cut logs, reclaimed wood, or PAR pine (69 x 69) that you will find at your local Builders Warehouse. The hanging bed can be mounted on a patio (if there are roof beams to support it) for relaxing on lazy days, in a den, or in a bedroom.
YOU WILL NEED:
2 of wooden logs or (69 x 69) PAR pine beams, 2 metres in length
2 of wooden logs or (69 x 69) PAR pine beams, 910mm in length
2 of 32 x 32 x 1862mm PAR pine - supports
9 of 19 x 140 x 910mm PAR pine - base slats
4 of sturdy eye-bolts and hooks/anchors
Rope, 12mm thick x 12 metres in length
6 x 75mm screws [8]
4 x 40mm screws
Acrylic paint in your choice of colour - we used white
TOOLS:
Drill/Driver plus assorted bits
Countersink bit
Jigsaw and clean-cut blade
Multi Sander plus 120- and 180-grit sanding pads
Bosch PFS spray system or painting equipment
Tape measure and pencil
Stepladder
Clamps
HERE'S HOW:
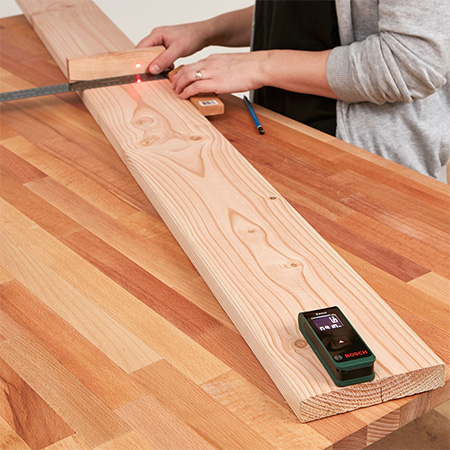
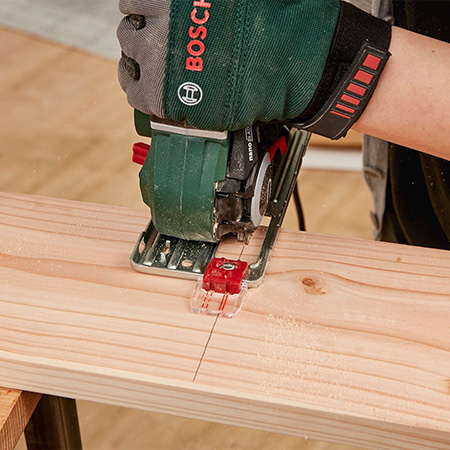
1. Using the measurements above you can have all the PAR pine cut to length at your nearest Builders Warehouse. If you're using logs you can cut these to length yourself using a jigsaw, reciprocating saw or chainsaw.
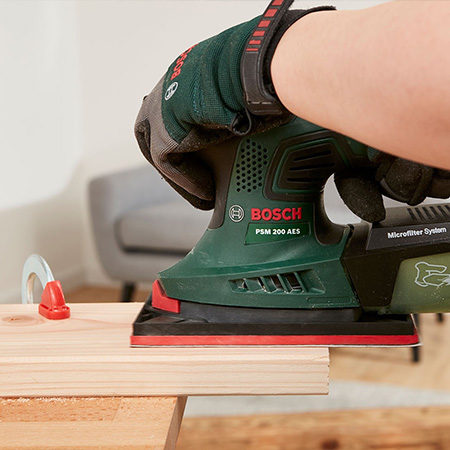
2. Before assembly, take the time to sand all the cut pieces nice and smooth.
3. If you are painting the PAR pine, spray all the individual sections using acrylic paint and a Bosch PFS spray system. Spray the paint evenly onto the wooden slats and supports and leave to dry. Follow the recommended paint drying times on the paint container.
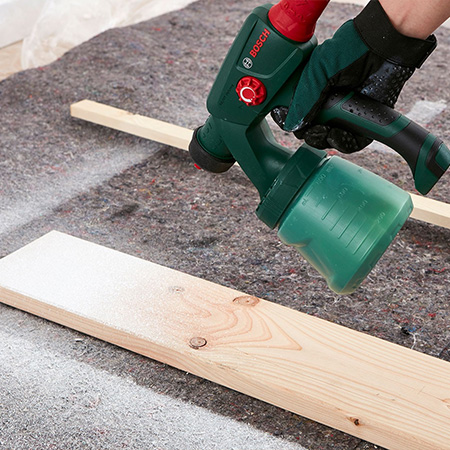
GOOD TO KNOW: Cover your flooring with a drop cloth to protect from overspray.
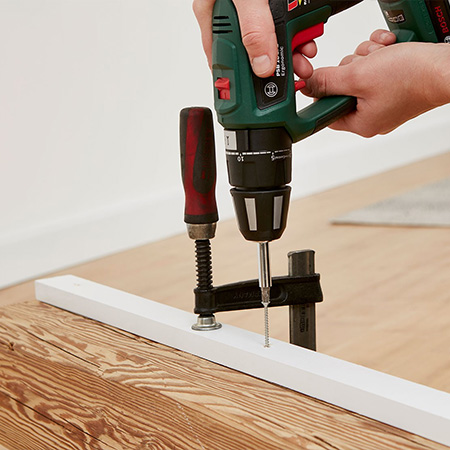
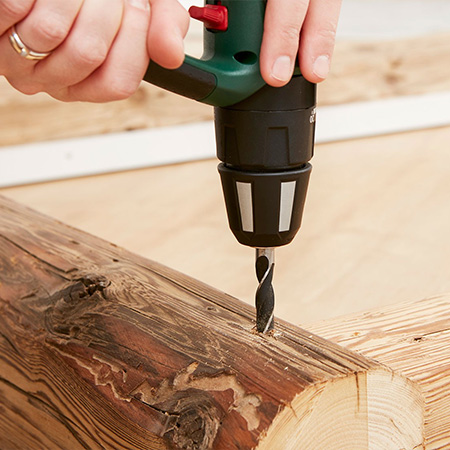
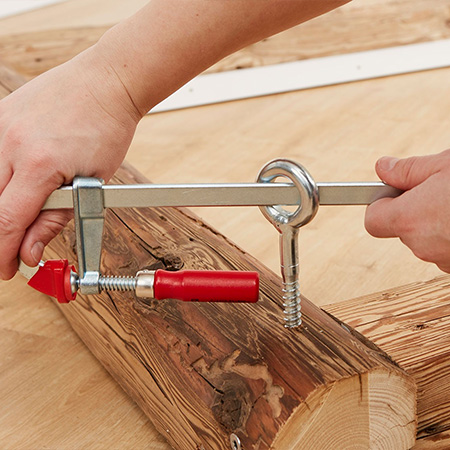
4. Clamp the supports onto the long lengths and secure using 4 x 40mm screws. You will need to drill 2.5 or 3mm pilots holes through the pine to prevent splitting. Use [5] screws along the length of each support.
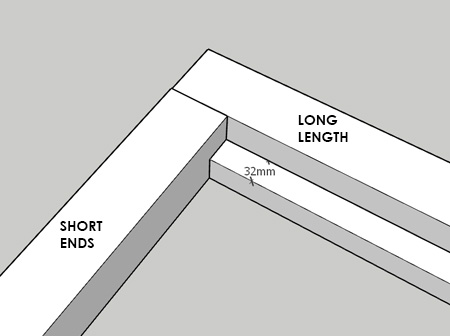
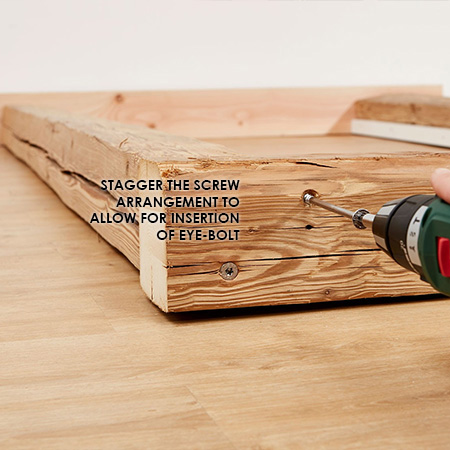
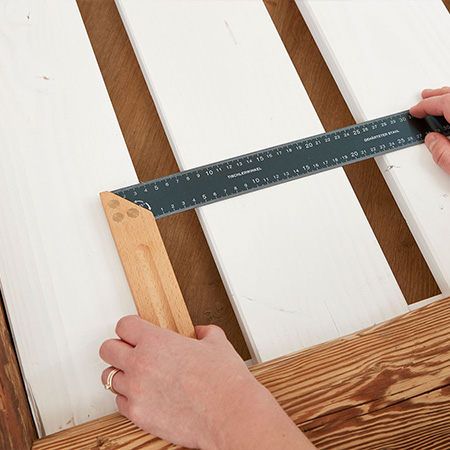
5. Secure the long lengths (side for the hanging bed) to the short ends - see diagram above - using [2] 6 x 75mm screws per join. You will need to drill 5mm pilots holes through the timber to prevent splitting. Finish off with a countersink bit before driving screws to join.
GOOD TO KNOW: Stagger the screw arrangement - as shown below - to allow for inserting eye-bolts in the next step.
6. Using the size of your eye-bolts as a guide for the correct drill bit to use and use a bit one point smaller to drill appropriate sized holes in the top of the frame for the bed, approximately 60mm in from the end.
7. Twist the eye-bolts into the drilled holes at each corner.
8. Now you can start adding the slats onto the supports that create the base for a mattress.
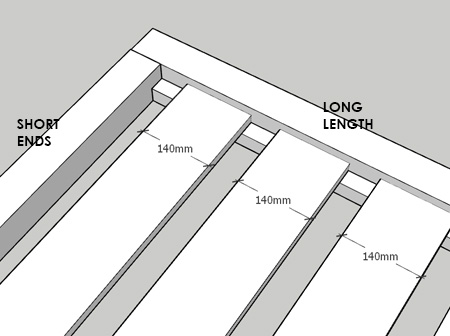
GOOD TO KNOW: We have allowed a total of 9 x 140mm slats, spaced evenly along the length of the supports. The gap between the ends and each slat is approx. 60mm. Screw these onto the supports with [1] 4 x 40mm screw.
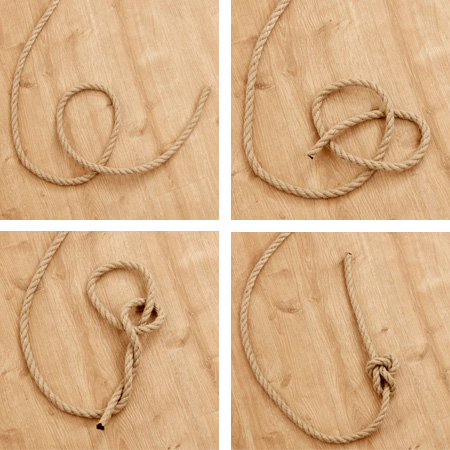
9. Use a strong rope to hang the bed - at least 12mm in diameter and see the instructions below for making a sturdy bowline knot to secure into the eye-bolts.
GOOD TO KNOW: Measure the height from the required height of the bed to the ceiling to know how long to make the rope to support the hanging bed, plus extra length for tying the knots.
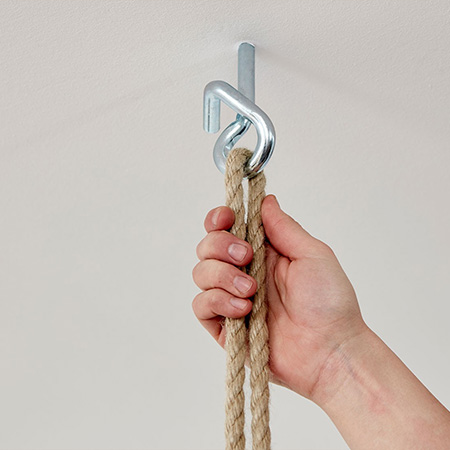
10. The hooks/anchors must be secured into strong ceiling beams. If you're not sure about whether beams can support the weight of the bed, it might be better to add your own beams to ensure safe mounting.
GOOD TO KNOW: Measure the distance from corner to corner where the eye-bolts are installed and transfer this to the ceiling for installing the hooks/anchors.
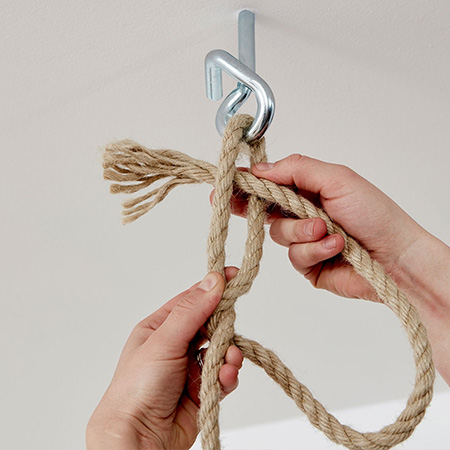
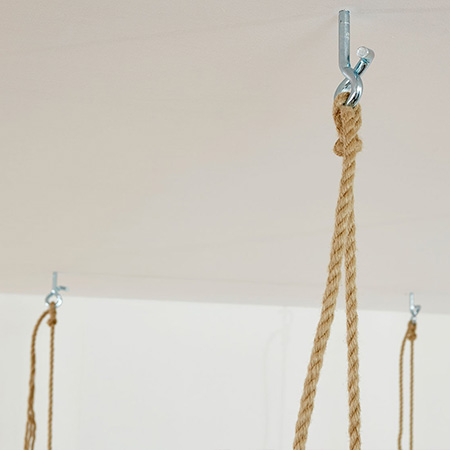
11. You will need a couple of helpers to lift the bed while you secure each corner to a pre-mounted hook/anchor in the ceiling. It is extremely important to knot the ropes securely one by one onto the ceiling hooks - moving from one corner to the next.
Secure Knots
Thread the rope through the ceiling hook/anchor while a helper lifts the bed to the required height. You will use a hangman's knot to hang the bed from the hooks/anchors. To make a hangman's knot, thread the rope through the ceiling hook/anchor and lay it alongside the other, longer part of the rope, first from the front and then from behind. Thread the end of the rope through the loop and pull everything tight.
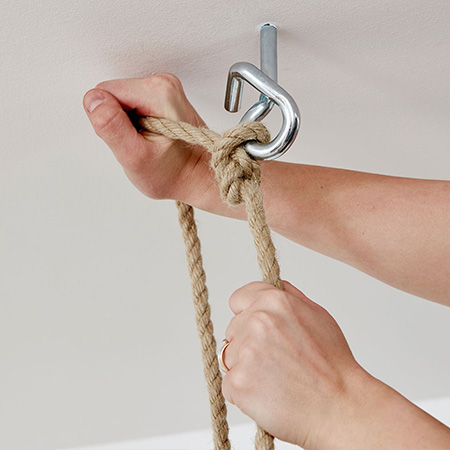
GOOD TO KNOW: Before you put your stepladder away, check that the bed is hanging properly and well secured at all corners.
We do not accept any responsibility for incorrect or improper installation for a hanging bed. You follow these instructions at your own risk.