
Quick Project: Make A Handy Step Stool
A step stool or low stool comes in handy in the workshop or around the home and you can make a set of nesting stools in an hour or so.
11/05/2021
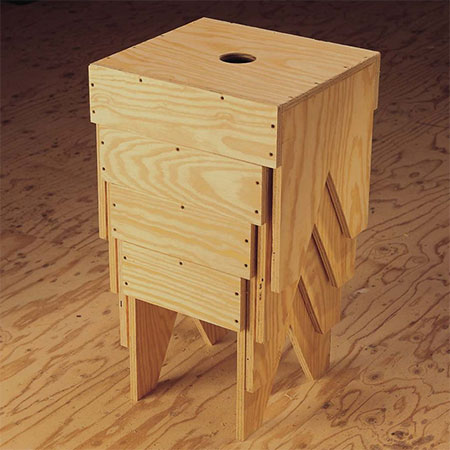
This set of nesting stools is great to have in the home or workshop, especially if you are a shorty like me! If you find it difficult to reach a high shelf or struggle to get to the top of your closet, or perhaps even if you battle to clean your windows. In the workshop, you can use a low stool to get down low when working on projects or reach higher when you are working on something tall.
The stools are made using 18mm shutterply, which is the cheapest plywood you can buy at any hardware store or timber merchant. If you would prefer something a bit better looking, substitute shutterply for pine plywood or marine plywood, or slightly modify the dimensions to make a set of nesting stools out of laminated pine shelving.
Having all the components cut to size at the hardware store or timber merchant will cost down on the time to make a complete set of nesting stools.
After making the stools you can leave as is or you can stain and seal, apply a tinted interior varnish or even paint them in bright primary colours.
YOU WILL NEED:
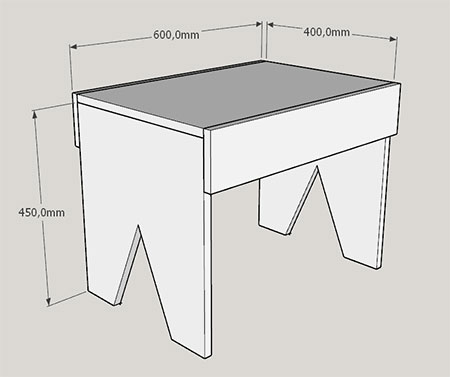
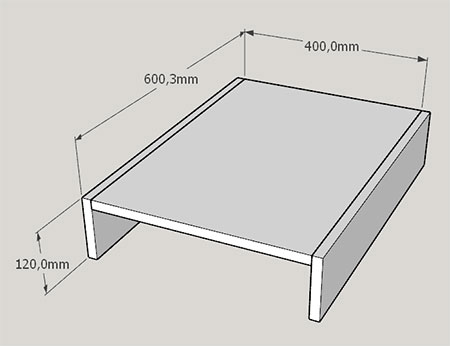
1 of 400 x 600mm - top
2 of 120 x 400mm - front/back apron
2 of 400 x 450mm - legs
4 x 45mm cut screws
Wood glue
TOOLS:
Drill/Driver plus assorted bits
OR hammer and nails
Jigsaw and steel cutting blade
Workbench or sawhorse
Quick clamps
Tape measure and pencil
Safety gear
GOOD TO KNOW:
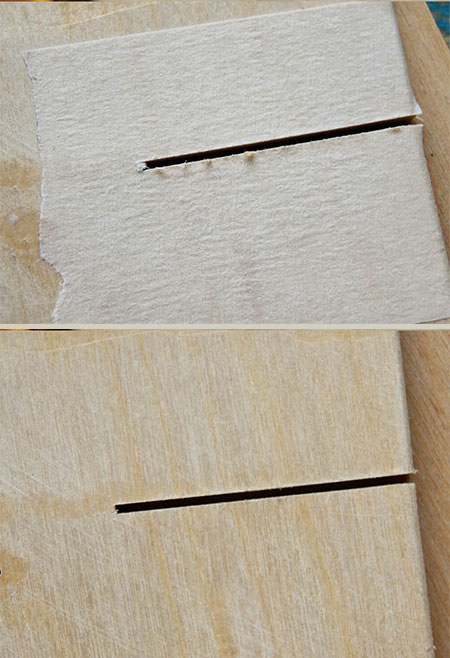
When cutting plywood, it tends to splinter or rip along the cut edge. The easy way to prevent this is 1) use a fine-toothed jigsaw blade such as that used for cutting steel and, 2) Apply masking tape along the edge or over the area where you will cut. If you use both these options, your cuts will be smooth and clean.
The size of the largest stool is 600mm long x 436mm wide x 468mm wide. If you need a larger stool size, either width or height, simply modify the dimensions to accommodate for this.
HERE'S HOW:
Step 1
Assemble the top part of the stool using wood glue and 45mm screws. Align the front and back aprons with the top of the stool so that everything is flush. Drive [2] screws through the front and back aprons and into the top. DO use cut screws, as these will remove the need for pilot holes.
Step 2
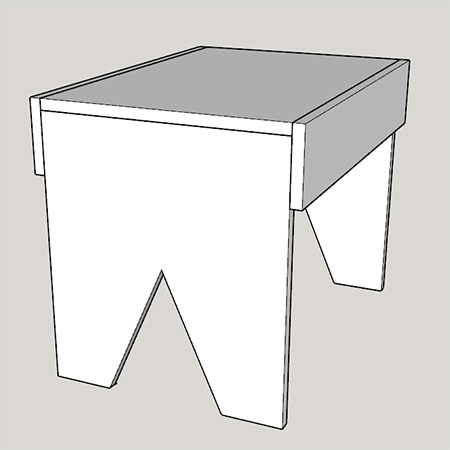
Measure and mark to cut out the shape on the legs. The diagram below shows the necessary measurements and you can use a jigsaw and steel cutting blade to cut out. Place the legs on a workbench and clamp firmly in place before cutting.

Step 3
Secure the legs as shown below using wood glue and 45mm screws. Drive [4] screws through the top into the legs and [2] screws at each side of the front and back aprons.
To make a nesting set, reduce the dimensions so that each subsequent stool will fit neatly under the previous one.
FINISHING
If you are just slapping together a stool for the workshop, you can leave as is. For use in the home, apply stain and sealer or tinted varnish to provide protection and finish off the stool.
family handyman