
Upholstered ottoman stool for hair styling tools and accessories
I made an upholstered ottoman as a comfortable stool to fit under my (small) dressing table. The ottoman has a removable tray and can store all my hair styling tools and accessories.
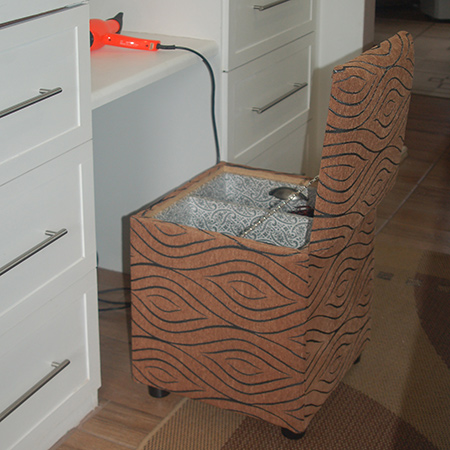
My hair styling tools are all over the place and I decided it would be just the thing to make an upholstered storage ottoman that would be comfy to sit on while I style my hair, and would also be able to contain all my equipment and accessories.
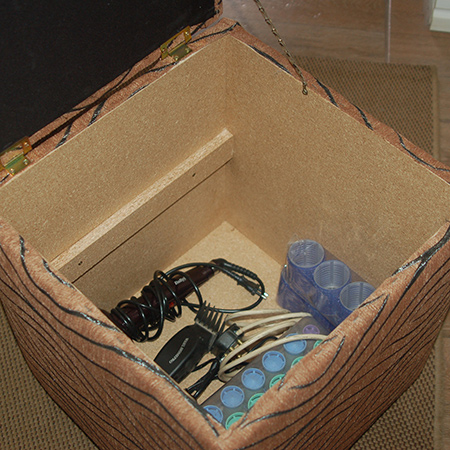
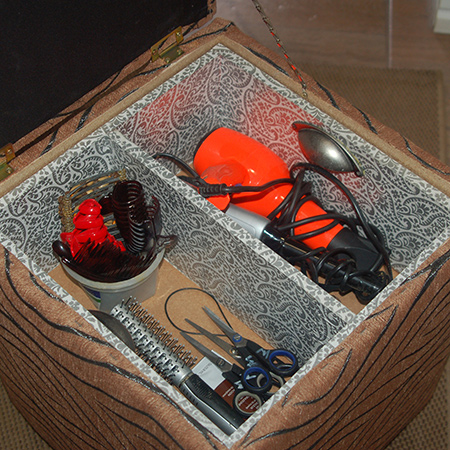
I designed a storage compartment inside the storage ottoman that could easily be removed and allow for two levels of storage. At the bottom there is plenty of room for hair styling tools and accessories, while the top tray has two compartments with hair styling tools that I use all the time.
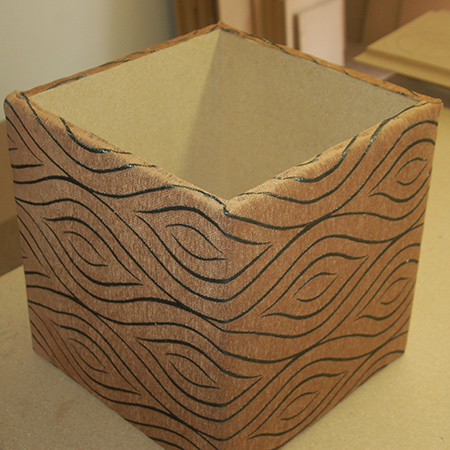
The upholstered storage ottoman is the perfect height for sitting in front of the mirror and has just the right amount of padding to get comfortable when I style my hair!

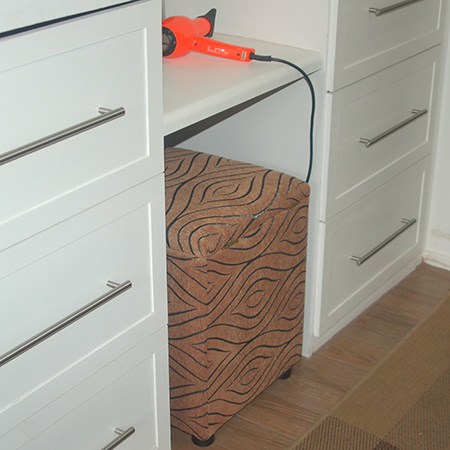
When not in use I can simply push the ottoman underneath the countertop so it's out of sight. This is a great way to free up cupboard space, store tons of stuff, and have a comfy place to sit.
YOU WILL NEED:
4 of 400 x 400mm 16mm BisonBord (chipboard) - front / back, top and base
2 of 368 x 400mm 16mm BisonBord (chipboard) - sides
3 x 50 x 368mm 16mm BisonBord (chipboard) - supports
2 of 260 x 360mm 12mm SupaWood - container front / back
2 of 260 x 336mm 12mm SupaWood - container sides
1 of 248 x 336mm 12mm SupaWood - container centre divider
1 of 336 x 336mm 12mm SupaWood - container base
4 feet and [4] 50mm screws, or small castor wheels and 16mm screws
2 butt hinges and [4] 16mm and [4] 30mm screws
2 metres of your choice of fabric
1/2 metre lining fabric (or use what's left of your main fabric)
2 metres thin batting
1 piece of 400 x 400mm thin foam for the top
Iron-on webbing or double-sided adhesive interfacing
Alcolin sprayable adhesive
4 x 30mm screws [20]
TOOLS:
Drill / Driver plus assorted bits (incl. countersink bit)
Bosch Tacker or heavy-duty staple gun
Corner clamps
Tape measure
Iron
Buy everything you need for this project (excluding fabric and accessories) at your local Builders Warehouse.
HERE'S HOW:
1. Attach the sides to the front and back to create the box shape.
GOOD TO KNOW: If you are working on your own, Tork Craft corner clamps are a 'must-have' for your collection. They are easy to use and hold sections firmly in place while you work - acting as an extra pair of hands! You will find these at your local Builders store.
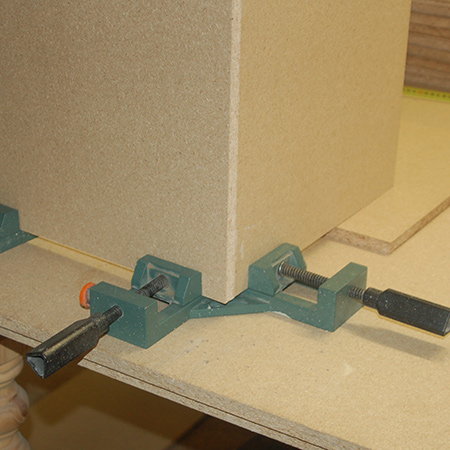
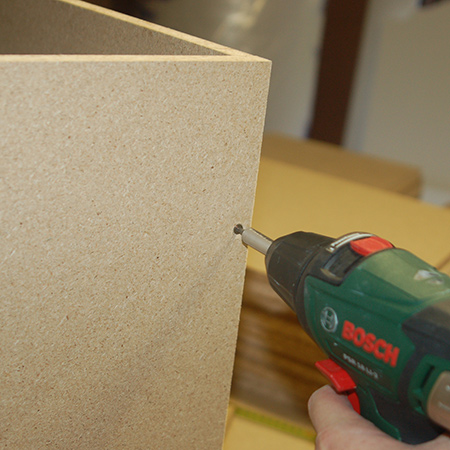
2. Drill 3mm countersunk pilot holes - 2 down each side of the front and back - to secure the sides in place.
3. Secure the base onto the frame with [2] screws along each side.

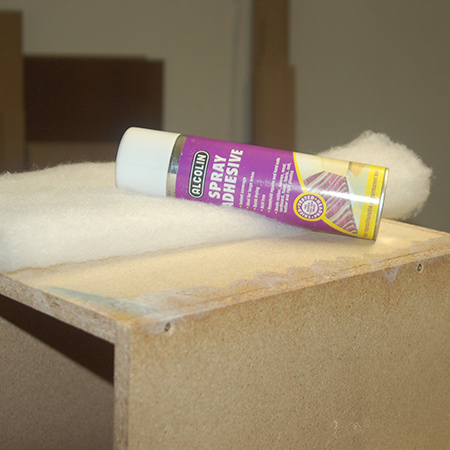
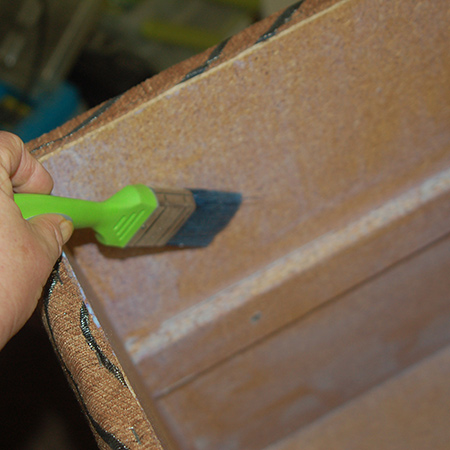
4. Cut a piece of batting to wrap around the sides of the box, leaving some extra at the top and bottom. Secure one end of the batting to the box using Alcolin sprayable adhesive. Follow the instructions on the can for proper application.
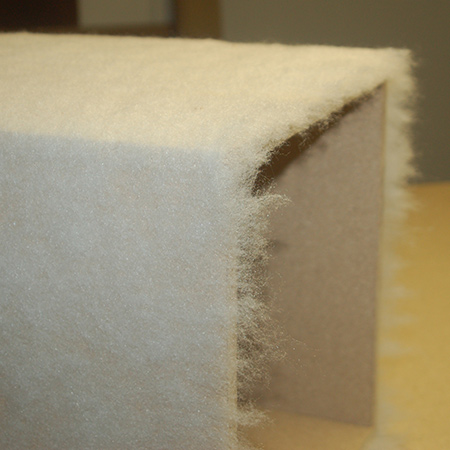
5. Secure the end and then wrap the batting around the box, securing the other end in the same way. Pull away any excess with your hands to avoid any bulky areas.
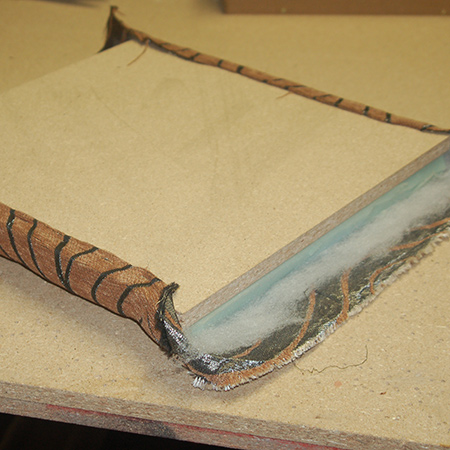
6. Pull away excess batting at the top and bottom. You only need a thin layer of batting to soften the sharp edges that could eventually tear your fabric.
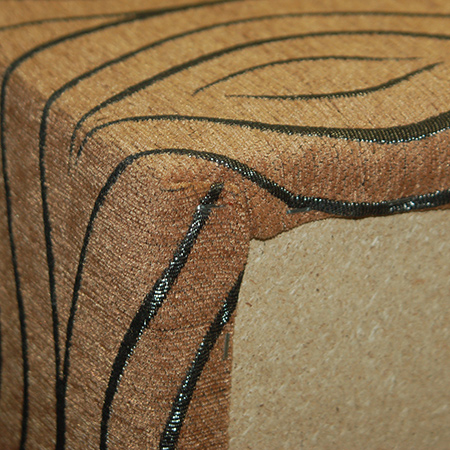
7. Cut your fabric to fit around the ottoman, allowing extra for folding under at both ends, and at least 50mm extra at both the top and bottom for folding under and over
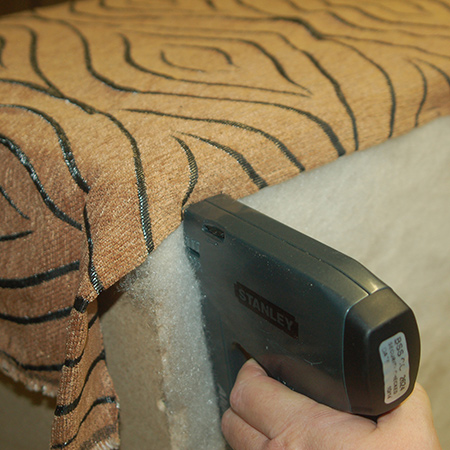
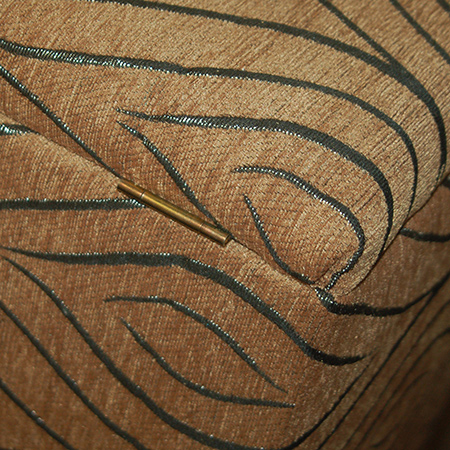
8. Fold under and secure the starting edge of the fabric to the box frame. You only need [3] staples close to the top, bottom and centre to hold the fabric in place. Turn the ottoman to wrap with fabric, making sure to keep even at the top and bottom.
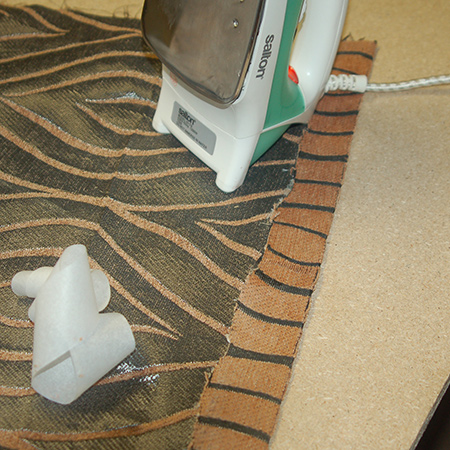
9. Once you know exactly how much fabric is needed to overlap the starting edge, cut away excess, fold under and use iron-on webbing to secure the fold. Also apply iron-on webbing to the edge of the fabric to secure on top of the starting edge.
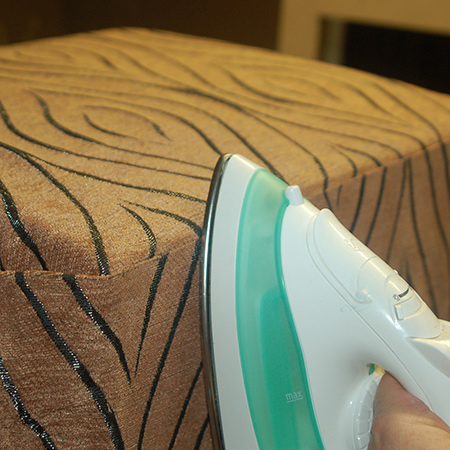
10. Iron the edge of the fabric over the starting edge, making sure to align with the corner of the box so that this is hardly visible once the ottoman is finished.
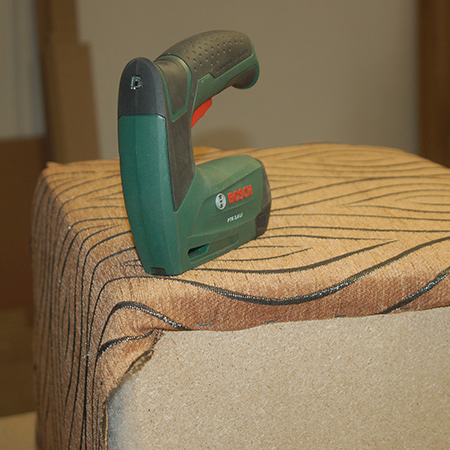
11. Now you can begin to fold over and staple the fabric to the base of the box. Start at the centre of one side and then move to the opposite side. Repeat this for the other two sides. Use your hand to smooth the fabric as you work from the centre towards the corners and stop at about 50mm away from each corner, so that you have plenty of space to tuck corners.
GOOD TO KNOW:
A
Bosch Tacker is far easier to
use than a heavy-duty staple gun. Hardly any
pressure is required to staple upholstery
projects.
GOOD TO KNOW:
Leave the corners until last so
that you can fold under and over for a nice,
neat and professional finish.
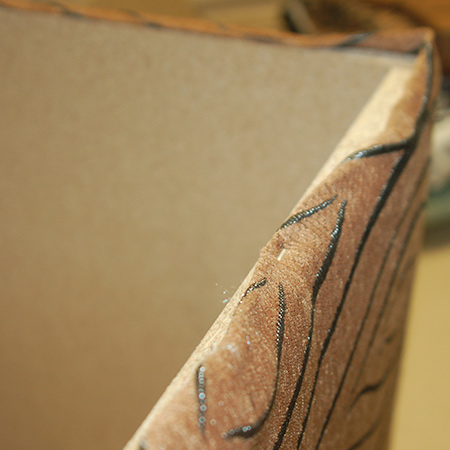
12. For the top edge you will also fold under and fold over to secure the fabric to the top edge. Again, start in the centre and work towards the corners, leaving a space for folding and tucking the corners for a neat finish. Gently pull the fabric up the sides - using your hand to smooth - to avoid floppy or loose fabric.
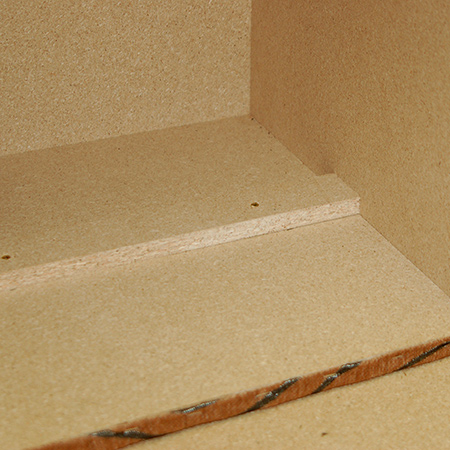
13. Measure down 280mm inside the box and secure the support under this line with [2] screws. This support with hold the storage container in place.
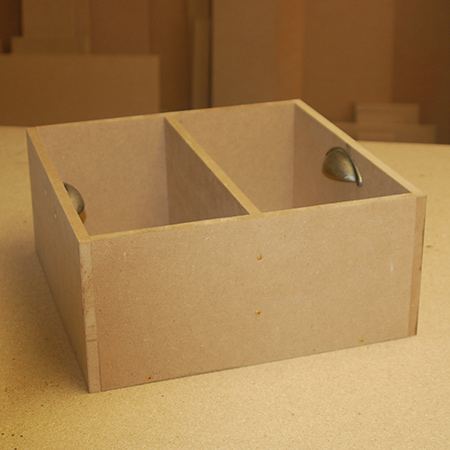
14. I made my storage container using 12mm SupaWood offcuts, but you can have pieces cut for the 16mm BisonBord if you prefer. Should you decide to use BisonBord, allow for the difference in thickness when having the BisonBord cut to size. Assemble the box as show below.
GOOD TO KNOW:
Although I attached handles on
the storage container, these aren't really necessary
and had to be glued in place using epoxy glue,
since the screws supplied were too long.
Making the top
1. To upholster the top, layer cut fabric (fabric should be 100mm wide all around), batting and foam under the lid. Tease the edge of the batting to soften and reduce bulk.
2. Starting on one side, fold the fabric over and under and staple - starting at the centre and working towards the sides. Stop about 100mm from the corners to leave enough space for tucking the corners. Move onto the opposite side and then repeat this process for the other two sides.
GOOD TO KNOW:
Don't pull the fabric too tight
when stapling the opposite sides - just enough
for the fabric to be taut and not loose.
3. Leave the corners until last and then tuck and fold until neat.
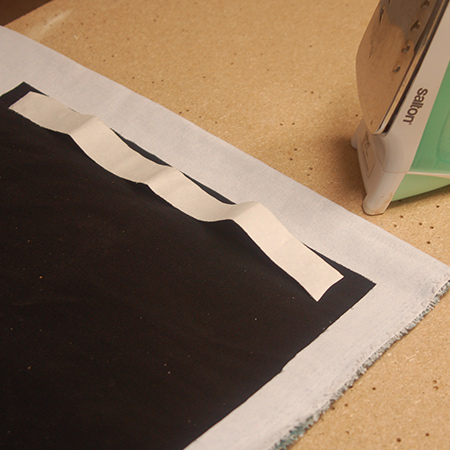
4. To finish off the underside of the top, and to hide the staples, I used a piece of lining fabric cut to size. If you have upholstery fabric left over - and you should have - you can use this instead. Attach iron-on webbing to the back of the fabric, peel off the backing and then iron onto the lid.
5. The top is mounted to the base using butt hinges. Use a small, flathead screwdriver to make holes in the fabric before attaching the hinges to the lid with 16mm screws, and the hinge to the base with 30mm screws.
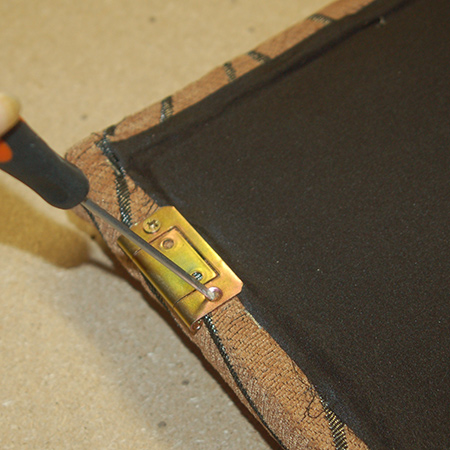
GOOD TO KNOW:
When working on
your own it is easier to attach the
hinges to the lid and then to the frame. Place
both on a flat surface and then use something to
raise the base to the height of the lid for easy
mounting.
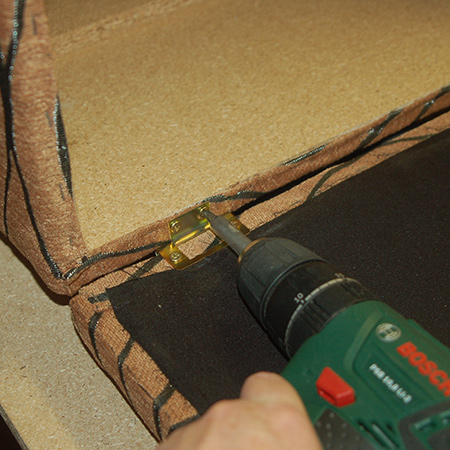
GOOD TO KNOW:
The barrel of the hinge
should always be over the edge of the board. If
not mounted this way the lid won't close properly.
OPTIONAL: To stop the lid from opening too far I attached a piece of chain to the top and inside of the box.

To finish off (not shown) I attached 4 plastic feet to the base using 50mm screws. Don't over screw these - when the screw feels tight - stop.