
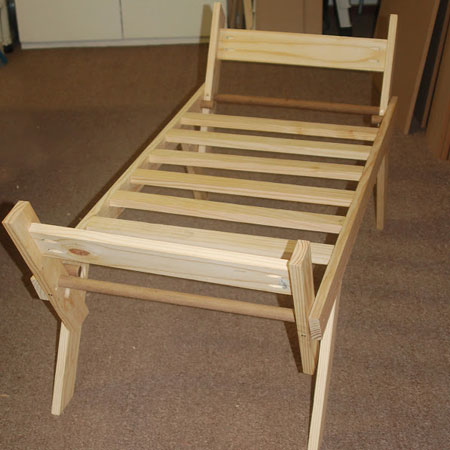
DIY Futon Sleeper Couch
This DIY futon sleeper couch is made using readily available pine PAR that you can buy at your local Builders. The futon sleeper couch is a comfortable couch that easily converts into a bed, for when guests sleep over.
11/01/2018

This futon sleeper couch is made using pine PAR that you can buy at any Builders store. During the day the futon serves as comfortable seating, and at night it easily transforms into a sleeper.

YOU WILL NEED:
4 of 94 x 350mm pine - legs*
2 of 19 x 94 x 1200mm pine - front/back seat frame*
4 of 19 x 94 x 450mm pine - arm sides*
1 of 25 x 180mmmm pine dowel - arm dowels, cut to:
- 4 of 538mm length
- 4 of 50mm length
2 of 19 x 94 x 500mm pine - arm tops
6 of 10 x 44 x 540mm pine - seat slats
2 of 19 x 94 x 465mm pine - seat back, uprights*
1 of 19 x 94 x 620mm pine - seat back, bottom slat*
1 of 19 x 94 x 450mm pine - seat back, top slat*
2 of 19 x 94 x 160mm pine - seat back, end slat*
2 of 19 x 94 x 330mm pine - seat back, end slat*
2 of 19 x 94 x 540mm pine - seat frame side, leg support
*After cutting 25-degree angle at both ends.
Wood glue
Wood filler
Pocket-hole screws, coarse-thread, 32mm
3.5 x 40mm screws [4]
24mm spade bit
TOOLS:
Drill / Driver plus assorted bits
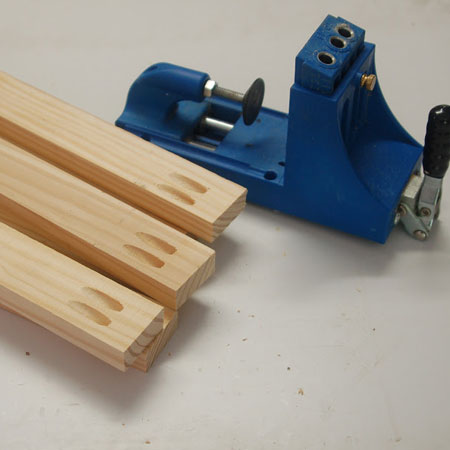
Kreg Pocket-Hole Jig
Table saw, mitre saw or jigsaw
Orbital Sander plus 120- and 240-grit sanding pads
Clamp
Tape measure and pencil

HERE'S HOW:

Preparation
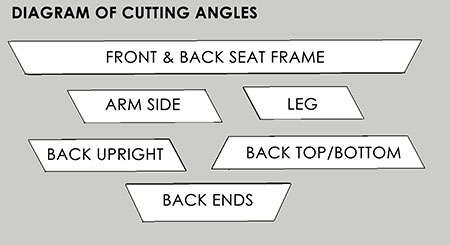
Cut all the required 25-degree angles as indicated in the cutting list above. Confirm the direction of angles before cutting by browsing the images below. Some pieces have left-left (mirror) angles and others left-right (opposite) angles.
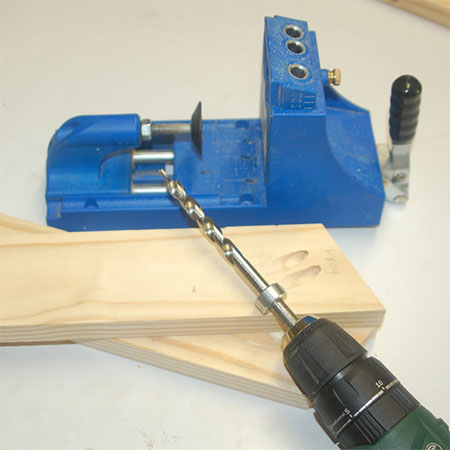
1. Drill two pocket-holes at the top of each of the four legs.
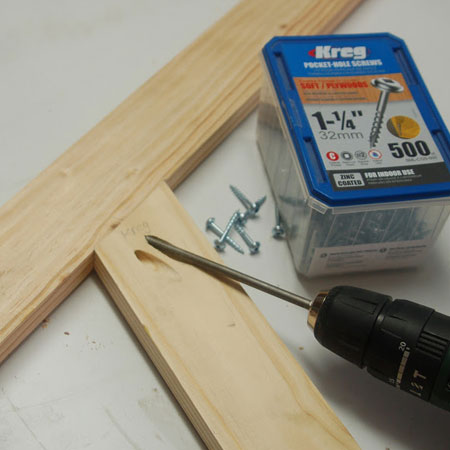
2. Mount the legs 150mm in from the bottom of the front and back seat frame. Use wood glue and 32mm pocket-hole screws to secure in place.
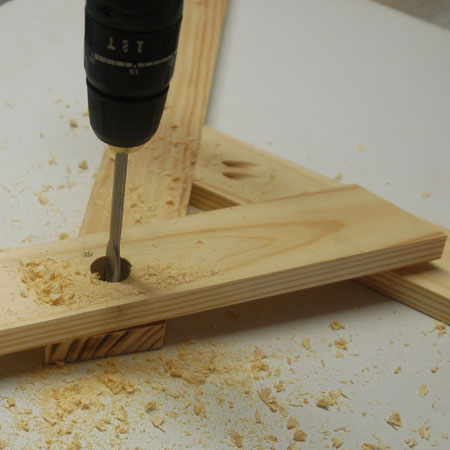
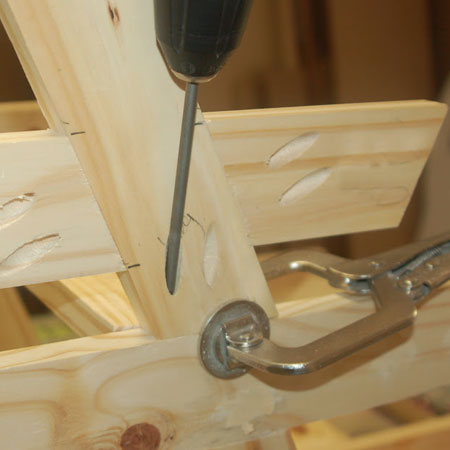
3. Place a seat arm on top of the front seat frame (back) - aligning the bottom of the seat arm with the angle of the leg and the end of the seat frame. Use a 24mm spade bit to drill a hole completely through the arm and to a depth of 15mm in the back of the front seat frame. Repeat this for the other side of the front seat frame and also for the back seat frame.
GOOD TO KNOW
Wrap a piece of masking tape around the spade bit to the total depth that needs to be drilled.
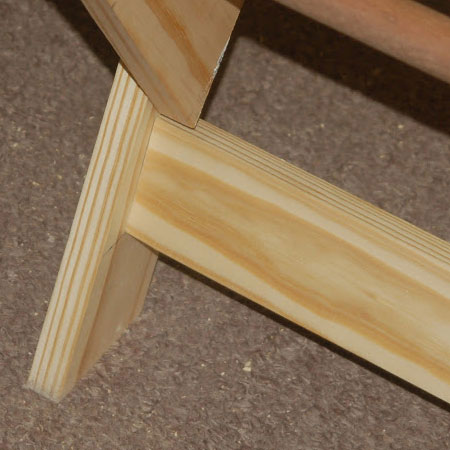
BELOW: How the drilled hole should look once drilled through the arm side and seat frame.

IMPORTANT: The drilled holes should accommodate a tight fit for the arm dowels. Don't overdrill. Sand the holes in the seat arm but DO NOT sand the drilled holes in the seat frames.
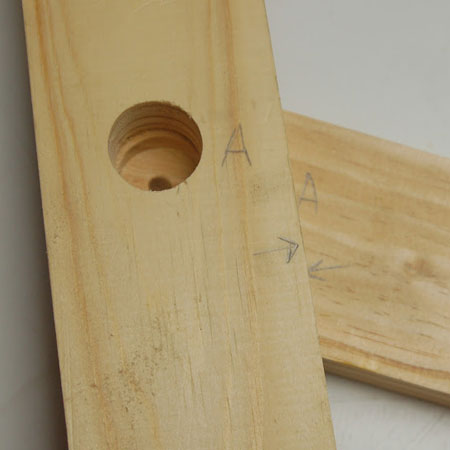
TOP TIP: As you drill each arm side, mark the arm side and seat front to make it easier to match up the pieces when you assemble.
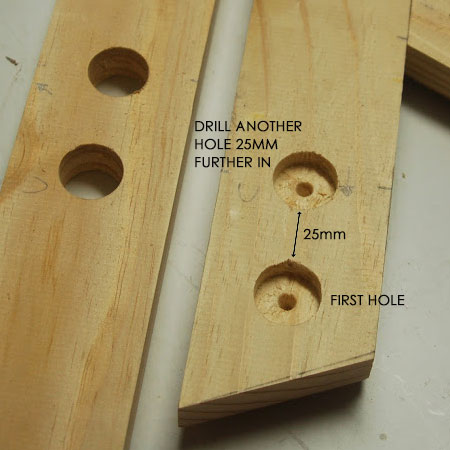
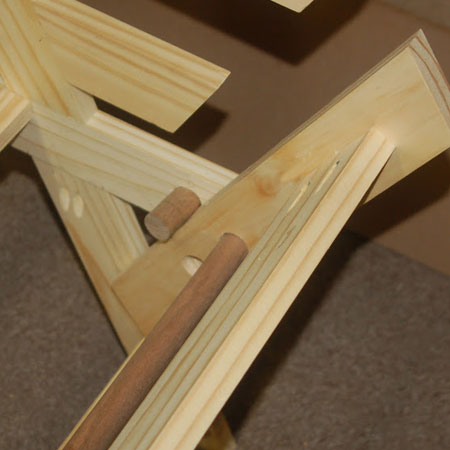
4. Align the arm side to be in line with the seat frame and drill a second hole 25mm in from the first hole. This hole is used to support the arm side in upright position.
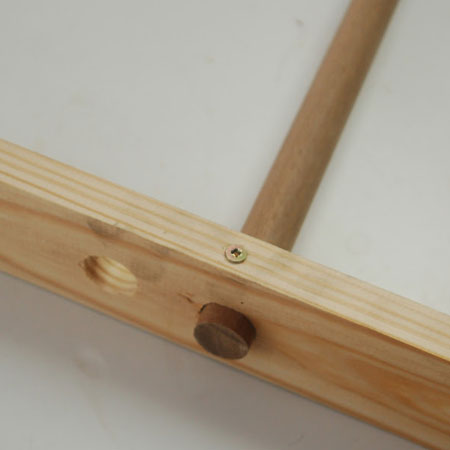
5. Cut the 25mm dowels into 4 lengths of 568mm. Insert through the first hole drilled in the seat arms. Pre-drill a 2.5mm pilot hole and secure in place with 3.5 x 40mm screws.
GOOD TO KNOW
Allow a 15mm overhang on both sides of the arm sides for fitting into the drilled holes in the seat frame.
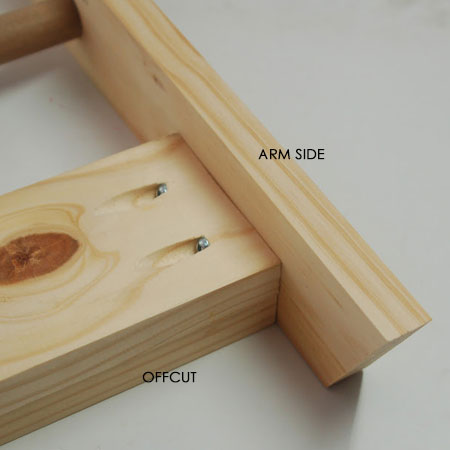
6. Now you can attach the arm top. Drill two pocket-holes at the ends of each arm top and secure inside the arm sides with 32mm coarse-thread pocket-hole screws and wood glue.
GOOD TO KNOW
Use an offcut to hold the arm top in place as you secure with screws.
GOOD TO KNOW
Before attaching the seat slats, place the assembled arm sections in position. These will be loose until you secure the slats in place.
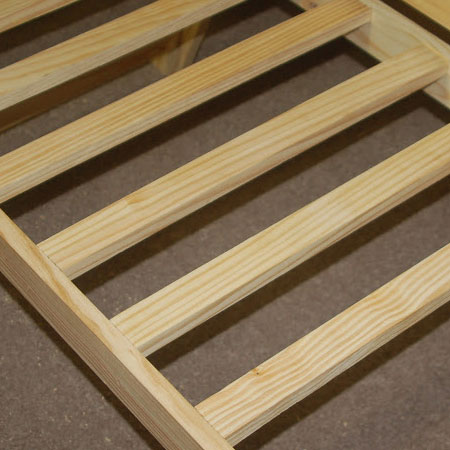
7. Drill 2 pocket-holes at both ends of the seat slats.
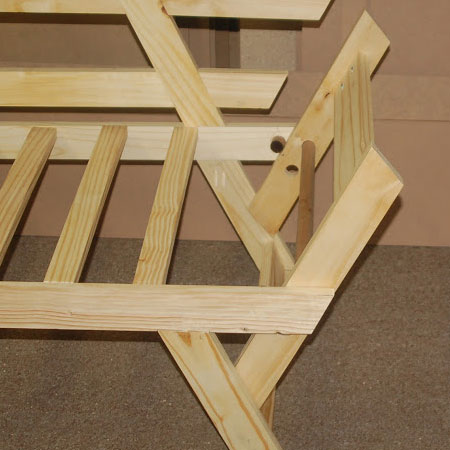
8. Attach the seat slats to the back side of the front and back seat frames. The slats are flush with the top edge of the seat frames. Start with the first slat at both ends and space the remaining slats in between.
9. Drill two pocket-holes at both ends of the seat frame side, leg support and secure this 80mm up from the bottom of each leg with wood glue and screws.
10. Assemble the seat back using wood glue and pocket-hole screws. The centre and side pieces are attached to the two main uprights.

11. Once assembled, secure the seat back to the seat frame using wood glue and pocket-hole screws.
GOOD TO KNOW
Clamp the back to the seat frame to make it easier to join.
Finishing
Sand all the pieces smooth with 120-grit and then 240-grit sandpaper and round-off all the sharp edges.
Apply a clean, polyurethane sealer, oil or wax to protect.
BELOW: Seat in upright position with dowel inserted to support arm sides.
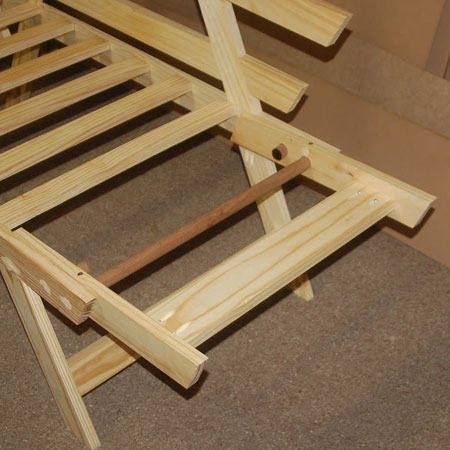
BELOW: Seat in flat position with dowel inserted to hold level.
NOTE: Click here for instructions on making your own mattress or French tufted mattress