
Quick Project: Make these Easy Wall Shelves for any Room
These shelves are probably one of the easiest and most affordable to make and they would be ideal for extra storage or display in any room in a home.
03/01/2021
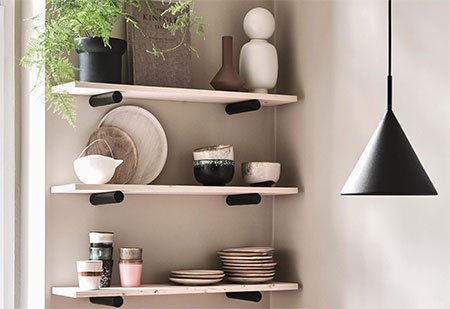
Easy to make and very affordable on materials, these wall shelves would look great in any room whether used for storage or for decorative display. All you need to install a set of 3 shelves in a pine or meranti dowel and some laminated pine. So, grab your tools and supplies as listed below and let's get started.
You can make and install these shelves if you want to have a kitchen herb garden close to a sunny window, or a small reading shelf in a lounge or study. But there are plenty of other uses for these inexpensive shelves.
YOU WILL NEED:
3 of laminated pine shelving, 200mm wide x 800mm length
1 of 25mm pine or meranti dowel, 1800mm length
35mm cut screws
5-minute epoxy glue
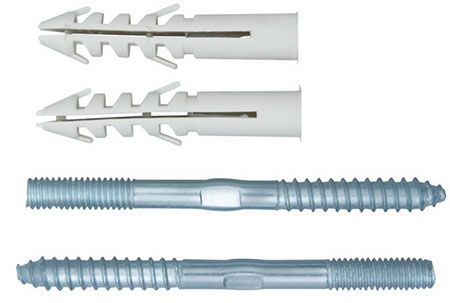
Fixing, hanging or connecting screws / bolts plus wall plugs
Paint, sealer or varnish to finish
Fixing or hanging bolts are great for mounting shelves onto a wall without seeing any visible screws! You can buy them at Builders or most hardware stores.
TOOLS:
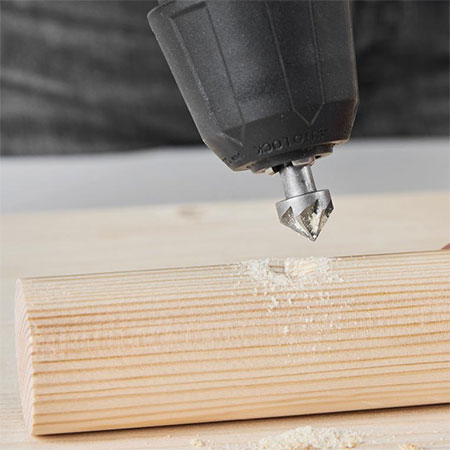
Drill / Driver plus assorted bits
Countersink bit
Wrench for tightening fixing bolts
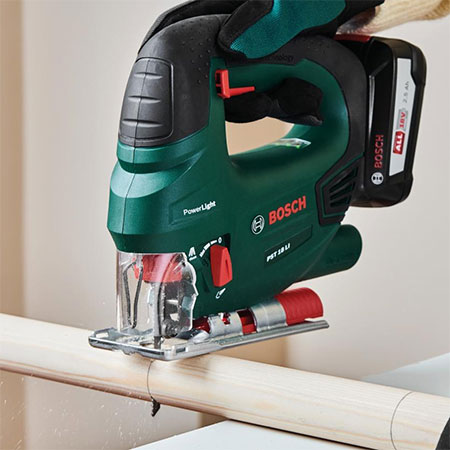
Jigsaw and clean-cut blade
Tape measure and pencil
Safety gear
HERE'S HOW:
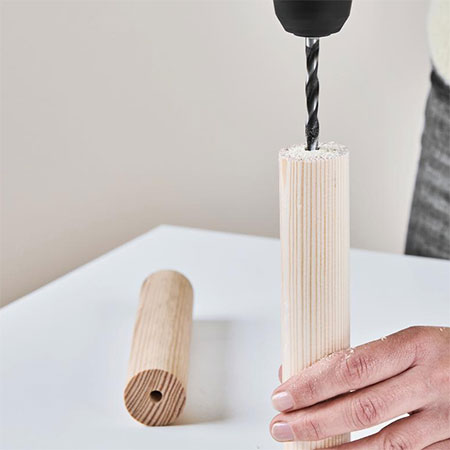
1. The first thing you need to do is to cut the dowels to length to support the shelves. If you didn't have the laminated pine cut to size, you can do this at the same time. Cut [6] dowels to a length of 190mm to support the [3] shelves as shown in this project.
GOOD TO KNOW: If you want to add more shelves, you can. For longer shelves, add an extra dowel support in the middle. Also do this if you will be placing heavy items on the shelves.
2. The cut dowels will be used to support the shelves but you need to drill a countersink at 6mm in from the front end. This will allow you to drive in a screw later on to secure the shelves to the dowels. Read more about this in the steps below.
GOOD TO KNOW: To know how deep to make the countersink, test the screw head as you drill. When the screw head fits into the countersink hole, you know it will be deep enough.
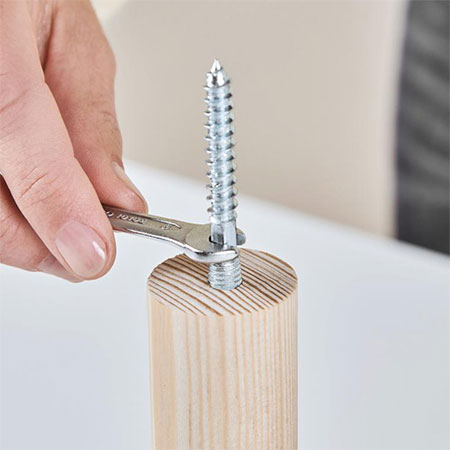
3. Depending on the diameter of the fixing or hanging bolts you purchased, use a wood bit to drill a suitably sized hole in the back end of each dowel. The depth to drill will be that of the length of the screw end of the fixing or hanging bolts you have. Don't drill the hole too big or the bolts will have nothing to bite into when you screw them in.
4. Place some epoxy glue into the drilled hole and then screw the fixing bolt in place until it is tightly in position. Put aside for a few minutes to let the epoxy cure.
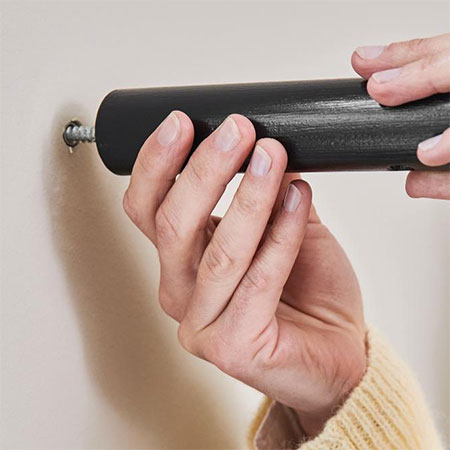
5. At this stage, you can paint, seal or varnish the shelves and dowels as required.
6. On the wall where the shelves will be mounted, measure and mark the location for drilling holes and inserting wall plugs. Screw the dowels in place.
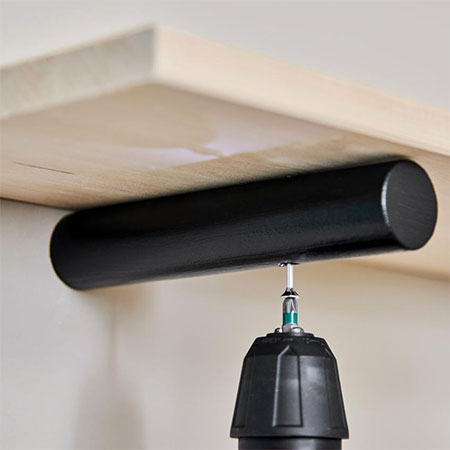
7. Now all that is left to do is position the shelves on top. Double check that everything is in the right place and then drive a screw through the countersink hole and into each shelf.
all about diy