
The easy way to make a Lazy Susan turntable
Every entertainer loves a Lazy Susan turntable, and we show you the easy way to make your own Lazy Susan for any table.
26/06/2019

YOU WILL NEED:
1 of 19 x 800 x 600mm laminated pine
1 of 8mm pine dowel, 30mm length
4 of Castors, small
12mm screws
Wood glue
Painter's tape
Sanding sponge, fine
Templates (drinking glass and plate will do)
TOOLS:
Drill/Driver plus assorted bits
Jigsaw plus clean-cut blade
Compass
Clamps
Tape measure and pencil

HERE'S HOW:
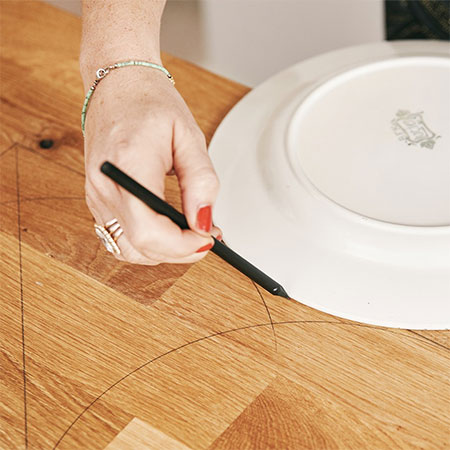
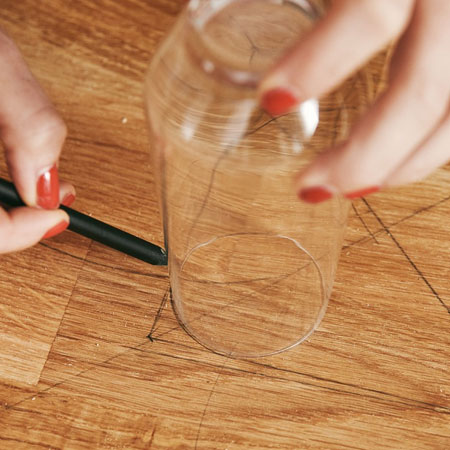
1. Mark out the main shape of the lazy Susan (470 x 470mm) and then use a template to mark the curved corners. The curved lines should overlap and you will have four rounded curves at the sides.
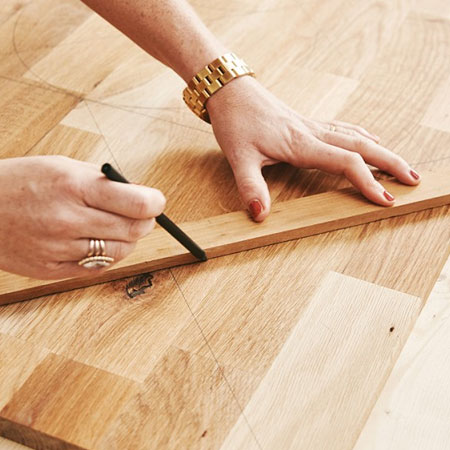
2. Mark an additional square on the same board with a side length of 335mm to indicate the middle.
GOOD TO KNOW
Use a plank or straightedge to ensure all the lines are straight.
3. Using a compass in the centre, draw out a circle with a 335mm radius.
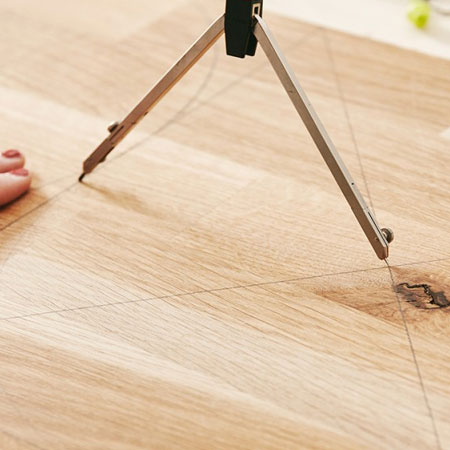
4. You should have a small rectangular shape left over in one corner. Measure out the middle of this, too, and use the compass to draw out another circle that fits into this space.
GOOD TO KNOW
Once you have completed the shape of the Lazy Susan it should resemble the image below.
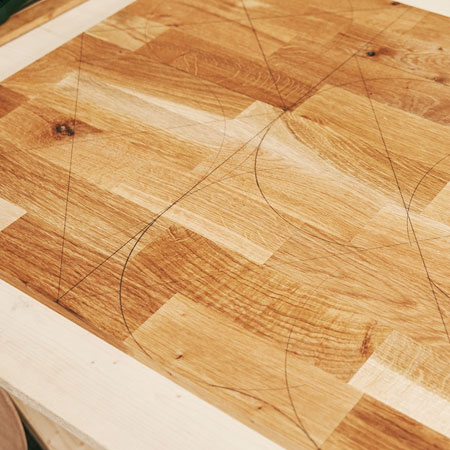
5. Use a jigsaw to slowly cut out the marked shapes. Once finished cutting you should have a square with curved corners, as well as two circular boards - small and large.

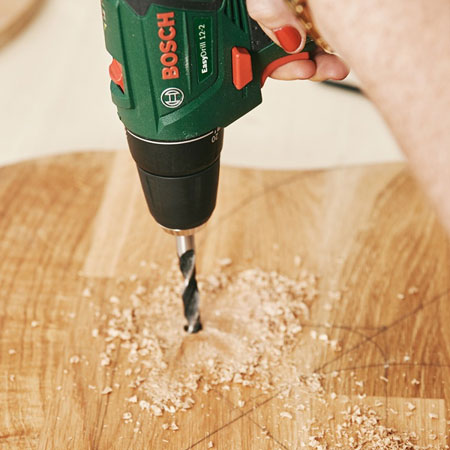
6. To make the recessed shelf in the centre of the board, which can be used for condiments or spices, take the large shape you have already sawn out (with the curved corners) and measure out 100 mm from the centre on each diagonal line to draw the square.
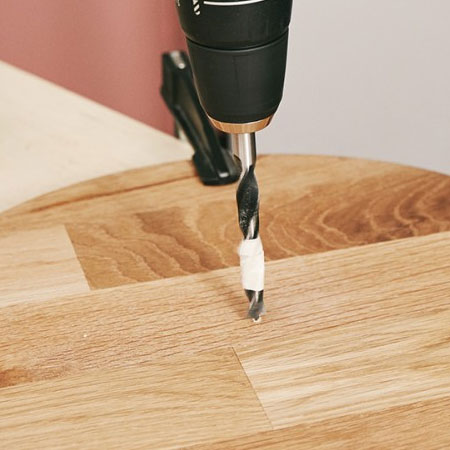
7. Use a smaller template - or glass - to round off the corners (above) and drill a hole in one place on the line you have drawn so that it is easier for you to cut out the shape in the centre (below).
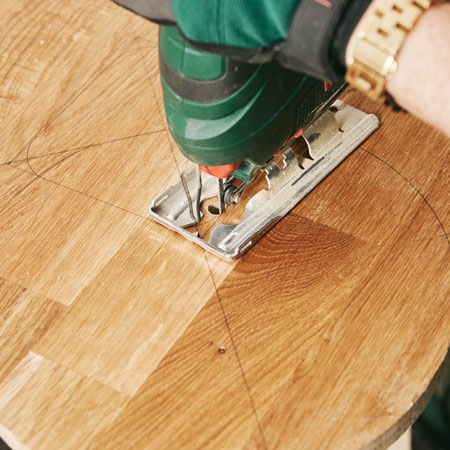
8. Using the drilled hole as an entry point, cut out the square (image three) with your jigsaw.
GOOD TO KNOW:
If you prefer, the Lazy Susan will also work without this gap.
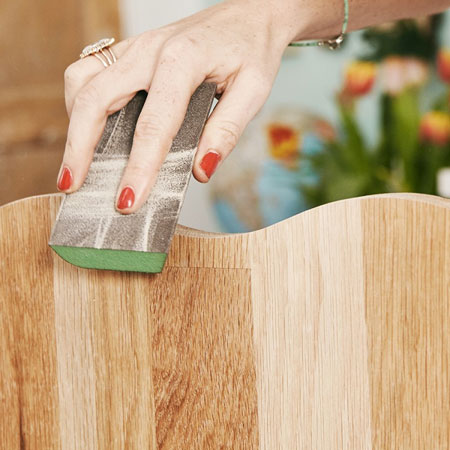
9. Sand all the cut edges smooth.
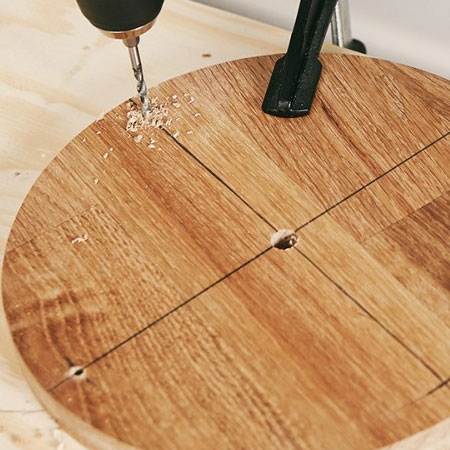
10. Using the [2] cut circular boards, mark the centre of each and drill a hole on the mark.
GOOD TO KNOW
DO NOT drill completely through the board. These holes are for the support dowels and should only be to about half of the thickness.
11. Now it's time to join the smaller circular board to the larger one. First, drill [4] four holes in the circular board - 15mm in from the edge.
12. Place the smaller board exactly in the centre of the larger board and about 100mm in from the edge (all the way around). Secure in place with [4] screws.
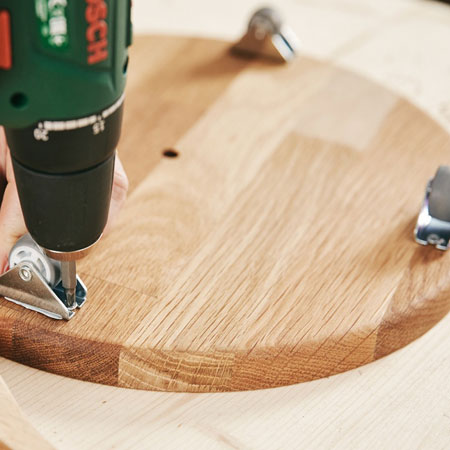
13. Secure the [4] wheels to the underside of the larger circle with screws.
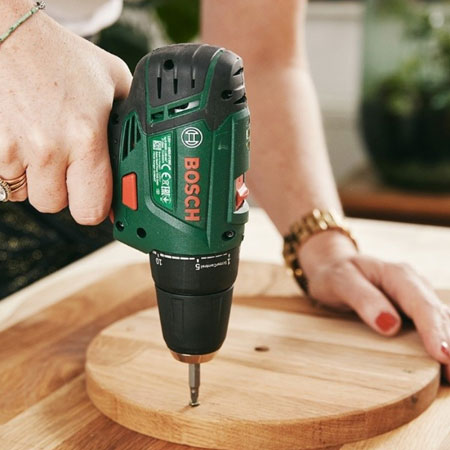
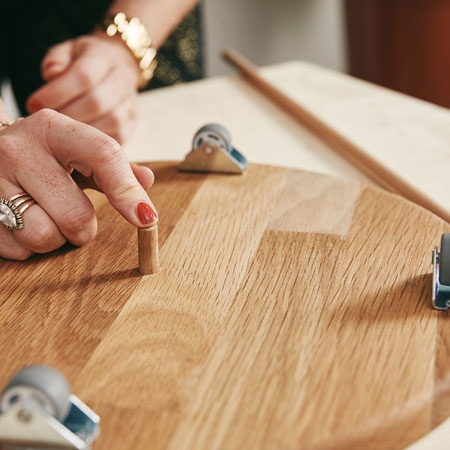
14. Push the 8mm dowel into the centre hole (below).
15. To assemble the Lazy Susan turntable, insert the two parts together.

all about diy