
Easy DIY Sofa
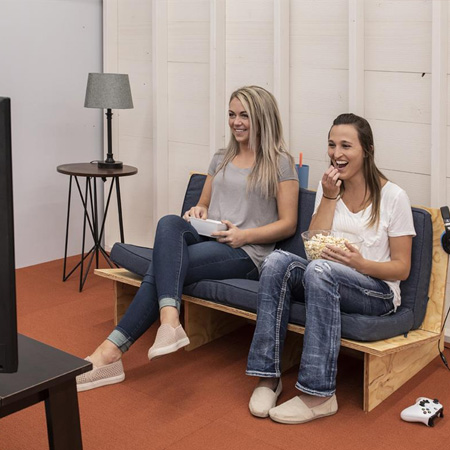
This padded sofa is easy to make and perfect if you need extra seating in a family room or den, in a kid's bedroom, or for your very first apartment.
01/10/2018
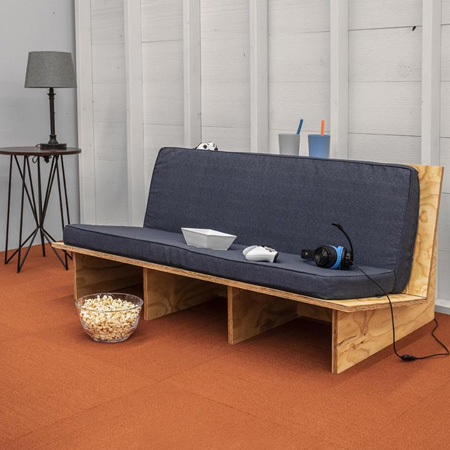
You can easily knock up this plywood sofa in a day, and it's perfect for extra seating in a family room or den, in a kid's bedroom, or if you need furniture for your very first apartment. Thanks to Build Something for sharing this project.

For the padded cushions, buy 50mm-thick medium-density foam cut to size and cover with your choice of fabric. That way you can finish off the sofa to match the room decor.
YOU WILL NEED:
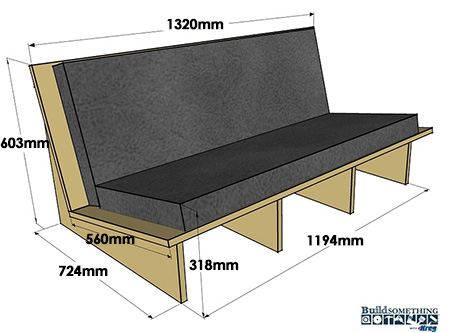
1 of 127 x 1220mm 19mm plywood - back shelf
3 of 372 x 1220mm 19mm plywood - support brace
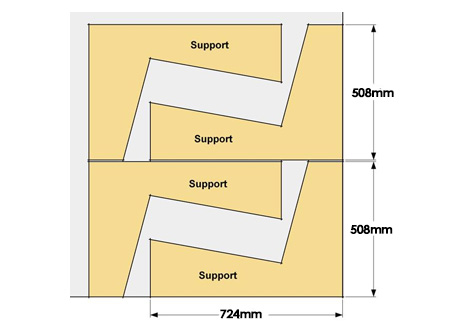
4 of 508 x 724mm 19mm plywood - supports, cut to shape
1 of 560 x 1320mm 19mm plywood - seat
1 of 470 x 1320mm 19mm plywood - seat back
32mm coarse-thread pocket hole screws
Polyurethane sealer or varnish to finish
TOOLS:
Drill /Driver plus assorted bits
Kreg pocket hole jig
Kreg clamps
Jigsaw and fine-toothed blade for cutting plywood
Orbital sander plus 240-grit sanding pads
Tape measure and pencil
Have all your 19mm plywood cut to size at Builders Warehouse for easy, fast assembly.
Not responsible for errors or omissions
HERE'S HOW:
Preparation
Before you assemble, sand all the pieces nice and smooth with 240-grit sandpaper.
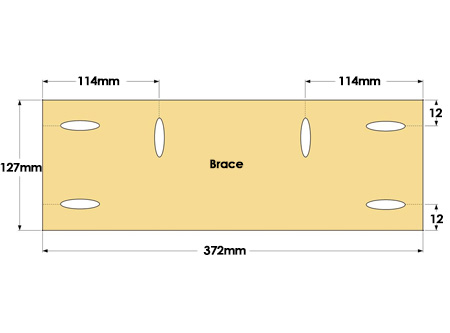
1. Set your Kreg Jig for 19mm material and drill pocket holes as shown above in the [3] Braces.
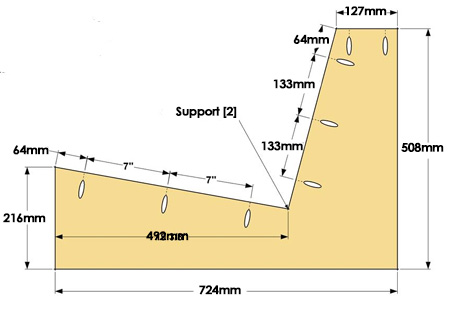
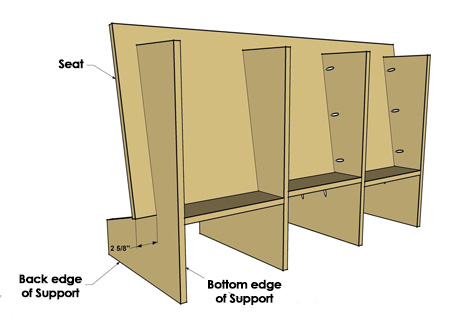
2. Cut out the plywood supports using the dimensions below. You can fit two supports into 508 x 724mm.
3. Drill pocket holes in the locations shown below. You will make [2] Left Supports and [2] Right Supports that are 'mirror' images. This ensures the pocket holes will face inward once the sofa is assembled.
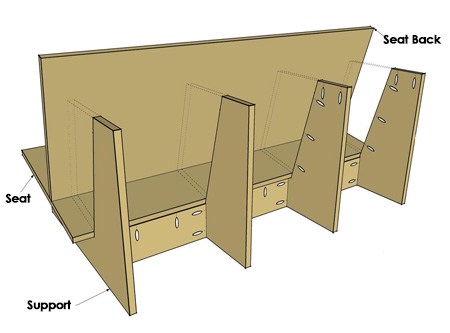
4. Starting with [2] 'left' Supports, add a Brace where shown. Use 32mm screws to secure the Brace in position. Repeat for the 'right' support.
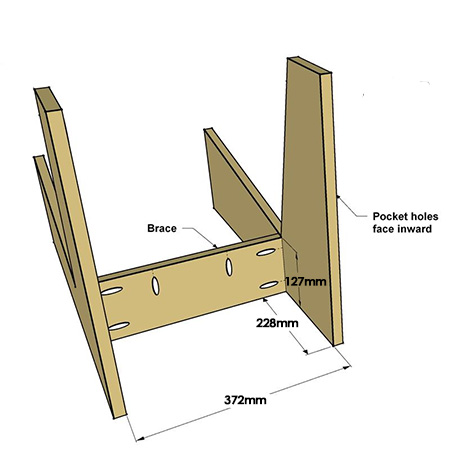
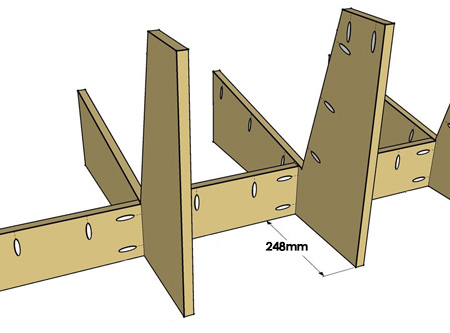
5. Add a Brace to join the two sections together. The centre Brace is set farther forward to allow for the pocket hole screws on either side.
6. Lay the sofa base on its back edges in order to position the seat. Clamp in place and secure with 32mm screws through the Supports.
7. Now you can attach the Seat Back. Position the sofa in the upright position and clamp the Seat Back in place to secure with 32mm screws through the supports.
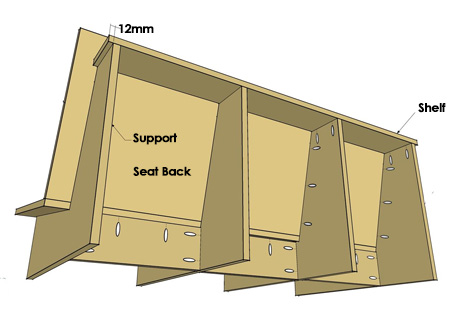
8. The final step is to add the Shelf to the back of your sofa. Allow an overhang equally on both ends and secure with 32mm screws.
Finishing
Do any final sanding that needs to be done before applying tinted or clear polyurethane sealer or varnish.