
Quick Tip: Fill Gaps in Woodworking Projects
There will always be times when you have gaps between joined sections, no matter whether you are a beginner or advanced woodworking enthusiasts, but these can be easily fixed.
21/05/2020
kregtool.com
Gaps between joined sections are an occurrence that happens all the time. We would like to believe that our power tools and woodworking equipment is the 'best of the best', but there will still be times when a slight gap occurs between mating pieces. Since many of us are looking for perfection - for a job well done, these gaps need to be disguised so as not to spoil the finish of a project, and there is an easy way to do this.
Wood filler is the woodworker's eraser, it's an easy way to fill and disguise gaps in projects that would otherwise mar the finished piece. Every woodworker has wood filler in his workshop that has been used at one time or another. Using the wood filler correctly is essential in disguising mistakes rather than them being blatant and obvious. Here are a few tips on how to use wood filler to disguise and hide any gaps.
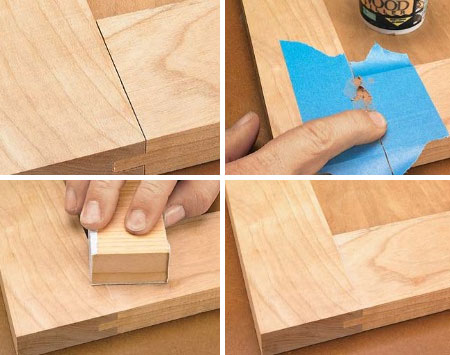
1. Apply painter's tape to both sides of where you want to fill the gap. Make sure that the tape is as close to the edge as possible, without interfering with application of the wood filler.
2. Press the wood filler firmly down into the gap. It is best to use your fingertip for this to ensure the filler goes as deep as possible. Wipe away any excess filler before removing the tape.
3. Once the wood filler is dry, lightly sand until it blends in with the surrounding finish.
How to Disguise Gaps between Wood Pieces
There are other ways to disguise gaps, whether in flat pieces or in mitred corners, other ways that do not use just wood filler, but other clever tricks as well.
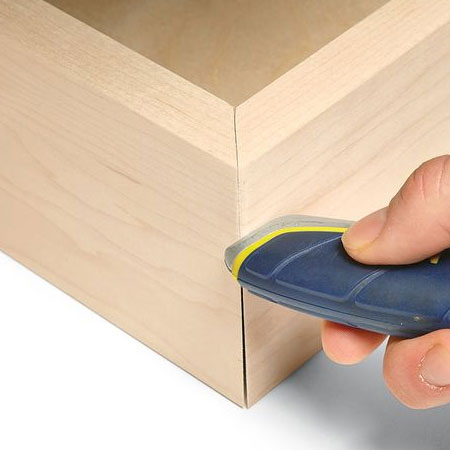
- Flatten Fibres
When you are working with mitre joints, adding wood filler to fill up gaps doesn't always work out as you would like. When filling gaps in these types of joints it is sometimes far easier to add a small amount of wood glue into the gap and then use a tool to round off the sharp corner and force the wood fibres into the gap to fill up the blank space. This way, you have a much neater finish and less chance of the wood filler chipping or breaking out.

Let the wood glue dry overnight before sanding smooth to remove any loose fibres. Don't round-off the corner, sand from both sides towards the corner edge for a flat sanding finish.
- Use Wood Glue and Sawdust
When using wood filler to disguise gaps is it important to note that wood filler does not accept a stain - any stain. For this reason, it is important to select a wood filler tint that matches that to be applied to your project. In the event that you are unable to find a matching tint in the wood filler available, another woodworking trick is to use wood glue and sawdust kept over from sanding the project. However, wood glue and sawdust mixed together still will not accept wood stain. So what now?
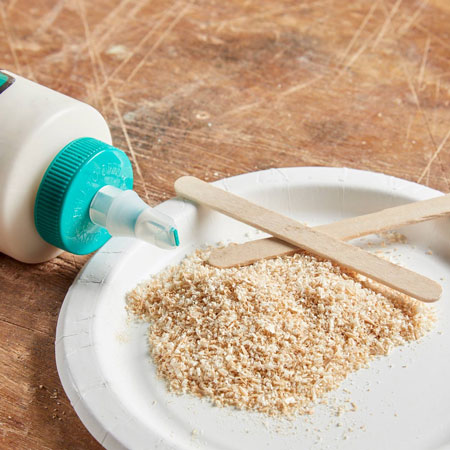
The simple solution is to always have scrap pieces on hand that can be stained in advance with the stain you will use to finish your project. Mix a small amount of wood stain with the sawdust and then add the wood glue. Doing this results in an almost invisible way to fill gaps.
images family handyman