Make a hutch desk for a child's bedroom
This hutch and desk might look complicated, but it's actually an easy project if you break it down and assemble in sections.
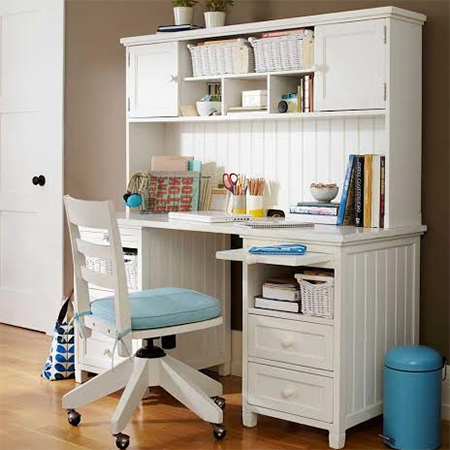
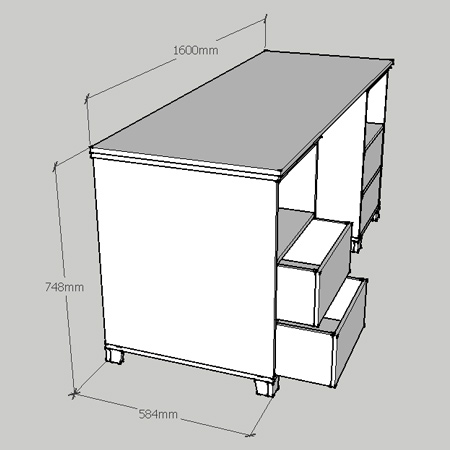
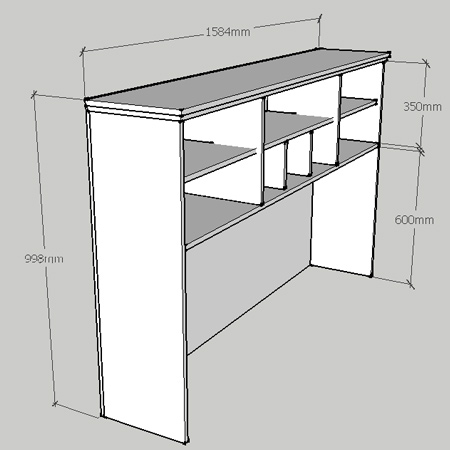
The desk consists of two pedestals with a single top. The hutch involves cutting slots to join sections together for an almost seamless design. What gives this desk a stand-out look is the beadboard design on the sides and back panel, and the framed sections.
YOU WILL NEED:
DESK:
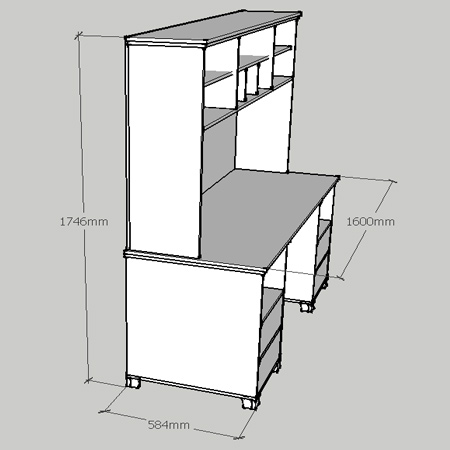
1 of 600 x 1600mm 16mm SupaWood - desk top
2 of 450 x 592mm 16mm SupaWood - pedestal top
6 of 396 x 584mm 16mm SupaWood - pedestal frame top / shelves
2 of 428 x 584mm 16mm SupaWood - pedestal frame base
4 of 584 x 650mm 16mm SupaWood - pedestal frame sides
8 of 50 x 60mm 16mm SupaWood - pedestal feet front / back
8 of 50 x 44mm 16mm SupaWood - pedestal feet sides
8 of 177 x 392mm 12mm SupaWood - drawer front / back
8 of 177 x 557mm 12mm SupaWood - drawer sides
4 of 368 x 557mm 12mm SupaWood - drawer base
40mm wide strips of 3mm SupaWood cut to fit - frames
HUTCH:
1 of 316 x 1600mm 16mm SupaWood - hutch top
1 of 308 x 1584mm 16mm SupaWood - hutch frame top
2 of 300 x 966mm 16mm SupaWood - hutch frame sides
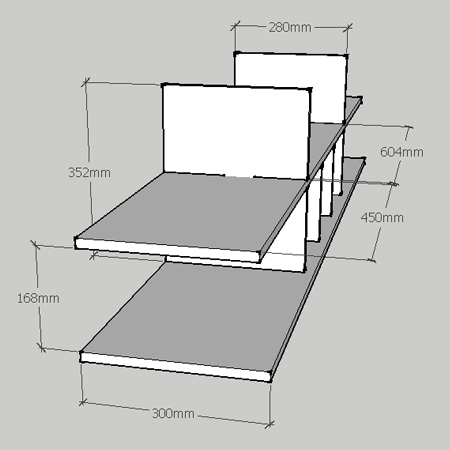
1 of 280 x 1536mm 16mm SupaWood - centre shelf with cut slots
1 of 300 x 1536mm 16mm SupaWood - bottom shelf
2 of 280 x 352mm 16mm SupaWood - main shelf uprights with cut slots
2 of 280 x 168mm 16mm SupaWood - shelf dividers
2 of 348 x 445mm 16mm SupaWood - doors
1 of 998 x 1568mm 12mm SupaWood - back
4.5 x 30mm screws
Wood glue
Wood filler
4 butt hinges + 16mm screws
2 roller door latches + 16mm screws
Handles or knobs of your choice + screws
TOOLS:
Drill / Driver plus assorted bits
Countersink bit
Jigsaw and Mitre Saw
Dremel Trio or Router and 'V' cutting bit
Orbital sander plus 120-grit sanding pads
Quick clamps
Steel rule or straightedge
Tape measure and pencil
Buy all the tools and materials required for this project at your local Builders Warehouse.
HERE'S HOW:
Preparation
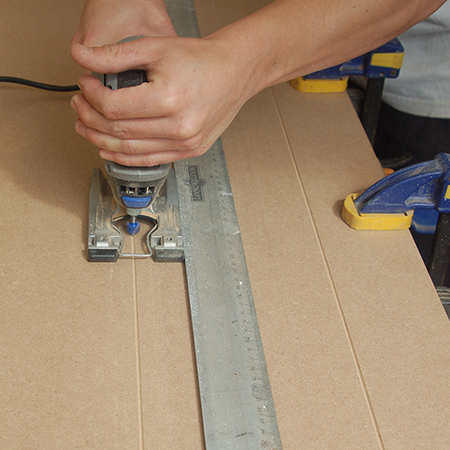
Before you begin any assembly, you need to add the beadboard design to the desk sides and back panel. This can be done using a Dremel Trio and 'V' shaped cutting bit, or a router and similar bit. The depth for cutting a groove need be no more than 2 to 3mm. The width between each groove is best between 80 to 100mm wide.
Making the Desk
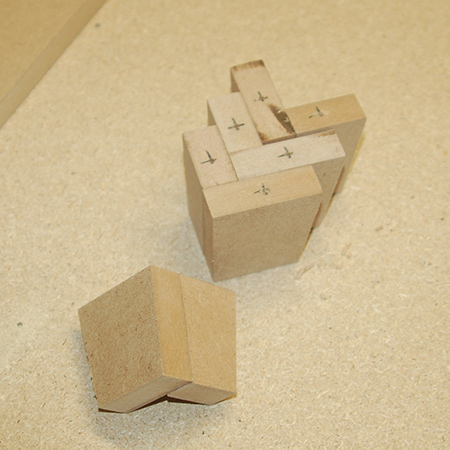
1. The first step is to make the feet for the desk - unless you would rather use bought feet. Each section is cut at a 30-degree angle along one edge and then glued together at the straight side to make angled corner feet.
GOOD TO KNOW:
If you prefer to use bought
feet, calculate this into the height of the desk
and make any modifications to allow for
increased height.
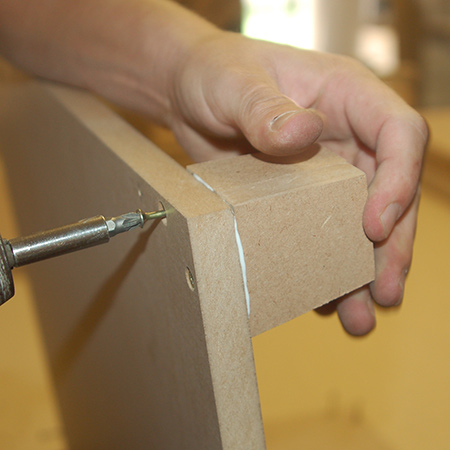
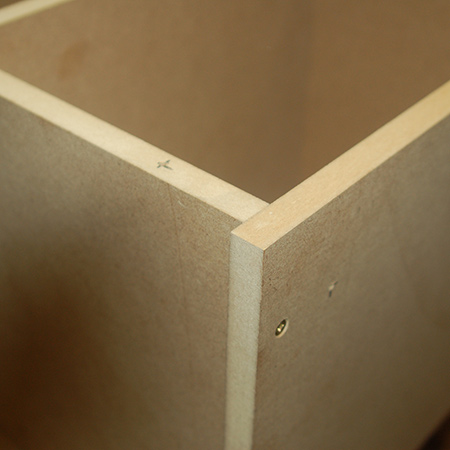
2. Allow time for the glue to dry and then attach the feet to the pedestal base using wood glue and screws. DO drill 3mm countersunk pilot holes. The feet align with the edge of each corner.
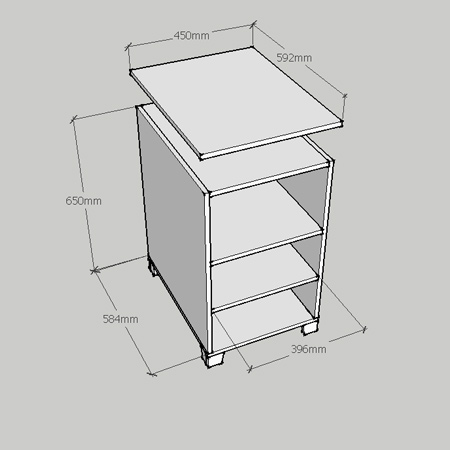
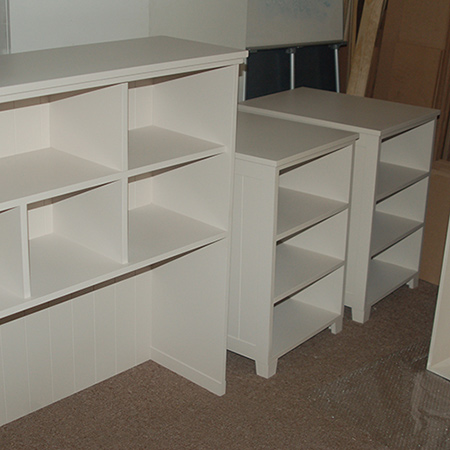
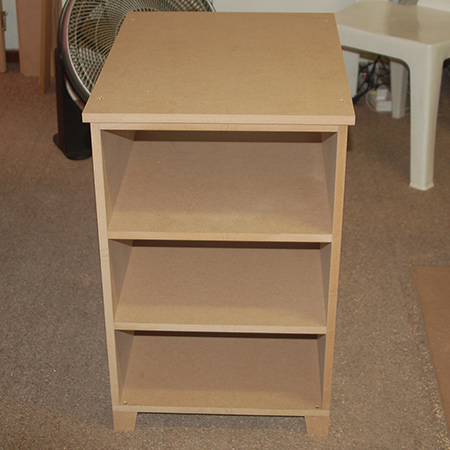
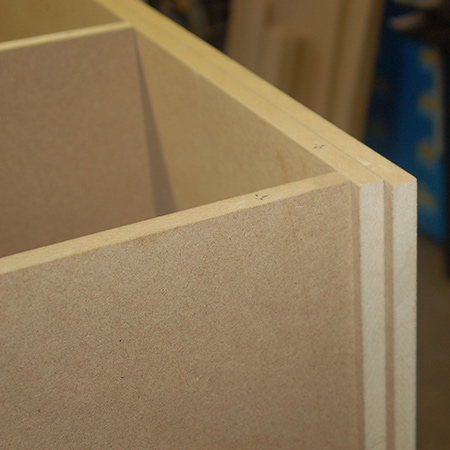
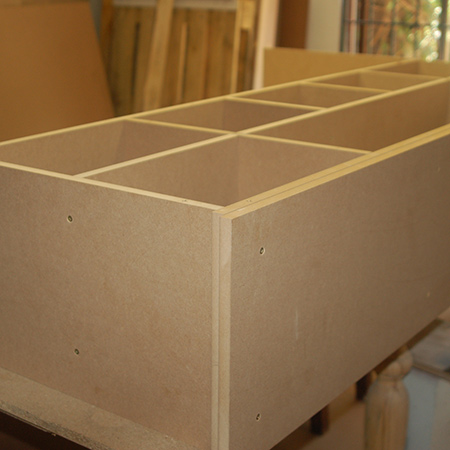
2. Assemble the pedestals as shown above and below. Place one side on a side edge and position the frame top and shelves against this to secure. Turn around and then add the other side. The main top is secured on top of this, flush with the back edge and with a matching overlap on both sides.
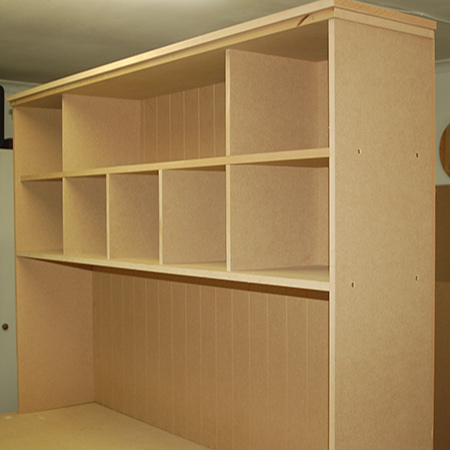
Making the Hutch
1. Use a jigsaw to cut 16mm wide slots in the middle of the centre shelf and main shelf uprights. The slots need to be exactly in the middle and half the width, so that the supports slot into the centre shelf.
2. Attach the 280 x 168mm shelf dividers at 652mm in from the edges of the slotted shelf and to the underside of the shelf.
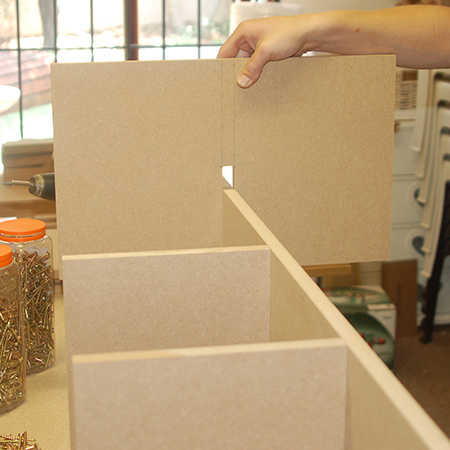
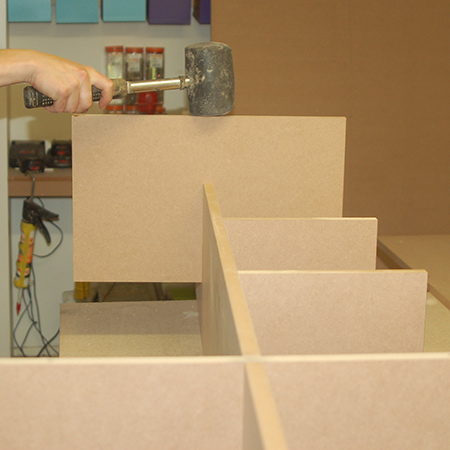
3. Slot the main shelf uprights into the slots in the centre shelf. You may need to lightly tap with a rubber mallet if you have difficulty slotting into place.
4. The next step is to attach the bottom shelf to the main shelf uprights and shelf supports. Always pre-drill countersunk pilot holes to prevent splitting the board.
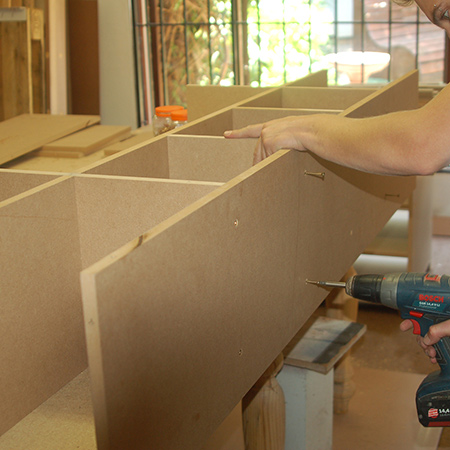
5. Now you can attach both side sections, securing these to the centre and bottom shelves.
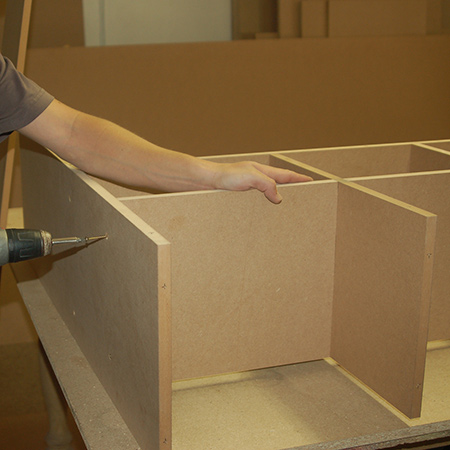
6. Attach the frame top and main top - in that order - making sure that the back is flush with the sides.
7. Make sure there is an equal overhang on both ends.
8. Finally, secure the back to the hutch by driving screws through the back of the sides, shelves and top frames. Again, pre-drill countersunk pilot holes.
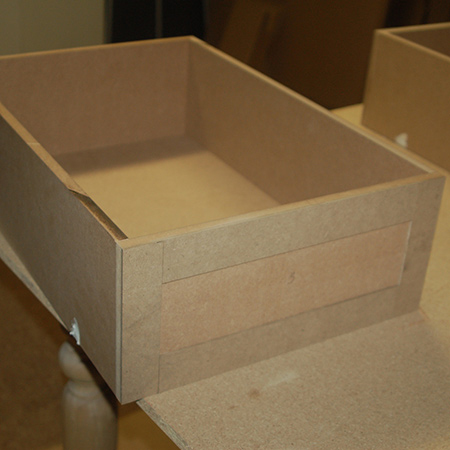
9. Assemble the drawers. There are no drawer runners on these drawers, but you can include these by reducing the width of the back and base according to the width of the drawer runners you are using.
Finishing
For best results use a Bosch PFS Spray System. We used a Bosch PFS 2000 and Prominent Paints Select Matt finished with 2 coats of Prominent clear acrylic sealer. The Bosch PFS 2000 is exclusive to Builders Warehouse and you can read our review here as well as find helpful tips for spray painting furniture projects.