
Make a Craft Centre to Keep your Craft or Hobby Room Organised
Many people are turning to their crafts and hobbies as a way to bring in extra cash, and this craft centre will help you stay organised.
19/06/2020
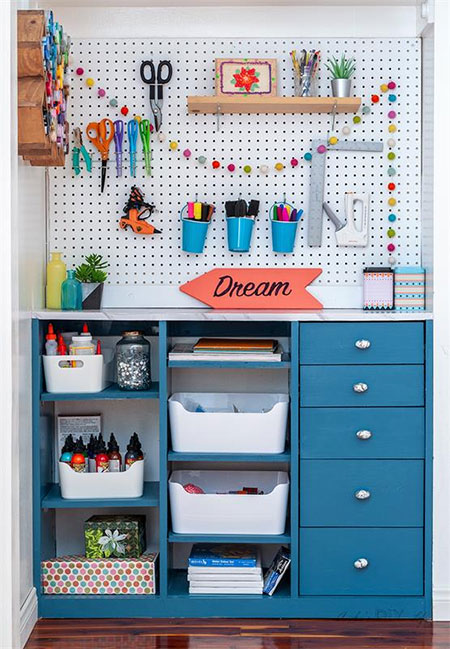
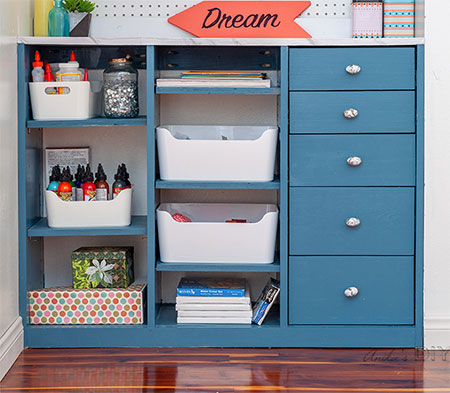
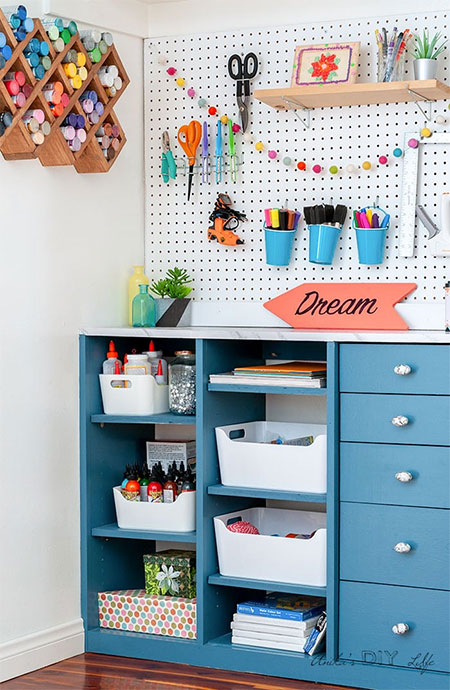
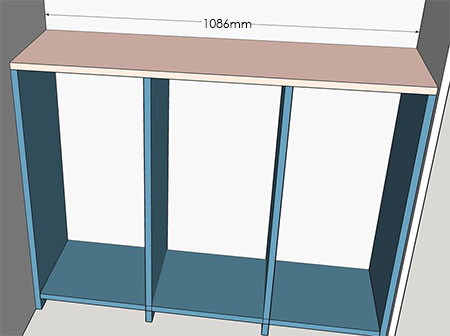
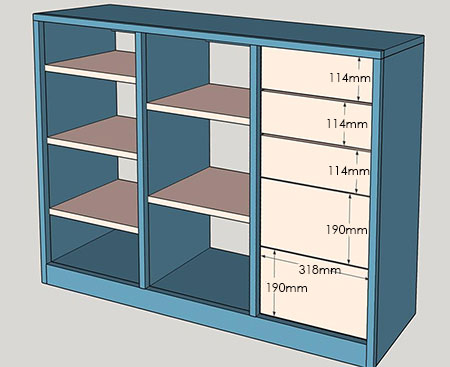
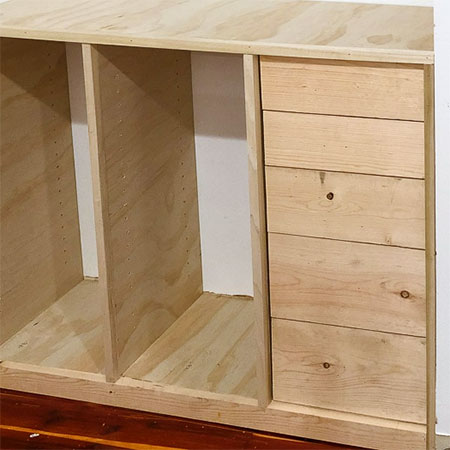
This DIY craft centre has all the storage you need to keep your craft or hobby supplies organised and sorted. It has open shelving and drawers for your crafting goodies and you can hang a pegboard above the unit for any additional supplies.
You can click here if you want to see the video step-by-step for making this craft centre, or follow the instructions below provided by buildsomething.com.
The craft centre was designed by Anika's DIY Life and we have step-by-step instructions below that make this an easy project for anyone to do. Use 19mm pine or veneered plywood to make the craft centre or substitute with your choice of material, amending the dimensions accordingly.
YOU WILL NEED:
19mm plywood sheet cut to the following sizes:
- 1 of 19 x 330 x 1086mm - top
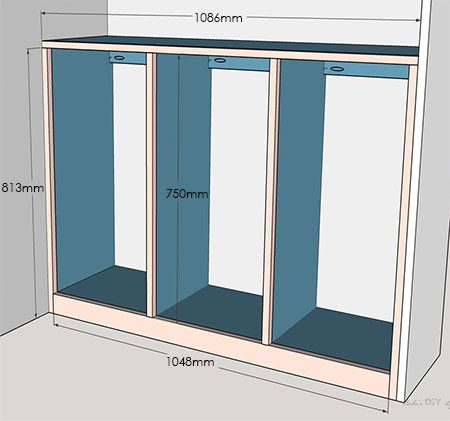
- 4 of 19 x 312 x 813mm - sides
- 2 of 19 x 311 x 343mm - base support A
- 1 of 19 x 311 x 324mm - base support B
- 3 of 19 x 114 x 318mm - drawer front, small
- 2 of 19 x 190 x 318mm - drawer front, large
- 5 of 19 x 311 x 343mm - shelves
- 6 of 19 x 64 x 260 - drawer side 1, small
- 6 of 19 x 64 x 280mm - drawer side 2, small
- 4 of 19 x 140 x 260mm - drawer side 1, large
- 4 of 19 x 140 x 280mm - drawer side 2, large
3mm masonite, hardboard or plywood cut to fit for drawer bases
Edge banding cut to fit.
Drawer runners, ball-bearing type [10] plus 16mm screws
Shelf pins
Knobs or handles of your choice
32mm pocket-hole screws
Wood glue
GOOD TO KNOW: Modify the above dimensions for variations in pine or board thickness
TOOLS:
Drill / Driver plus assorted bits
Circular saw (if cutting your own pieces to size)
Nail gun - or hammer and panel pins
Tape measure and pencil
Kreg pocket-hole jig
Clamps
OPTIONAL: Shelf Pin Jig, Drawer Slide Jig, Cabinet Hardware Jig
Not responsible for errors or omission
HERE'S HOW:
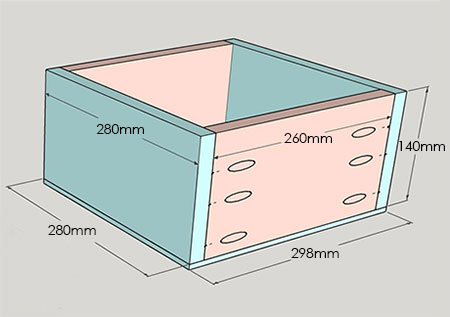
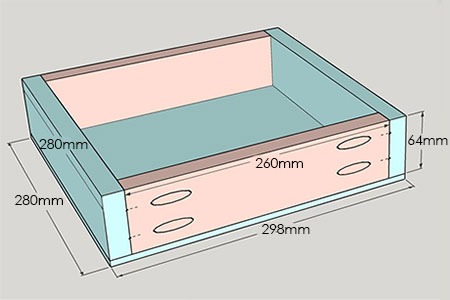
Assemble the drawers
Assemble the [5] large and small drawers as per the diagrams below.
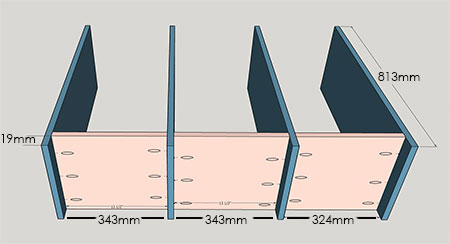
Drill for Shelf Pins
Use the Kreg Shelf Pin Jig to drill holes in the sides for the shelf pins to allow you to set the height of the shelves.
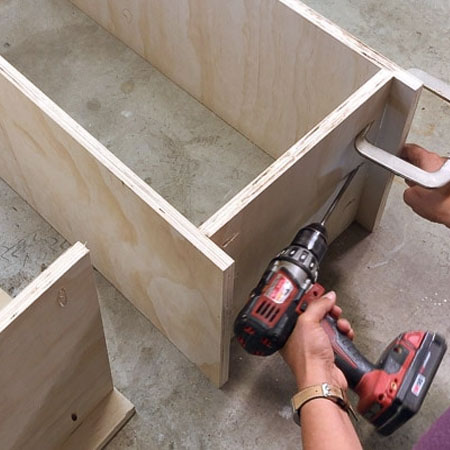
Construct the Frame
1. To assemble the frame, start by securing the base supports to the sides, as shown in the bottom view below. Note that the supports are 19mm up from the bottom edge of the sides. Drill all pocket holes in the locations shown.
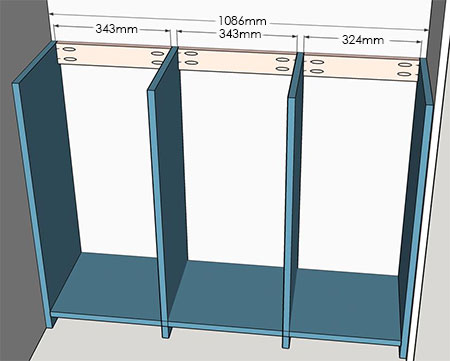
2. If you are securing the craft centre to a wall, add the back supports as indicated in the diagram below, with [2] pocket holes at the ends. You are now able to secure the finished assembly to the wall using nylon wall plugs and screws.
3. Attach the top to the frame with wood glue and panel pins.
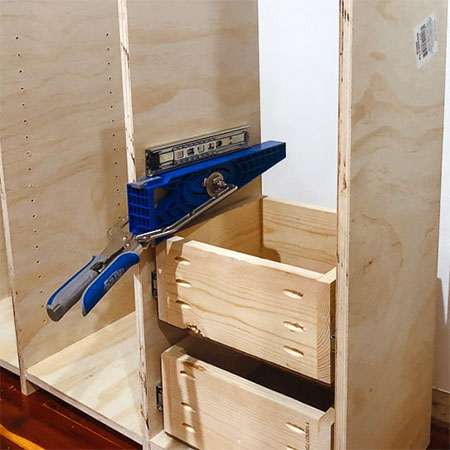
4. Glue edge banding around all the edges to finish off the frame and add a kick-plate with wood glue and panel pins.
5. Add the drawers using the Kreg Drawer Slide Jig. Once the drawers are fitted and correct, secure the drawer fronts in place.
Finishing
Fill all holes with wood filler, sand smooth and then paint, stain or varnish in your choice of finish
Add your choice of handles or knobs.