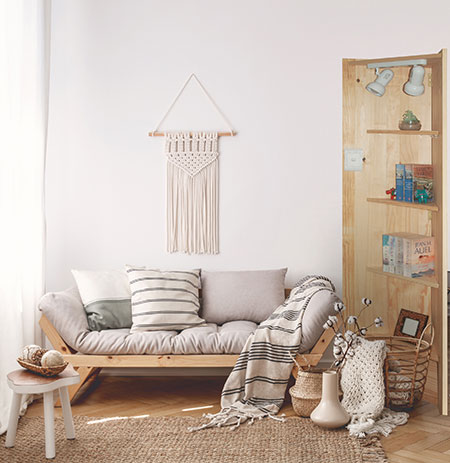
DIY Corner Bookshelf with fitted Light
This corner bookshelf is easy to make and ideal for setting up a reading corner in any room in a home, and perfect for a child's bedroom.
15/11/2018
This pine corner bookshelf is very easy to make, and we've included step-by-step instructions for you to add a double spotlight at the top of the unit as a lighting source. We made the corner bookshelf using PAR pine that you will find at any Builders Warehouse, as well as all the tools and accessories needed to complete the project.
Note that this was not the original design for the bookcase, but due to lack of stock on timber boards, we modified the design to use 220mm wide boards as opposed to laminated pine shelving. If your store has stock of laminated pine shelving, you can replace the [4] boards for the back sections with [2] 455mm wide laminated pine shelving boards, and this does work out slightly cheaper.
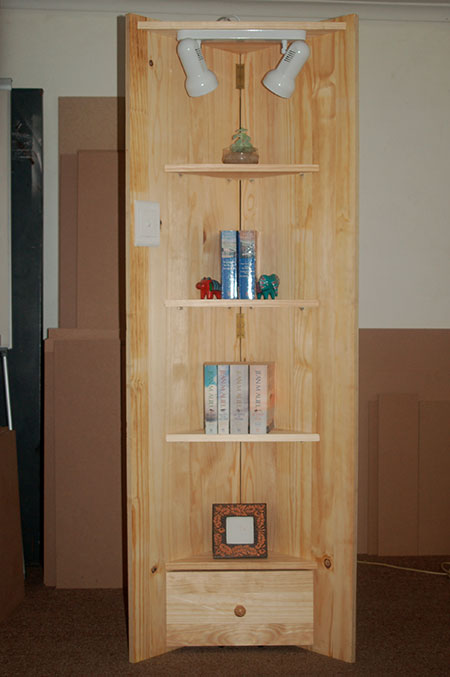
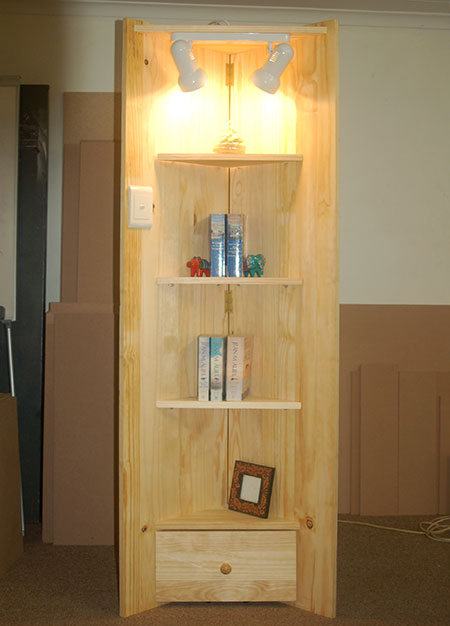
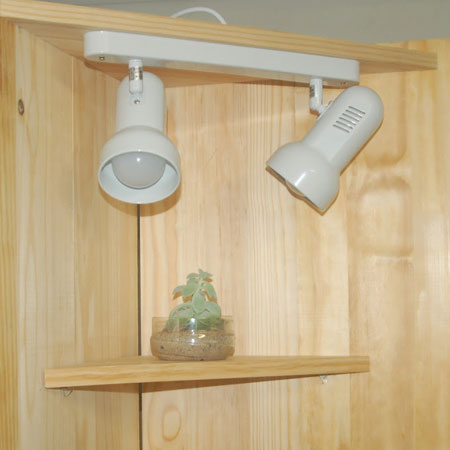
Compact in size, this pine corner bookshelf is small enough to set up a comfortable reading corner in any room, but is perfect for a mommy and baby reading corner (fastened to the wall for safety). The built-in spotlight as the top of the unit can be angled in any direction to provide a light source for night time reading.
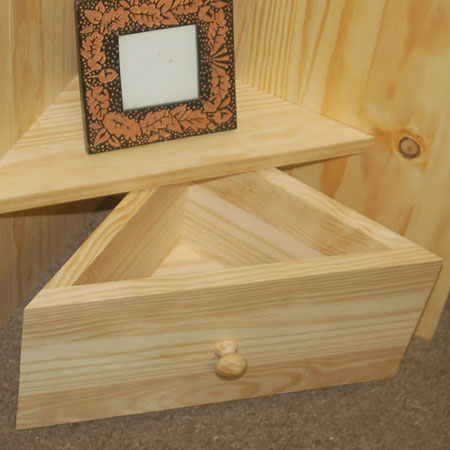
At the bottom of the DIY reading corner we added a small, optional pullout drawer for a bit of extra storage. You don't have to include this, but if you're prepared to buy an extra length of PAR pine 200mm, you can make the drawer as well to finish off the bookshelf.
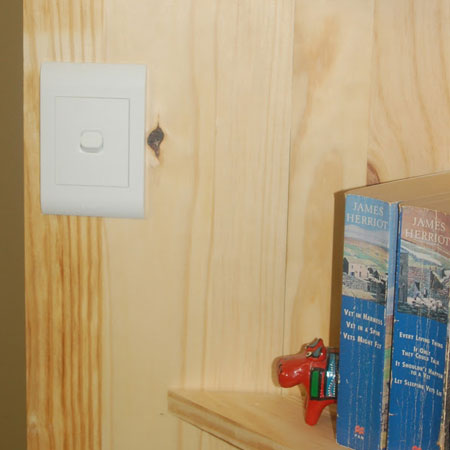
Rather than have an on/off clicker for the light, we built-in a proper light switch to control the spotlights. And safety first, the back of the light switch is closed off if you do decide to make this as a reading corner for a child's bedroom.
YOU WILL NEED:
5 of 22 x 220 x 180mm PAR pine (6 if you want to make the pullout drawer)
1 of 19 x 67 x 1800mm PAR pine
Light switch and 2-core electrical cable, and 3-pin plug
3 of 75mm butt hinges and [18] 16mm screws
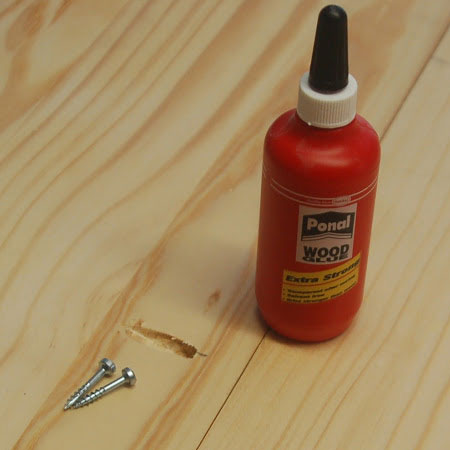
Wood glue
25mm pocket hole screws
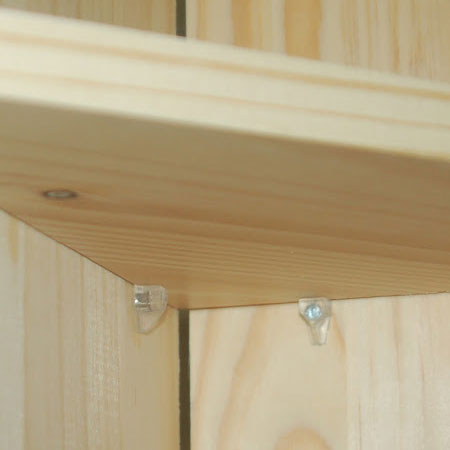
Shelf pins [12]
TOOLS:
Drill /Driver plus assorted bits
25mm spade bit
Kreg pocket hole jig
Jigsaw, mitre saw or table saw
Soldering iron and solder
Hot glue gun and glue stick
Tape measure and pencil
NOTE: While we used a pocket hole jig for this project, you can substitute this with simple butt joints to join the sections, use a biscuit joiner to laminate the back boards, or glue and clamp.
HERE'S HOW:
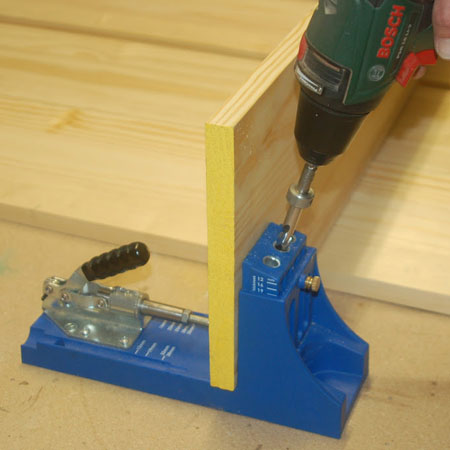
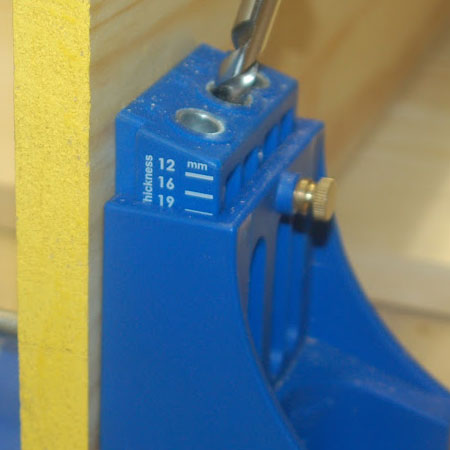
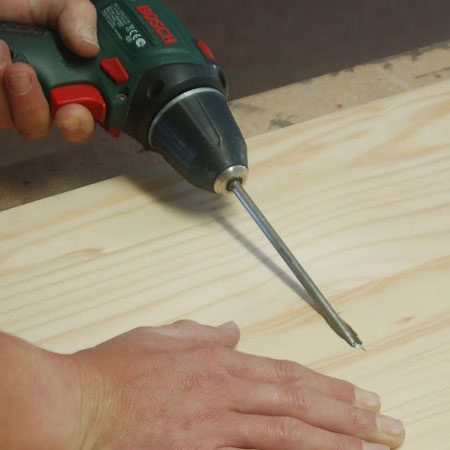
1. The back boards are 1800mm, so no cutting is required. Simply set up your pocket hole jig for 19mm or 22mm thickness material.
GOOD TO KNOW: We measured the thickness of our pine boards before setting up the pocket hole jig. Some were 20 - 21mm thick, and some 22mm thick. It is better to err on the side of caution, so we set up the jig for 19mm thick.
2. We applied a thin bead of wood glue along the edge of one of the boards before screwing together. For this step you can also use a biscuit joiner, or glue and clamp the boards together.
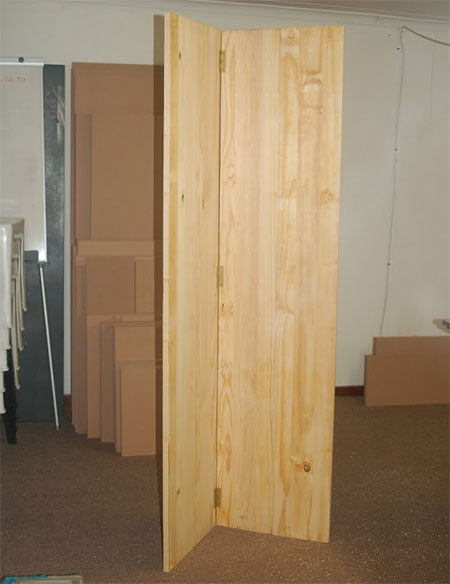
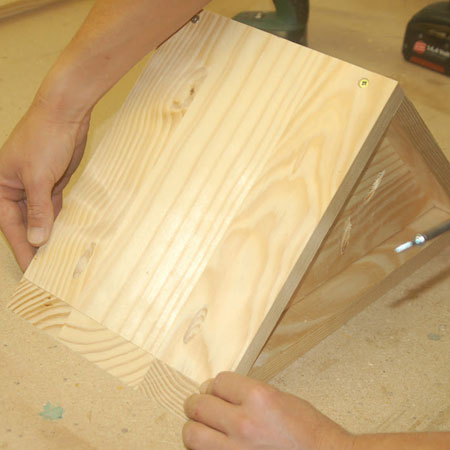
3. The back of the bookshelf consists of two sets of [2] boards glued and screwed together. Make sure these sections are flush when joining together with 25mm screws.
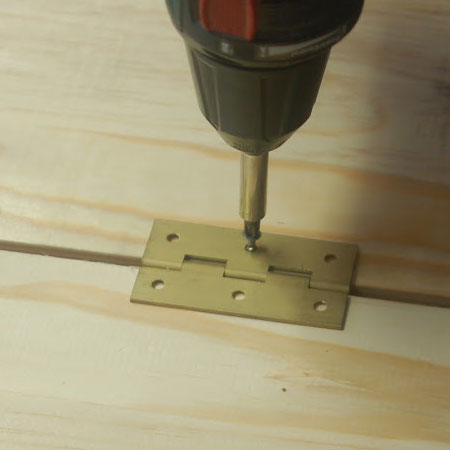
4. After joining the back boards, these two sections are connected using 75mm butt hinges. The hinges are mounted on the face of the boards using 16mm screws. Place a hinge at the top and bottom approximately 100mm up from the edge, and a hinge in the centre.
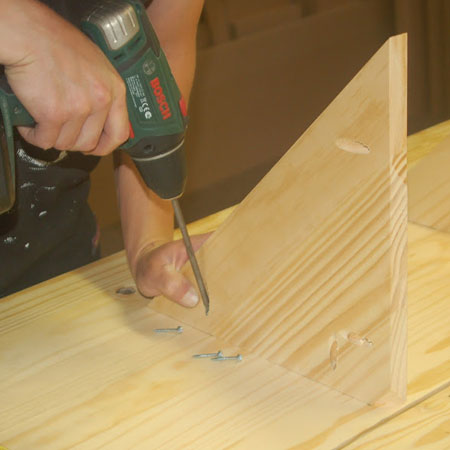
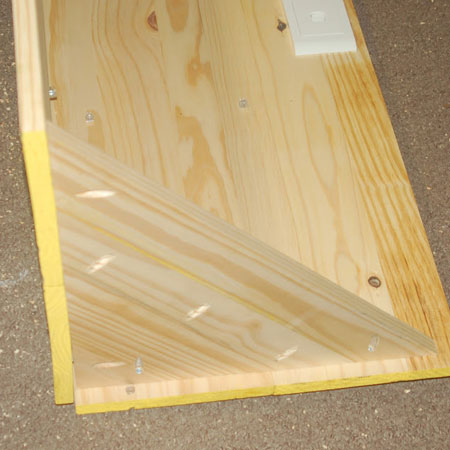
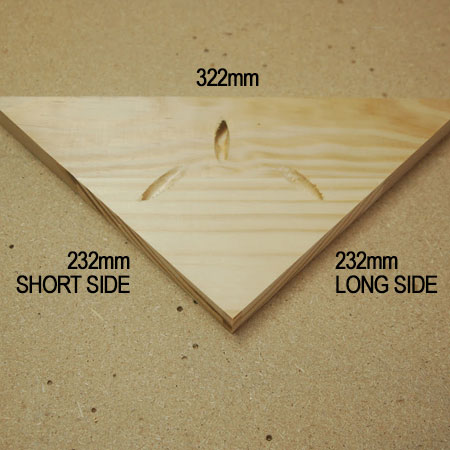
5. We used a mitre saw to cut the shelves for the unit, but you can also use a jigsaw or table saw. The shelves are cut at 45-degrees (left and right).
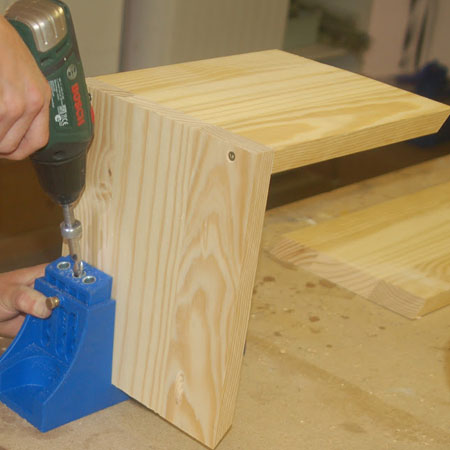
6. Only the bottom shelf is fixed, and the remaining shelves sit on shelf pins. We drilled pocket holes in the underside of the bottom shelf for mounting onto the back boards - see image below.
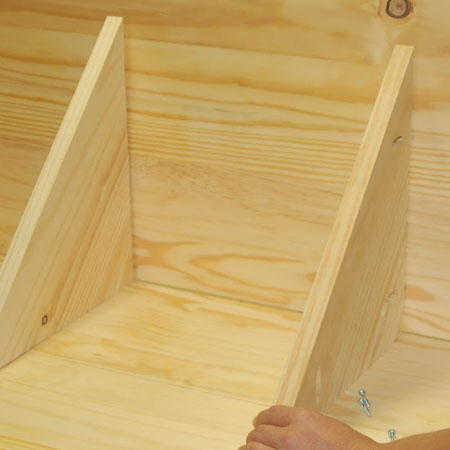
GOOD TO KNOW: If this unit is going into a child's bedroom as a reading nook, we recommend that all shelves be fixed in place in the same way as the bottom shelf.
7. Measure and mark the locations to drill holes for the shelf pins.
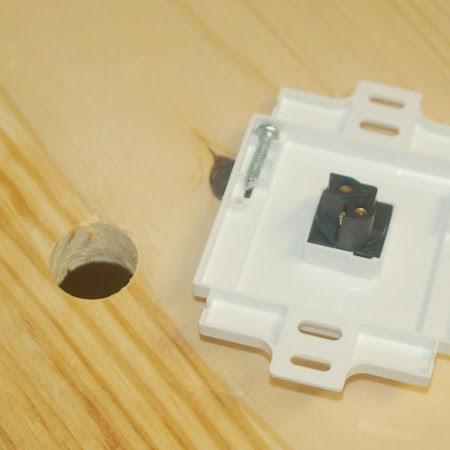
8. Use a 25mm spade bit to drill a hole where you want to mount the light switch.
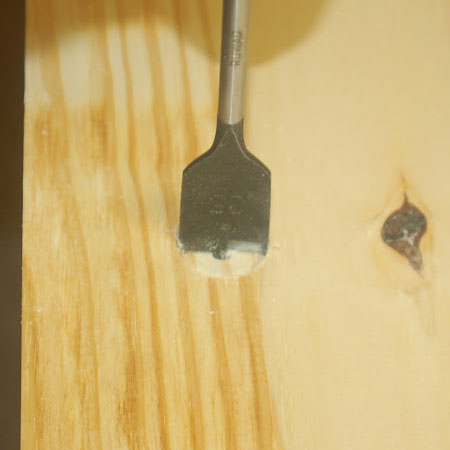
GOOD TO KNOW: When using a spade bit, only drill to 3/4 the depth with the spade bit and then drill from the other side. This gives you a hole with clean edges.
GOOD TO KNOW: Our hole was drilled to accommodate the light switch, and this may vary if you buy a different switch. Check the back of the light switch to ensure 25mm is large enough or adjust accordingly.
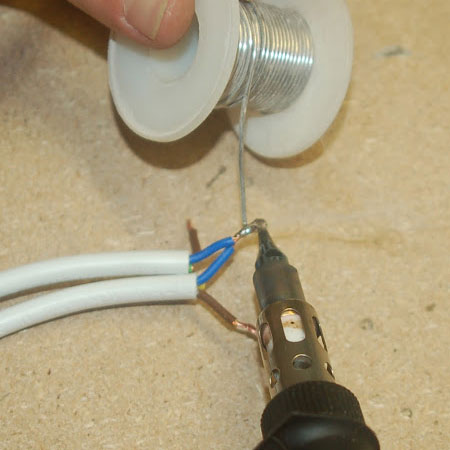
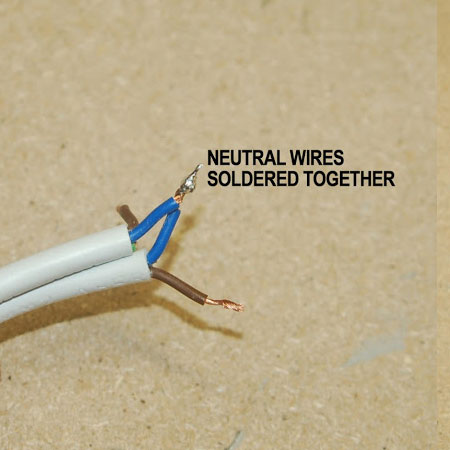
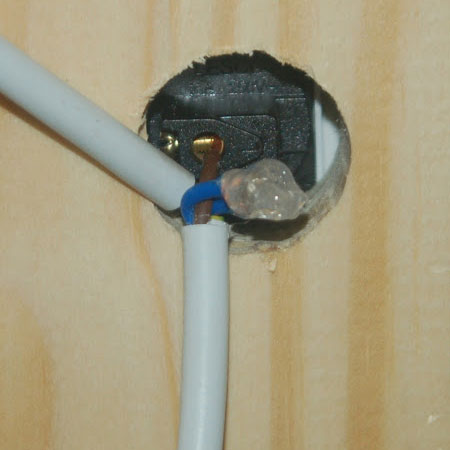
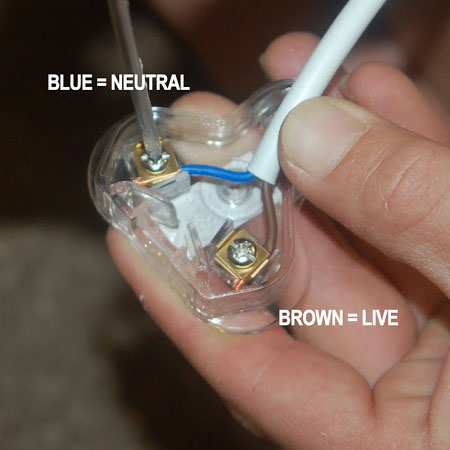
9. Cut [2] lengths of electrical cable; one long enough to reach from the wall plug socket to the back of the unit, the other to reach from the back of the unit (where mounted) to where the light will be fitted. Strip the ends of the cable. Use a soldering iron and solder to join the [2] blue neutral wires together for fitting into the light switch.
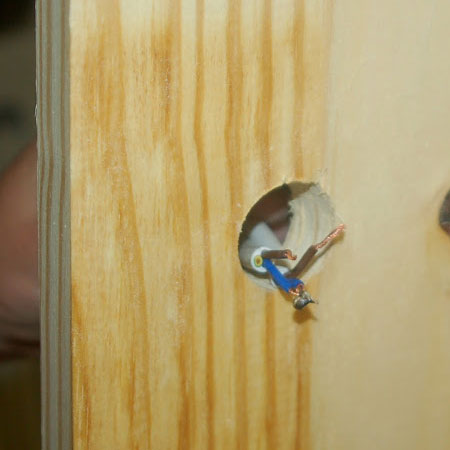
10. Push the electrical wires through the drilled hole in the back.
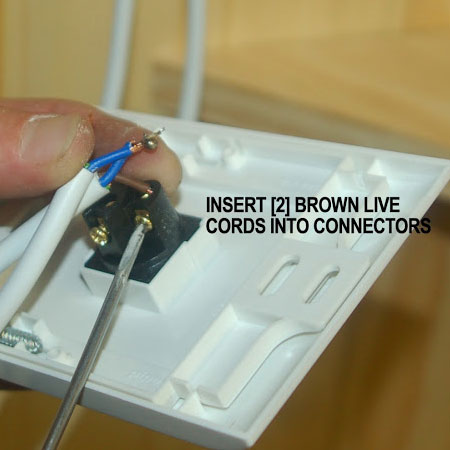
11. Secure the [2] brown live wires securely in the connectors at the back of the light switch.
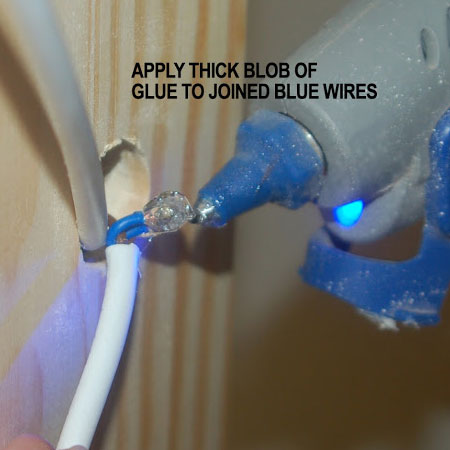
12. Place a large blob of hot glue over the joined blue wires. Alternatively screw on a ceramic wire cap.
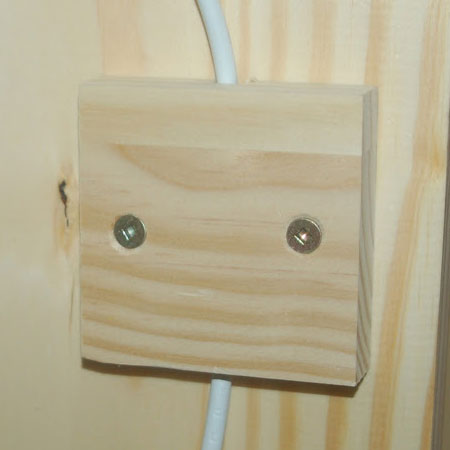
13. To cover the wires at the back you can screw a backing plate over the wires, or rout a slot in a piece of wood, as shown below.
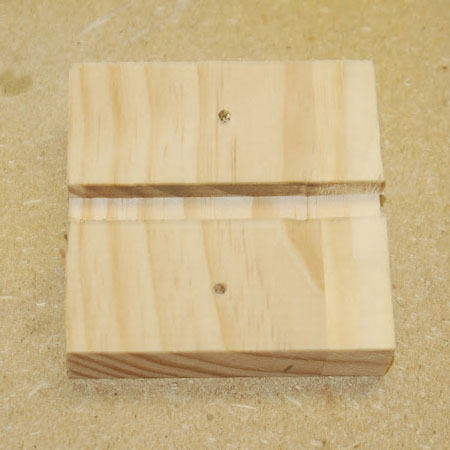
GOOD TO KNOW: A cover plate or block of wood to cover up the electrical wires ensures a safe fitting.
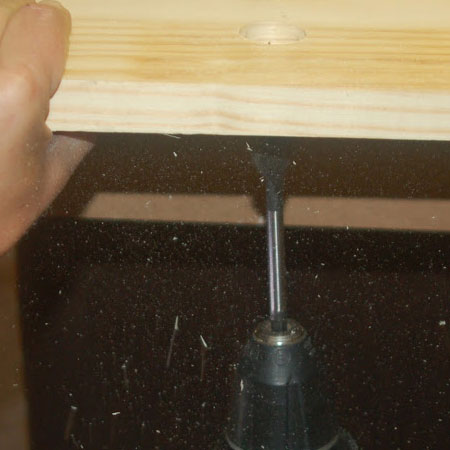
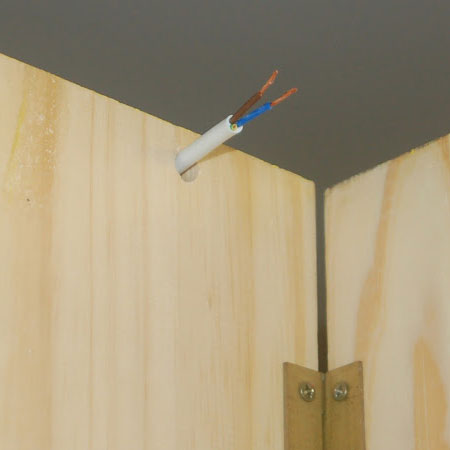
14. Drill a 10mm hole at the top of one back section in order to insert the electrical cable for wiring up the spotlights.
15. There was a delay in fitting the top (fixed) shelf, due to a lack of stock of PAR pine. The shelf was cut from the 220mm wide PAR pine, but needed an extra piece of 69mm wide PAR pine to extend further forward than the other shelves, in order to fit the spotlight. Once stock arrived we cut a piece of 69mm wide PAR pine to fit at the front of the shelf - joined with glue and pocket hole screws. This was then attached to the back pieces using wood glue and pocket hole screws.
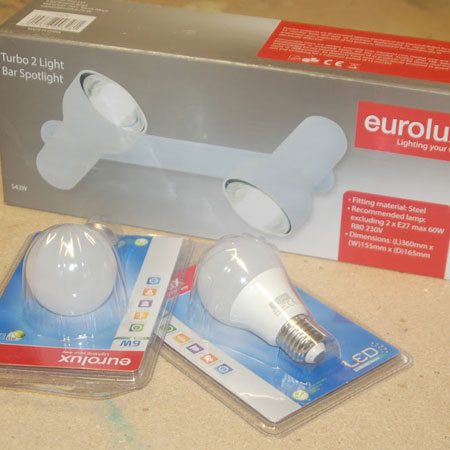
GOOD TO KNOW: For the light fitting we went with a basic, affordable (R209) double bar spotlight. This can be angled towards a chair or couch, and also be used to light up the bookshelf.
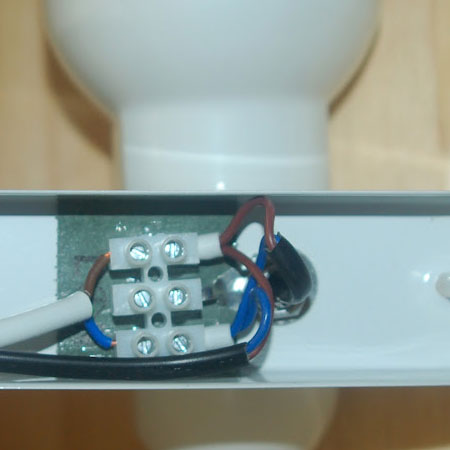
16. Wire up the spotlight with blue (N) and brown (L) in the marked connectors at the back of the spotlight. Screw tightly in place.
17. Add a 3-pin plug to the end of the electrical cable to be plugged into the plug socket.
OPTIONAL PULLOUT DRAWER
To make the pullout drawer you will need to cut [1] front 220 x 420mm, [1] side 220 x 272mm and [1] side 220 x 252mm, plus a base to bit. The drawer front is cut as 45-degree angles on both ends, while both sides are only cut at a 45-degree angle on the edge that butts against the drawer front.
1. Glue and screw the straight edges of the sides together. The shorter side butts against the longer side, as shown above.
2. Cut the base to fit and drill pocket holes to secure to the sides.
3. Drill [2] pocket holes along the two angled edges, place on the front of the drawer and secure in place with 25mm screws.
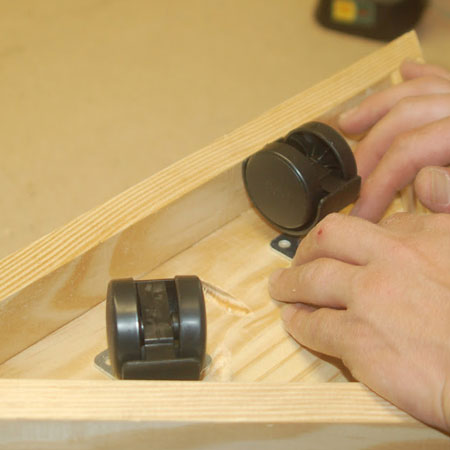
4. Secure [2] castor wheels at the front of the base, and [1] at the back. Because there are only 3 castor wheels fitted, the drawer does tip forwards a bit when removed from the bookshelf.
FINISHING THE BOOKSHELF
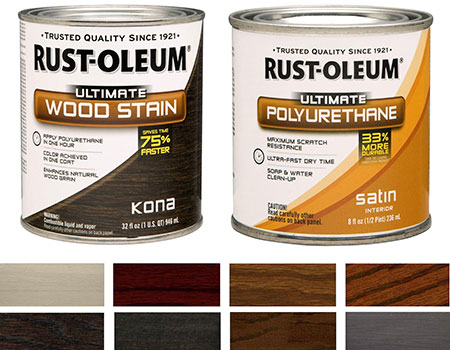
Finish off your completed pine bookshelf with stain and/or sealer. We applied two coats of Rust-Oleum Ultimate Polyurethane sealer with a satin finish. This will protect the wood and allow for easy cleaning. Rust-Oleum have a selection of wood stain colours that you can apply, or you can give it a distressed or vintage effect with Rust-Oleum Chalked Ultra Matte paint and glazed. The full range of Rust-Oleum wood stain, Chalked paint and Ultimate Polyurethane are available at Builders Warehouse.