
Making a DIY Coffee Table for the Home
Having moved my lounge back into its original place, it is time for me to take furniture pieces for the room, including a custom coffee table.
04/08/2022
A couple of months ago, I posted on making a sofa table for my new lounge. While I show the sofa table and basic design if you want to make your own, the article focused more on buying items that claim to be made using 'reclaimed pine'. Still on this topic, I have tried a further method for easily turning ordinary pine into reclaimed pine very simply and I will show you how.
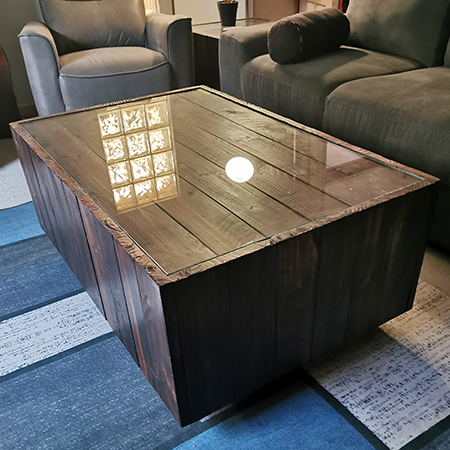
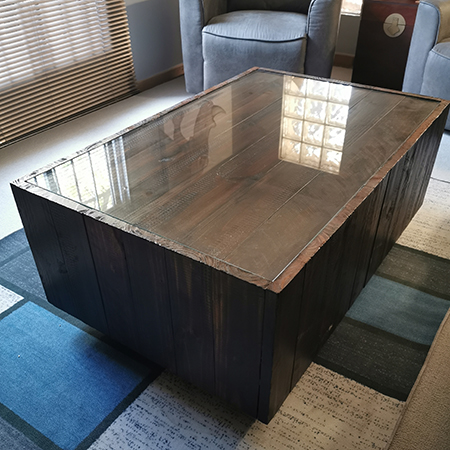
The coffee table that I made is a very simple design and if you have all the timber cut to size, it means you need less tools and it gives you easy assembly. The panels that make up the sides around the table are fastened together with wood glue and Kreg pocket-holes and these panels are then mounted onto the top and base. I have used my router to rout an edge on the inside of the frame to accommodate the 5mmm-thick glass on top. I decided it would be better to have the glass top when it came to cleaning.
There is a frame that runs underneath the base that us also secured using wood glue and pocket-holes and this frame disguises the caster wheels that allow for the coffee table to be moved when cleaning the carpets, etc.
Easy instructions to make a DIY Coffee Table that is finished to resemble reclaimed pine and that can be stained in the colour of your preference.
Making the coffee table
As mentioned above, it is very easy to assemble this coffee table design. All the pieces for the panels are fastened together using wood glue and Kreg pocketholes. I designed the coffee table so that none of the pieces had to be cut in width and only in length, making it easier to do with a jigsaw, mitre saw, or table saw. I wanted a table that would fit in the space and that means it would be a large coffee table and not something I would be able to buy in a store.
After assembling all the panels, the top panel was placed in position and the panels attached around the outside of this using wood glue and pocket-holes. The base was then fitted in place and wood glue and pocket-holes used to attach the base from underneath into the surrounding panels.
The frame at the bottom was last to be added and it will disguise the caster wheels to be mounted on the base to make the table more mobile.
Wood for the coffee table
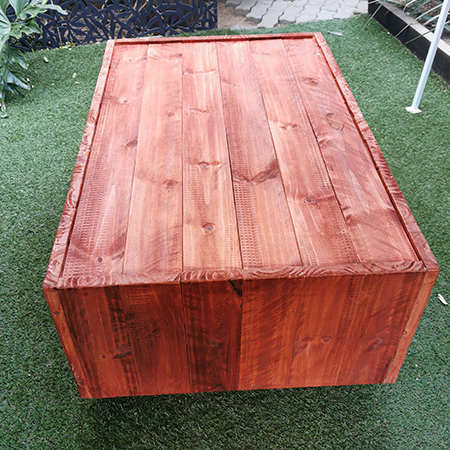
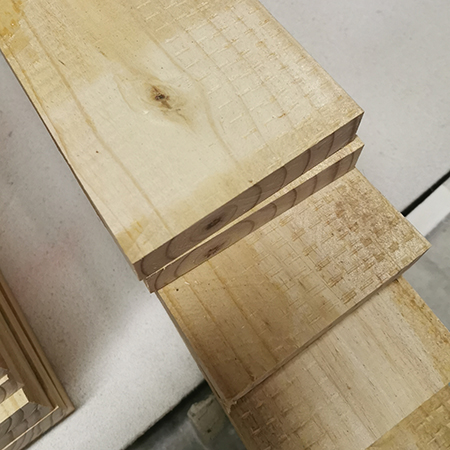
For the Sofa Table, I used PAR pine from my local Builders store and then used a variety of tools to distress and age the finish. I wanted an easier way than this and opted to try using raw pine - pine that has not been planed and quite rough. This pine is also thicker than PAR pine, which is Planed All Round and that reduces the thickness. The boards used are 25mm-thick and this gives the coffee table a chunky look and very sturdy design.
Raw, unplaned pine is far cheaper than PAR or planed pine and can be sourced at local timber merchants.
The image above highlights the 'natural' detail on the unplaned boards, and I think this will be absolutely perfect for the 'reclaimed' effect.
Staining and painting the coffee table
This is the easiest aging method that I have used to date, and it doesn't involve a lot of pre-sanding or heavy sanding afterwards and it is also inexpensive compared to other methods.
Step 1
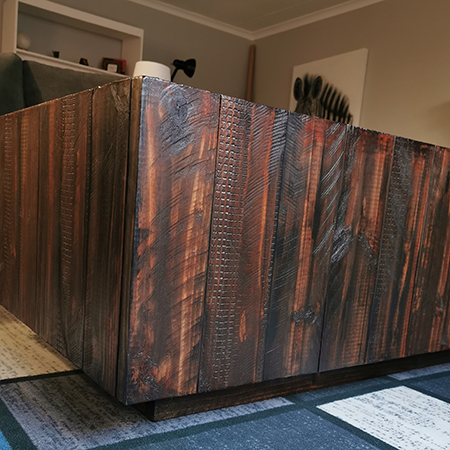
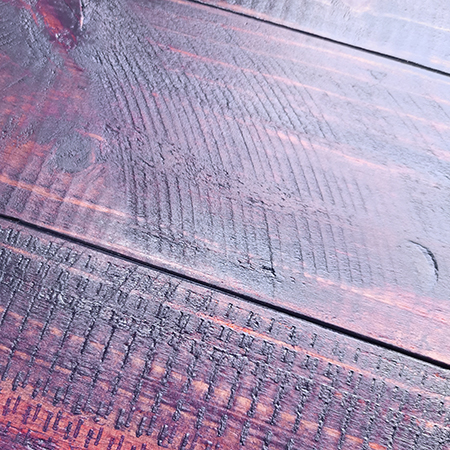
The first step was to apply the wood stain. I used a cherrywood stain to give the timber some warmth that would show through after the coffee table was finished. Using an old rag, I applied a liberal amount of stain over the surface of the boards. As you can see above, the stain does appear darker on the rougher areas, but I wanted more than this, especially when the dark areas lightened when the stain dried.
Step 2
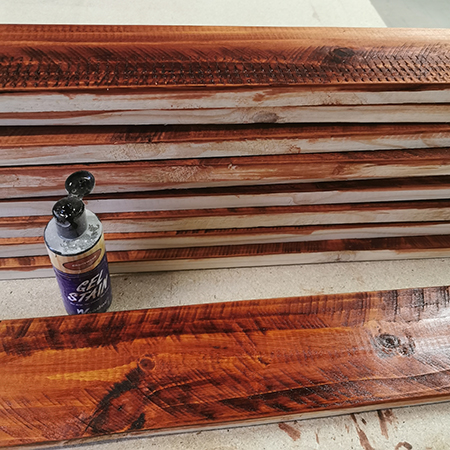
To give darker finish to the wood, I mixed water and black acrylic paint. You will also need rags and a bucket of clean water. Working on one board at a time, use a paintbrush to liberally apply the watered-down paint over the entire surface. Leave for about 5-minutes and then use a wet rag to wipe the paint away. Then it's on to the next board.
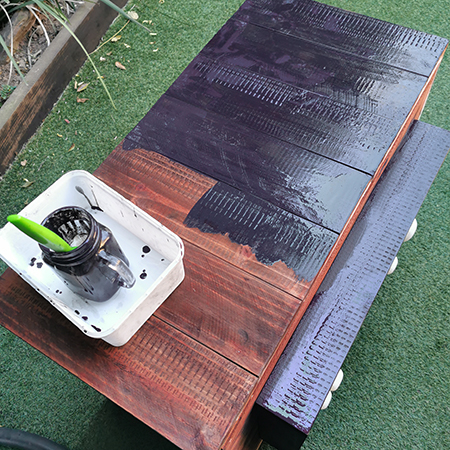
For a darker finish, use less water to paint ratio and you can also leave the paint on longer, say for about 10-minutes before wiping it off but don't let the paint dry.
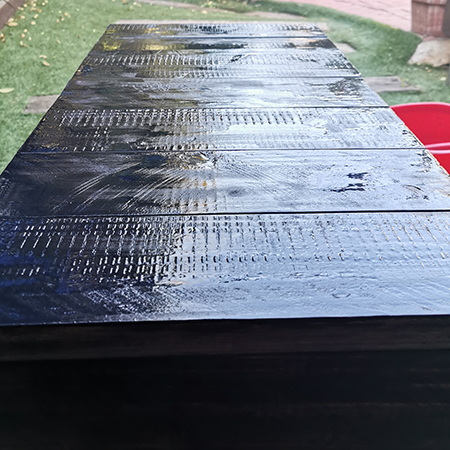
Below is the table after applying the cherrywood stain and 2 coats of watered-down black acrylic paint. The first coat didn't leave a dark enough finish and a second coat was perfect. Using this method, you can achieve the perfect finish that you want. If you use grey paint instead of black, the effect will be more subtle but still age the wood.
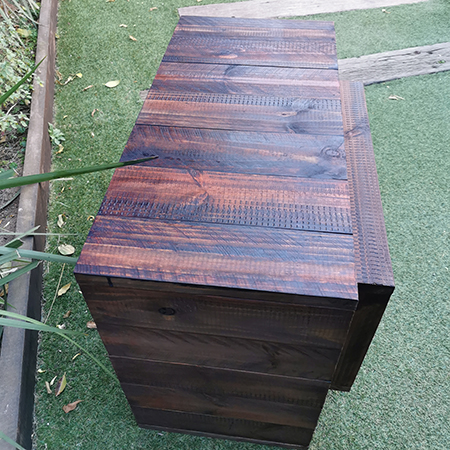
Here is the finished table. I applied 2 coats of clear, matt polyurethane sealer to provide protection.