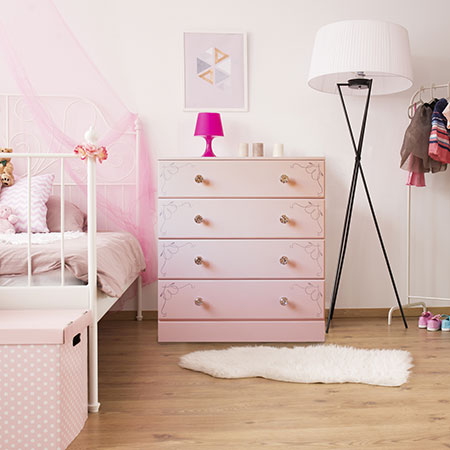
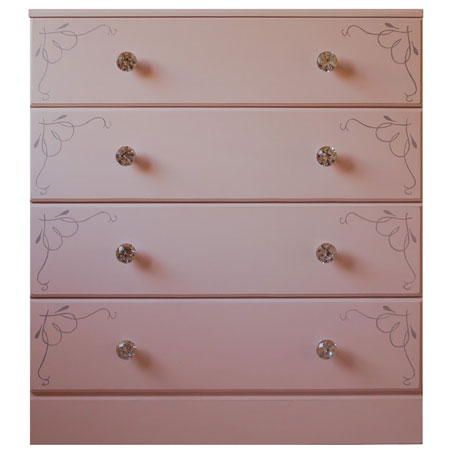
DIY Chest of Drawers finished with chalk paint
We show you how to make a chest of drawers at a fraction of what is costs to buy new, and finish with Rust-Oleum Chalked paint and gorgeous crystal handles.
20/07/2018
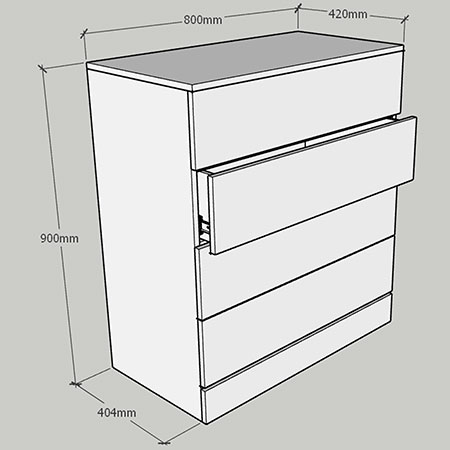
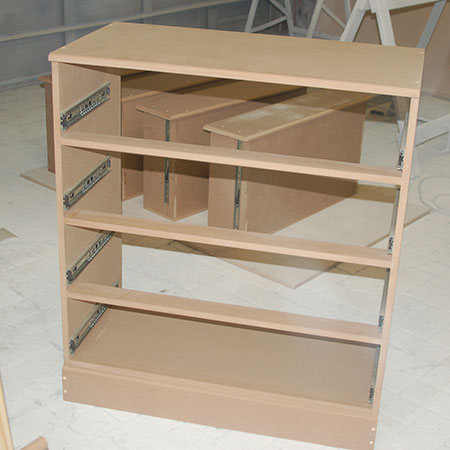
This chest of drawers was made from scratch using 16mm and 12mm SupaWood, which costs around R600 for an entire sheet (1830 x 2750mm) that is cut down to size for the pieces required. There will be quite a bit left over for small projects as well. You can buy and have 16mm SupaWood cut to the sizes needed for your project at Builders Warehouse.

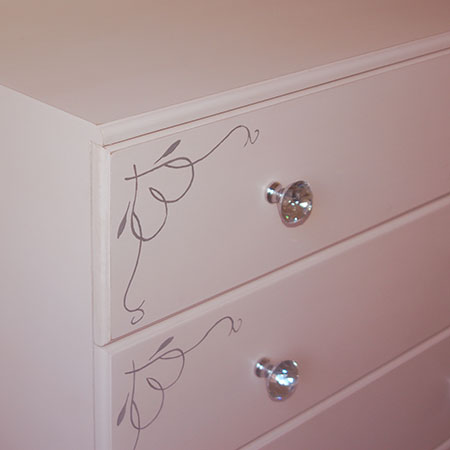
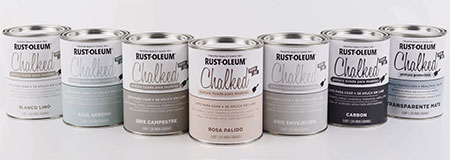
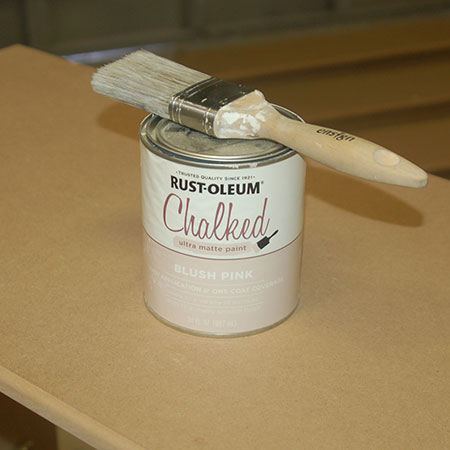
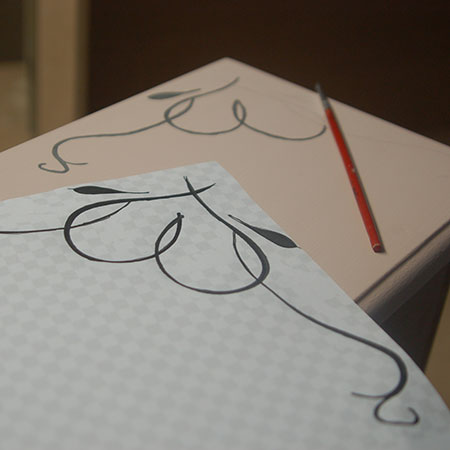
I chose Rust-Oleum Chalked paint in Blush Pink for the chest of drawers. Rather than just paint the entire chest of drawers in a dusty pink, I opted to incude a stencil design on the drawers to highlight the gorgeous crystal knobs that I bought from Gelmar. See more on these knobs below. They are so sparkly and look absolutely perfect on the finished chest of drawers.
YOU WILL NEED:
2 of 404 x 884mm 16mm SupaWood - sides
1 of 420 x 800mm 16mm SupaWood - top
1 of 404 x 768mm 16mm SupaWood - bottom
3 of 60 x 768mm 16mm SupaWood - shelf separators
1 of 100 x 800mm 16mm SupaWood - front apron
3 of 193 x 800mm 16mm SupaWood - drawer fronts
1 of 186 x 800mm 16mm SupaWood - drawer front - top drawer
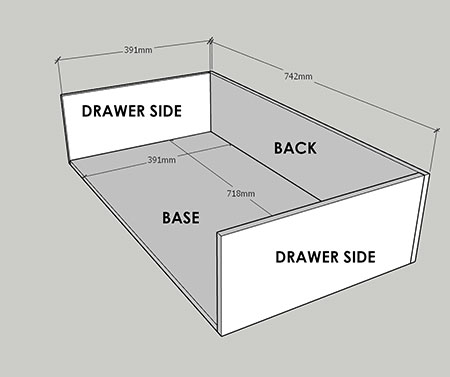
4 of 174 x 742mm 12mm SupaWood - drawer backs
4 of 391 x 718mm 12mm SupaWood - drawer bases
8 of 174 x 391mm 12mm SupaWood - drawer sides
OPTIONAL: 790 x 790mm 3mm SupaWood, Masonite or Hardboard - backing
3/3.5 x 30mm screws
4 x 50mm screws
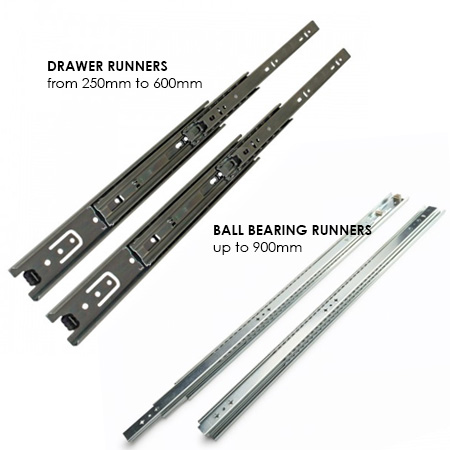
4 sets 350mm ballbearing drawer runners plus 16mm screws
Pattex No More Nails adhesive
Wood filler
Rust-Oleum Chalked Ultra Matte Paint, or paint of choice
Paintbrush or foam roller or PFS spray painting sysem
8 of choice of knobs or handles plus screws
TOOLS:
Drill/Driver plus assorted bits
Countersink bit
Orbital Sander plus 120- and 180/240-grit sanding pads
OPTIONAL: Router plus roundover or decorative edging bit
Tape measure and pencil
Not responsible for errors or omissions
HERE'S HOW:
Note: For all sections use a 2.5mm bit to drill pilots holes - all holes countersunk
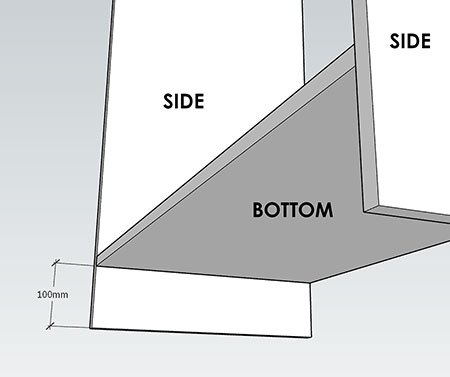
1. Measure up 100mm from the base to attach the bottom piece to the sides.
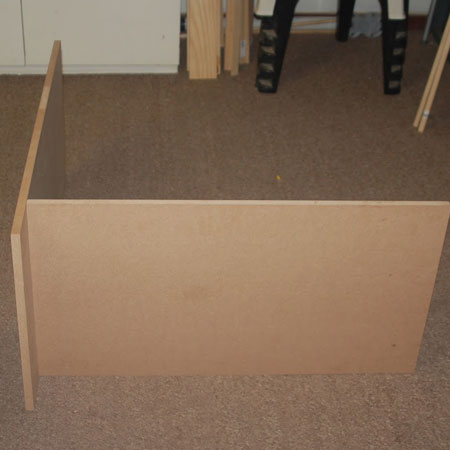
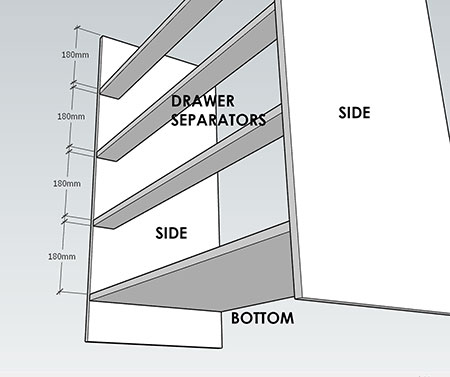
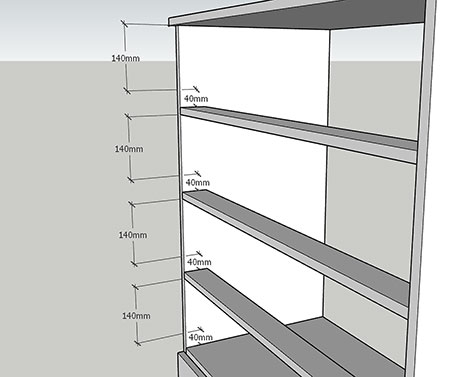
2. Use the diagram below to add the drawer separators to one of the sides. Ensure accurate measurements for correct spacing.
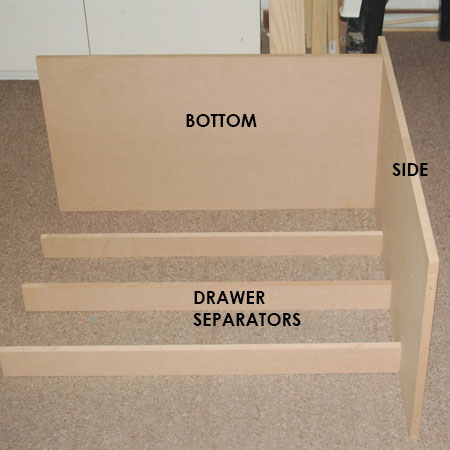
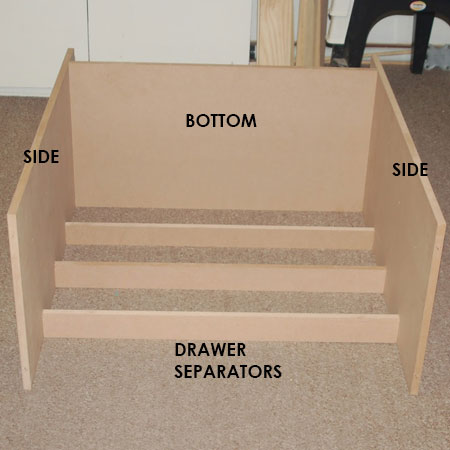
3. Add the remaining side as shown below.
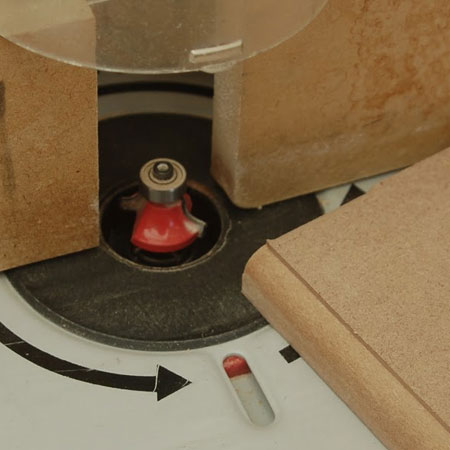
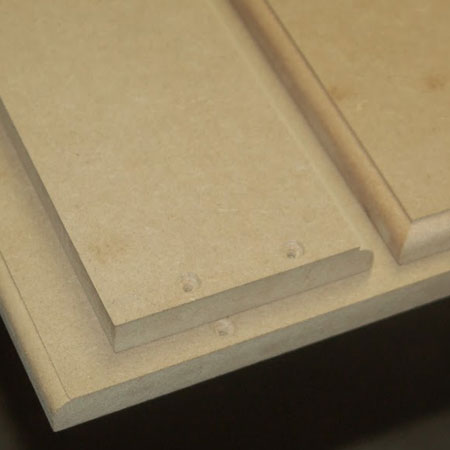
GOOD TO KNOW: For a decorative touch we used a router and roundover bit at the front edge of the top piece, the top of the front apron and all around the drawer fronts.
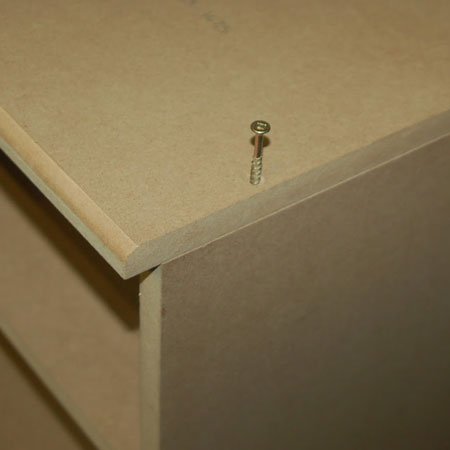
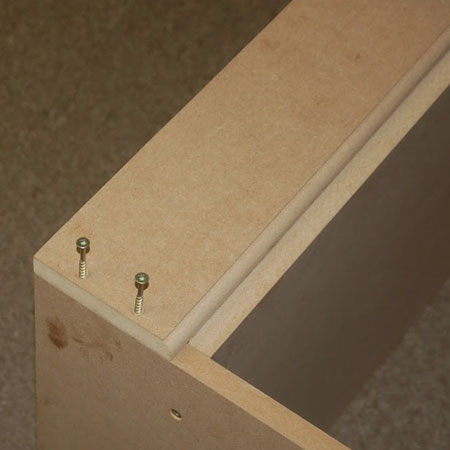
4. Secure the top piece to the frame.
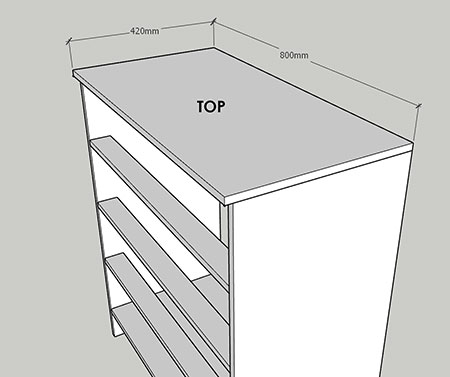
GOOD TO KNOW: Ensure the top is flush at the sides and back, with an overhang at the front.
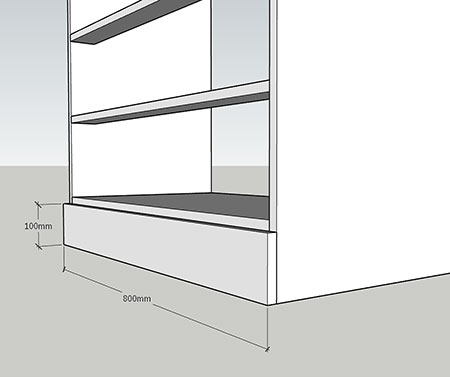
5. Attach the front apron at the bottom of the front face of the frame.
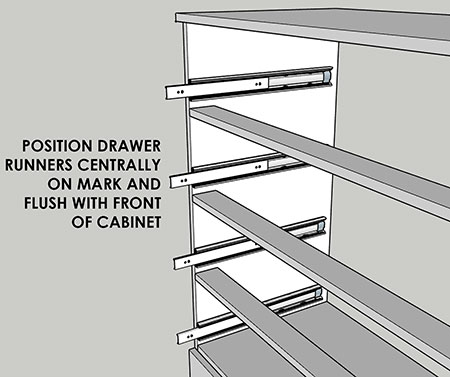
Drawer Runners
To attach your drawer runners first split them apart to separate the two essential sections. Measure and mark 40mm up from each drawer separator, or use the diagram below to measure and mark. Align the cabinet part of the runner centrally on your marked line and use 16mm screws to secure each drawer runner to both sides.
GOOD TO KNOW: Make sure the drawer runners are mounted in the right direction and equally spaced on either side and at the front of the frame.
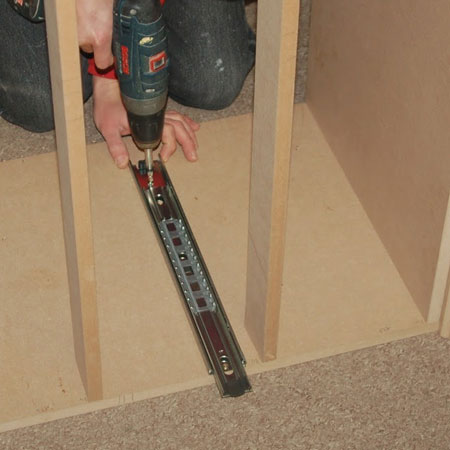
6. Use 16mm screws to secure the drawer runners to the sides of the frame.
Assemble Drawers
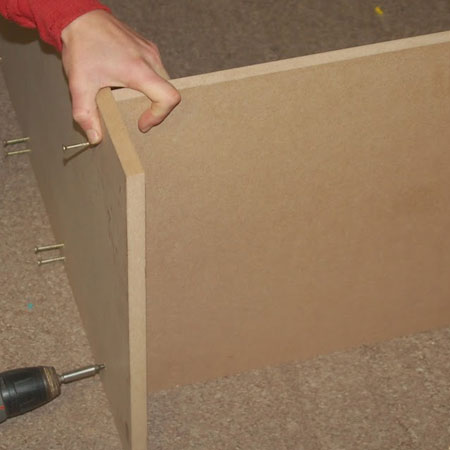
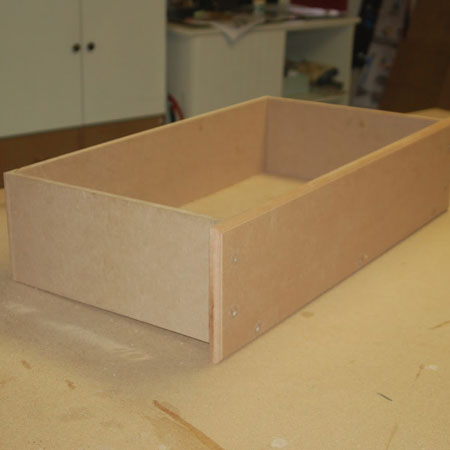
7. The drawers are made of 12mm SupaWood for lighter construction. For all drawers secure the sides and back around the base using 3/3.5 x 30mm screws.
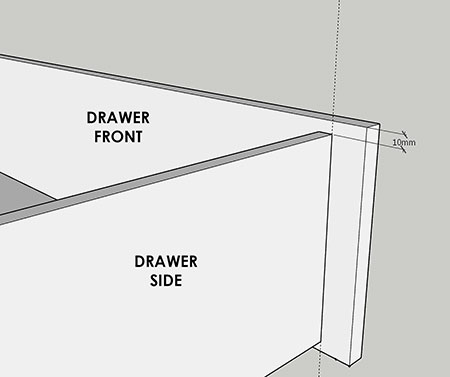
8. With the exception of the top drawer, where the sides of the drawer are flush with the top edge, all remaining drawer fronts have a 10mm gap from the top of the drawer front to the top of the drawer sides. Secure the drawer fronts with countersunk pilot holes through the drawer front into the sides and base.
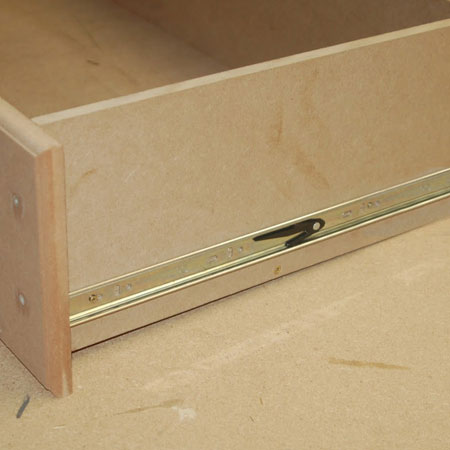
9. Fit the other section of the drawer runner to the side of the drawer,flush with the back of the drawer front and 37mm (centred) from the bottom of the drawer side. The 37mm measurement ties in with the 40mm mounting distance for the runner affixed to the side of the frame and allows a 3mm gap underneath the base of the drawer.
10. Apply a thin layer of adhesive over all the screw heads and let this dry for about an hour.
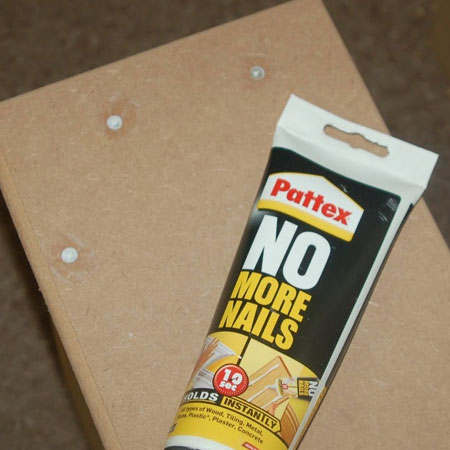
11. Fill all holes with wood filler and let this dry before sanding smooth.
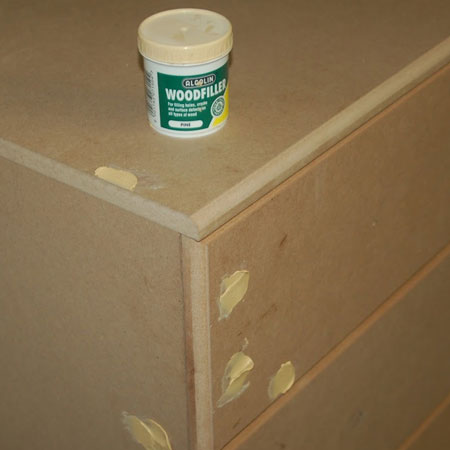
12. Sand the entire cabinet and drawers using 120-grit for any uneven edges or joins and then 180/240-grit to smooth the finish for painting.
13. If you're adding a backing to the chest of drawers you can do this now.
Painting your Chest of Drawers
14. After sanding and wiping clean you can paint in your choice of paint and colour. I'm using Rust-Oleum Ultra Matte Chalked paint for this particular project. This paint is just like chalk paint and is very easy to apply using a paintbrush.
GOOD TO KNOW: You don't have to use chalk paint to finish off your chest of drawers, you can use any acrylic paint.
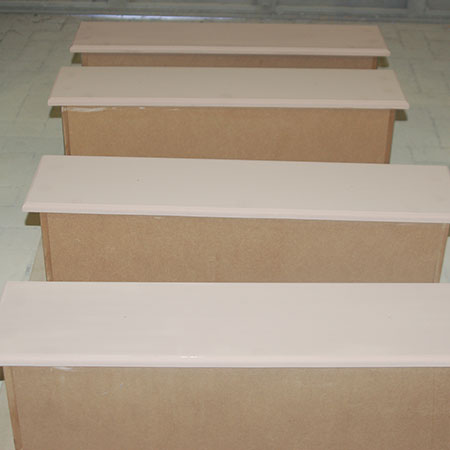
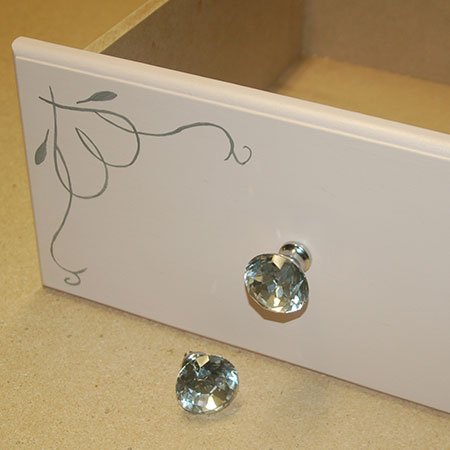
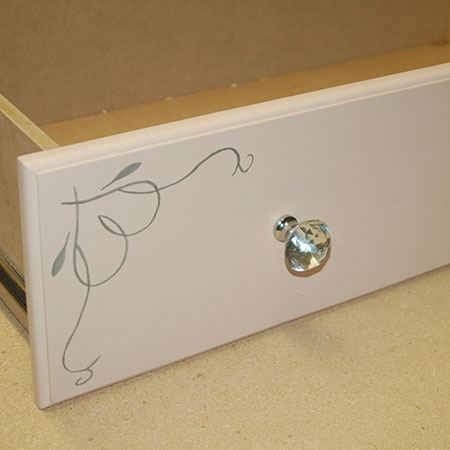
15. After applying two coats of chalk paint I printed out a design on my PC printer and transferred this onto the drawer fronts. To achieve a perfect pattern left and right the stencil is flipped over. I used a silver metallic paint to highlight the design to match the crystal knobs that were fitted below.
16. The entire cabinet was sealed with Rust-Oleum Chalked Top Coat. I applied two coats to the drawers and frame and 4 coats to the top of the chest of drawers. Allow sufficient drying time between coats. The sealer goes on milky but dries to a completely transparent finish that protects the painted surface.

Adding Hardware
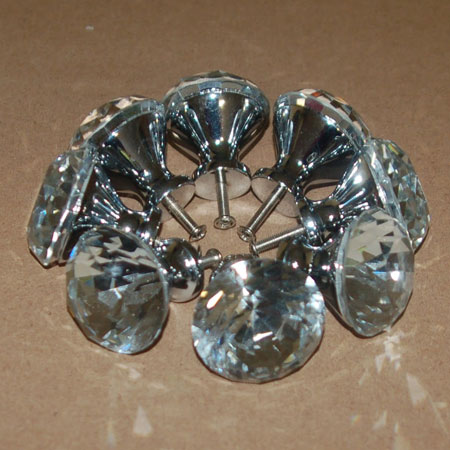
It's finally time to add the beautiful crystal knobs from Gelmar. The cone crystal knobs (40mm) cost R36.99 each and well worth every cent - they look stunning! They have small and medium crystal knobs priced from R26.99.