Wall mounted baby changing station
In a small nursery this wall mounted baby changing station takes up very little space and it has plenty of room for baby accessories.
03/08/2018
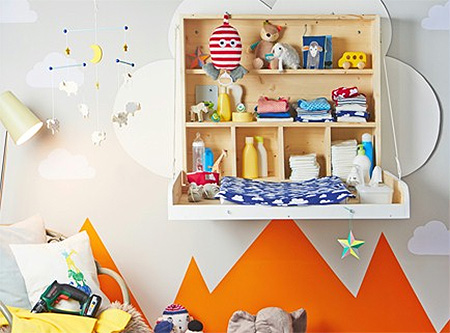
This wall mounted nappy changing station is perfect for a small nursery. Because it's wall mounted, it's out of the way when not in use, but when open there's plenty of storage space for baby accessories. You can buy all the materials and PAR pine for this project at your nearest Builders Warehouse or Builders store.
YOU WILL NEED:
2 of 19 x 220 x 820mm - top/bottom
2 of 19 x 220 x 696mm - frame sides
1 of 19 x 820 x 658mm - back
1 of 19 x 140 x 820mm - top shelf*
1 of 19 x 200 x 820mm - middle shelf
3 of 19 x 220 x 200mm - uprights
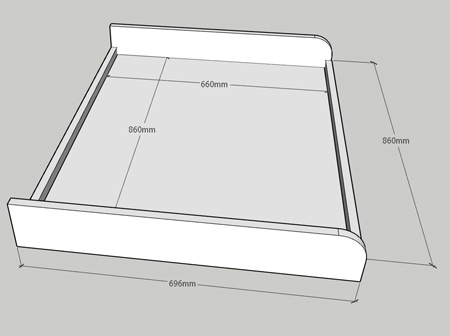
1 of 19 x 660 x 860mm - changing table base
2 of 19 x 44 x 860mm - changing table top/bottom
2 of 19 x 115 x 696mm - changing table sides
1 of piano hinge (cut to 820mm) plus 16mm screws
4 x 45mm screws
2 of cabin hook plus 16mm screws
Nylon rope
4 of steel eyebolts
4 of 6mm nylon wall plugs and screws
TOOLS:
Drill / Driver plus assorted bits
Orbital Sander plus 120- and 180-grit sanding pads
Jigsaw plus clean-cut blade
Tape measure and pencil
*You can substitute the 140mm wide shelf with 220mm if you prefer.
HERE'S HOW:
GOOD TO KNOW: If you are painting the unit, do this before attaching the changing table to the shelf unit.
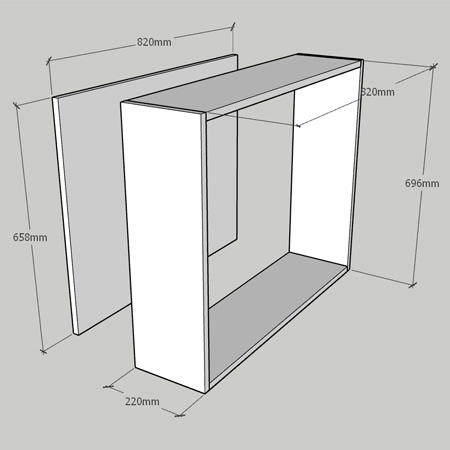
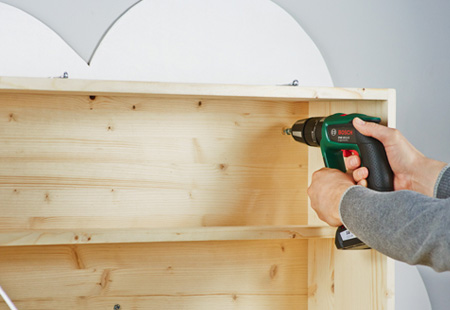
1. Assemble the shelf frame as shown in the diagram above. Make the frame around the back piece, driving [2] screws through the sides, top and bottom of the frame to secure the back piece in place. For all screws drill countersunk pilot holes and use 4 x 45mm screws.
GOOD TO KNOW: Sand all the pieces smooth before assembly.
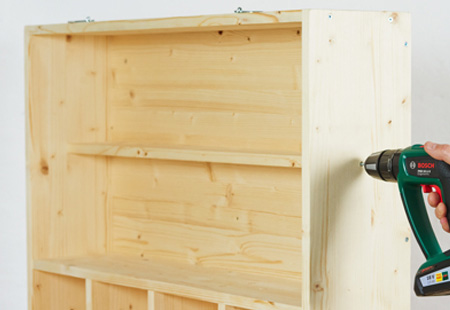
2. Add the shelves and uprights inside the frame, again drill countersunk pilot holes and use 4 x 45mm screws through the sides and into the shelves/uprights.
3. To make the changing table section, sand all the pieces before assembly and then join together as shown above. Again, drill countersunk pilot holes to assemble.
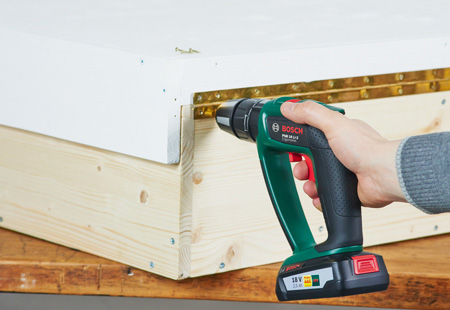
4. Join the changing table to the shelf unit with a piano hinge. Secure to the frames with 16mm screws.
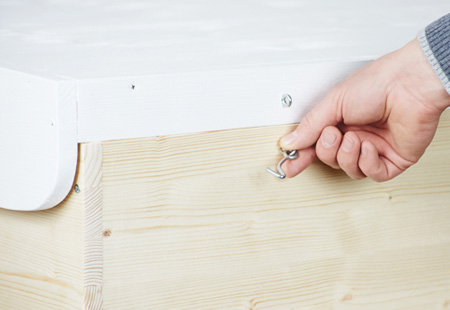
5. Secure [2] cabin hooks to the top of the shelf unit and top of changing station. These will ensure the drop-down changing tray stays firmly in position when not in use.
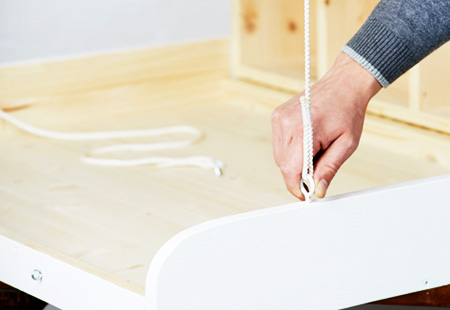
6. Screw an eyebolt into the edge of each side section for the changing table and into the side of the shelf unit. Thread nylon rope through the bolts and secure with tight knots Have someone hold the changing table at the correct height to determine the correct position and length for the nylon rope. The rope should ideally sit at a 45-degree angle when the changing table is open.
GOOD TO KNOW: If you prefer, use thin chain as a substitute for nylon rope.
7. To mount the unit onto the wall use nylon wall plugs and screws. Use [2] screws at the top and bottom for safe mounting. Drill through the back to secure onto a wall.
GOOD TO KNOW: You will need someone to hold the shelf against the wall while you mark and drill the holes.