
Build a traditional rocking horse with a modern touch
What little one wouldn't love their very own rocking horse, and this rocking horse is easy to make.
23/06/2019
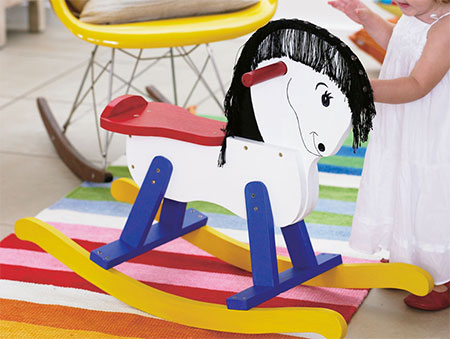
Little ones love to ride on a rocking horse and you can make this DIY rocking horse using either PAR pine or 19mm plywood that you can buy at any Builders Warehouse. While you're there, grab a couple of cans of Rust-Oleum 2X satin or gloss spray paint in your choice of colours to finish off the rocking horse.
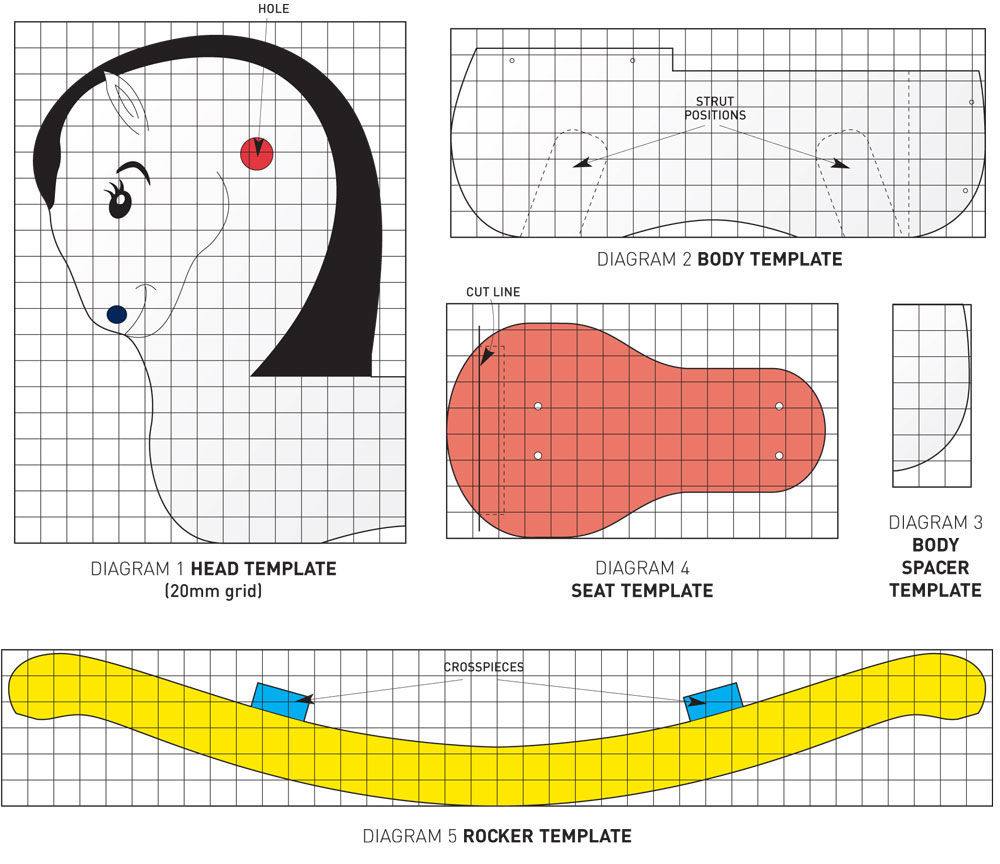
The above diagram makes it easy to assemble the DIY rocking horse with all the necessary pieces cut out and ready to assemble.
YOU WILL NEED:
1 of 19 x 400 x 290mm - head
2 of 19 x 410 x 145mm - body
1 of 19 x 130 x 60mm - body spacer
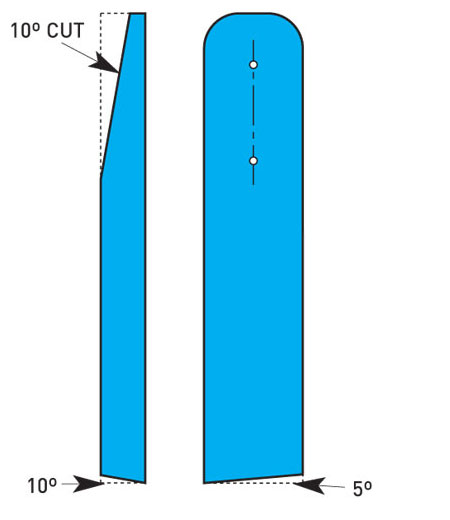
4 of 19 x 200 x 42mm - strut
2 of 19 x 320 x 42mm - crosspiece
2 of 19 x 750 x 115mm - rocker
1 of 19 x 295 x 165mm - seat
1 of 25mm pine dowel cut to 240mm - handle
4 x 30mm screws | 5 x 50mm screws
Wood glue
TOOLS:
Drill / Driver plus assorted bits
25mm Spade bit
Orbital sander plus 120-grit sanding pad
Jigsaw and clean-cut jigsaw blade
Tape measure and pencil
Workbench
HERE'S HOW:

Mark and cut out the templates
1. Using a piece of A4 piece ruled into a 20mm-square grid, transfer the individual diagrams onto the grid. For the body and rockers have a 20mm overlap to join the templates.
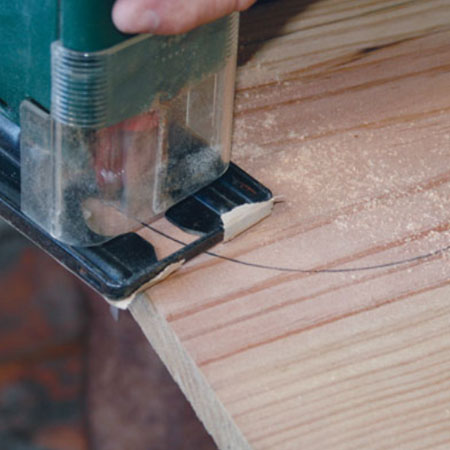
2. Transfer the shapes onto your pine or plywood and cut these out with a jigsaw. Use a 25mm spade bit to drill a hole in the head for the handle. Sand all the cut pieces smooth.
GOOD TO KNOW: When cutting the struts, use a mitre saw or jigsaw saw with the base plate set to the angles shown in the Strut Diagram above.
Sand and paint the components
3. Sand all the individual components smooth and then paint in your choice of colours using Rust-Oleum 2X satin or gloss spray paint. Follow the instructions on the can for proper application.
Assemble the components
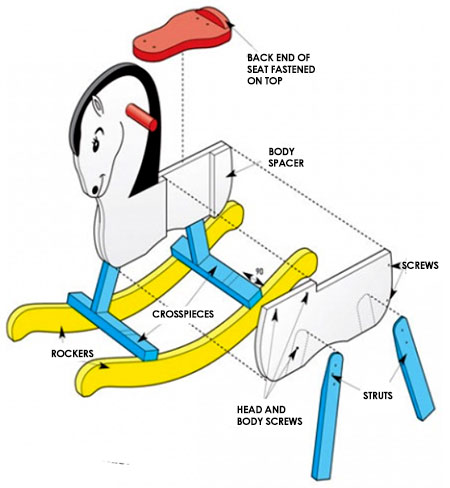
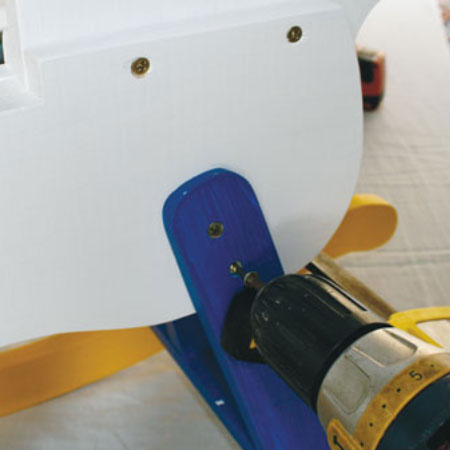
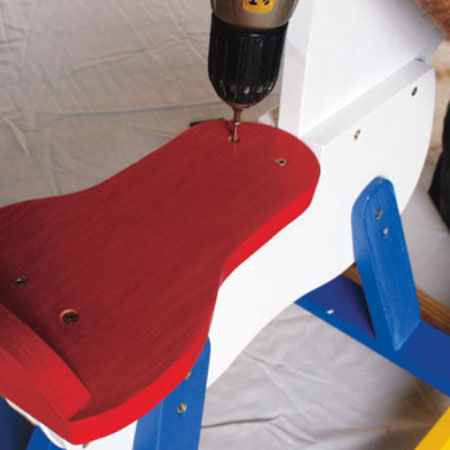
4. Start the assembly by joining the head and body parts. Place the components as shown in the Assembly Diagram above. Align the edges and drill countersunk pilot holes through the body and join with 30mm screws.
5. For the struts and crosspieces, mark the position to drill countersunk pilot holes from below and then secure with 50mm screws.
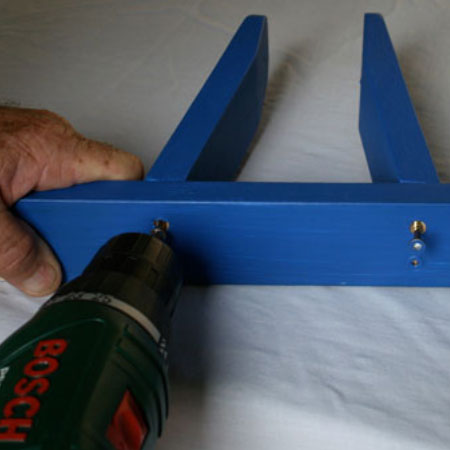
6. Drill countersunk pilot holes to attach the crosspieces. The crosspieces are 190mm in from the ends of the rocker and secure with 50mm screws.

7. Place the struts and clamp in place while you drill countersunk pilot holes and secure with 30mm screws.
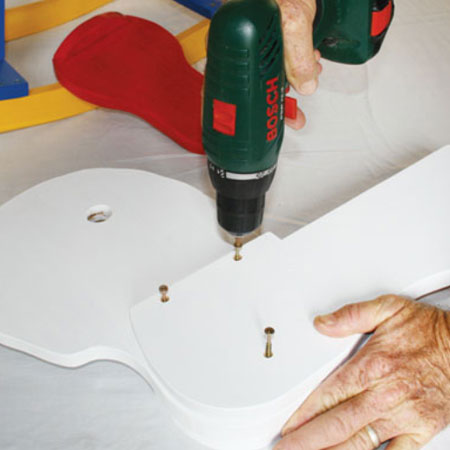
8. Now you can secure the top of the seat with wood glue and 30mm screws. Drill [4] countersunk pilot holes and secure the seat with 50mm screws.
9. Finish off by tapping the dowel through the pre-drilled holes for the handle. Secure in place with a small panel pin at an angle through the head and into the handle.
handyman magazine